
In this post I’ll continue my investigation on using DSC with Chef. In this post I’ll look at how we can onboard new nodes more easily (without the need to log into them interactively) and have them apply a run-list immediately (have the initial convergence to be part of the Chef agent install or VM deployment process). There won’t be much DSC content in this post but it is good to know how to get your nodes into management and have a configuration bootstrapped!
Index:
- Part 1: Chef intro
- Part 2: Chef notifications
- Part 3: Chef server
- Part 4: Chef bootstrapping
- Part 5: Chef client settings
- Part 6: Puppet intro
- Part 7: Puppet notifications
- Part 8: Puppet server
- Part 9: Puppet Modules, Roles and more
- Part 10: Puppet bootstrap
We’ll look at two scenario’s:
- Existing node which is not under Chef management yet
- Brand new node which onboards during deployment
Deploy a new VM
For the first scenario, let’s deploy a new VM using Azure CLI. This time I’m deploying the 1709 SA build of Windows Server.
az vm create -n chefdsc02 -g chefdsc --image MicrosoftWindowsServer:WindowsServerSemiAnnual:Datacenter-Core-1709-smalldisk:1709.0.20171012 --no-wait --size Standard_DS1_V2 --admin-username ben --admin-password 'My$uperSecretPa$$w0rd'
I already had the chefdsc resource group present, if you don’t have that anymore, please look at the first post in this series to see how it was created.
Bootstrap the node using knife
Make sure you navigate to your chef directory where the .chef subdirectory is located containing the knife.rb file.
Once the VM is created we are going to remotely “bootstrap” it with the Chef client. Meaning, the client will be installed and the client will be onboarded into the Chef server during the same process. Once onboarded the client will execute the assigned run-list as well. To do this we’ll make use of the knife tool from the ChefDK once again. This time we’ll make use of the knife windows plugin which is needed to handle Windows oriented operations. Luckily for us, the knife windows plugin is shipped by default as part of the ChefDK nowadays, so no need to install it manually.
If you want to see you have it installed, run the following:
chef gem list win

We are going to connect to the VM over the public ip address which was deployed as part of the az vm create command.
To figure out which public ip address was created run the following:
az vm list-ip-addresses -g chefdsc -n chefdsc02 -o table

Now we know the public ip of the VM, let’s see if knife is able to talk to the vm using it. Note that I’m specifying the --manual-list argument. This will tell knife that the node shouldn’t be looked up on the chef server (a lookup is the default behavior, this won’t work now as the node is not under management yet).
knife wsman test 52.178.77.145 --manual-list

Doesn’t look good. We need to open the winrm tcp port 5985 on the NSG. By default az vm create only opens rdp for Windows and ssh for Linux VMs.
az vm open-port --port 5985 --resource-group chefdsc --name chefdsc02
Let’s try again.
knife wsman test 52.178.77.145 --manual-list
Still not good. Since I know my PowerShell remoting I already know that the VM will have the Windows Firewall Public profile active and inbound winrm is not allowed in that case.
I’m trying to illustrate it’s not that straight forward to have a “zero-touch” bootstrap happening like this. You need to consider a few things to allow for this to happen more smoothly. Luckily we can fix this nowadays using a new azure functionality run-command which allow you to run commands in the VM without the need to fully define a script extension resource.
To see which run-command types are available:
az vm run-command list --location westeurope --query "[*].{commandid:id,label:label}"
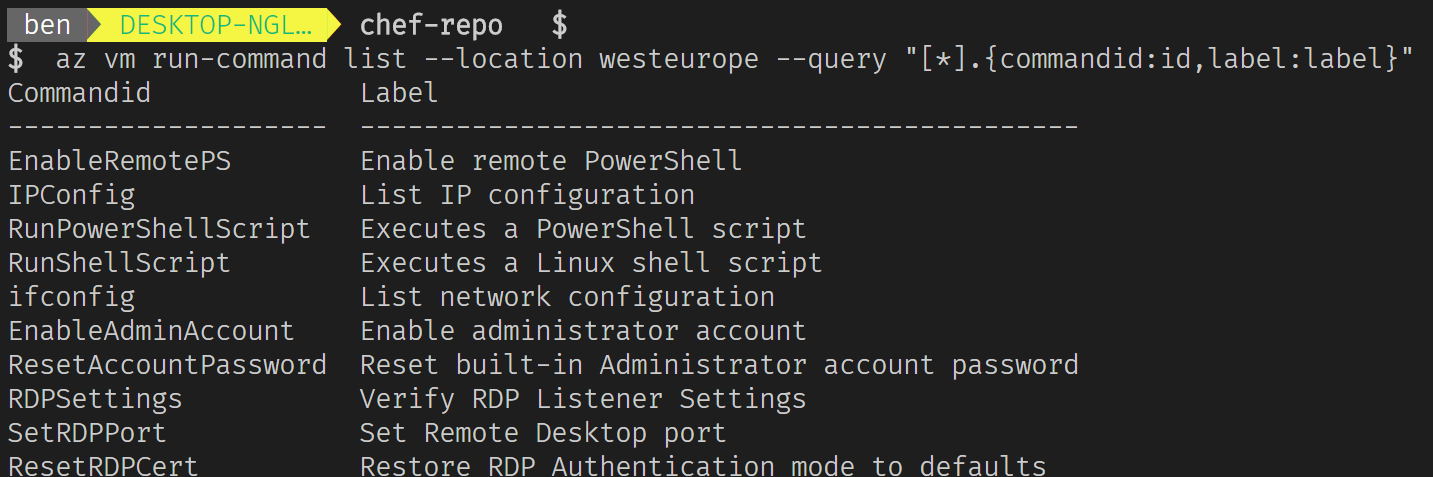
We are only targetting to open the winrm port on the public profile so we won’t choose the EnableRemotePS command type. Instead we will use the RunPowerShellScript type.
az vm run-command invoke --resource-group chefdsc --name chefdsc02 --command-id RunPowerShellScript --scripts "Set-NetFirewallRule -Name WINRM-HTTP-In-TCP-PUBLIC -RemoteAddress any"

Let’s verify if knife is able to communicate with the VM now.

Victory! Finally everything is in place to make this “bootstrap” happening. It is probably easier to define everything as an ARM template and have the prerequisites configured as part of its deployment making use of the script extension or even better, the Chef extension! In the next paragraph the Chef extension will be used to show how much easier it all is. For now, let’s continue the bootstrap using knife so you’ll appreciate the Chef extension more.
Knife needs to be able to talk to the node directly to bootstrap it. This works fine when you run knife inside of the boundaries of a fully routed network but doesn’t work well with segregated / isolated networks. The reason I point this out is, it’s just one of the ways to handle this and not the only one.
Let’s start the bootstrap procedure by telling the bootstrap sub-command to make use of winrm instead of ssh and provide the necessary authentication data as well as an initial run list.
knife bootstrap windows winrm 52.178.77.145 --winrm-user ben --winrm-password 'My$uperSecretPa$$w0rd' --node-name chefdsc02 --run-list 'recipe[dsctest01]'
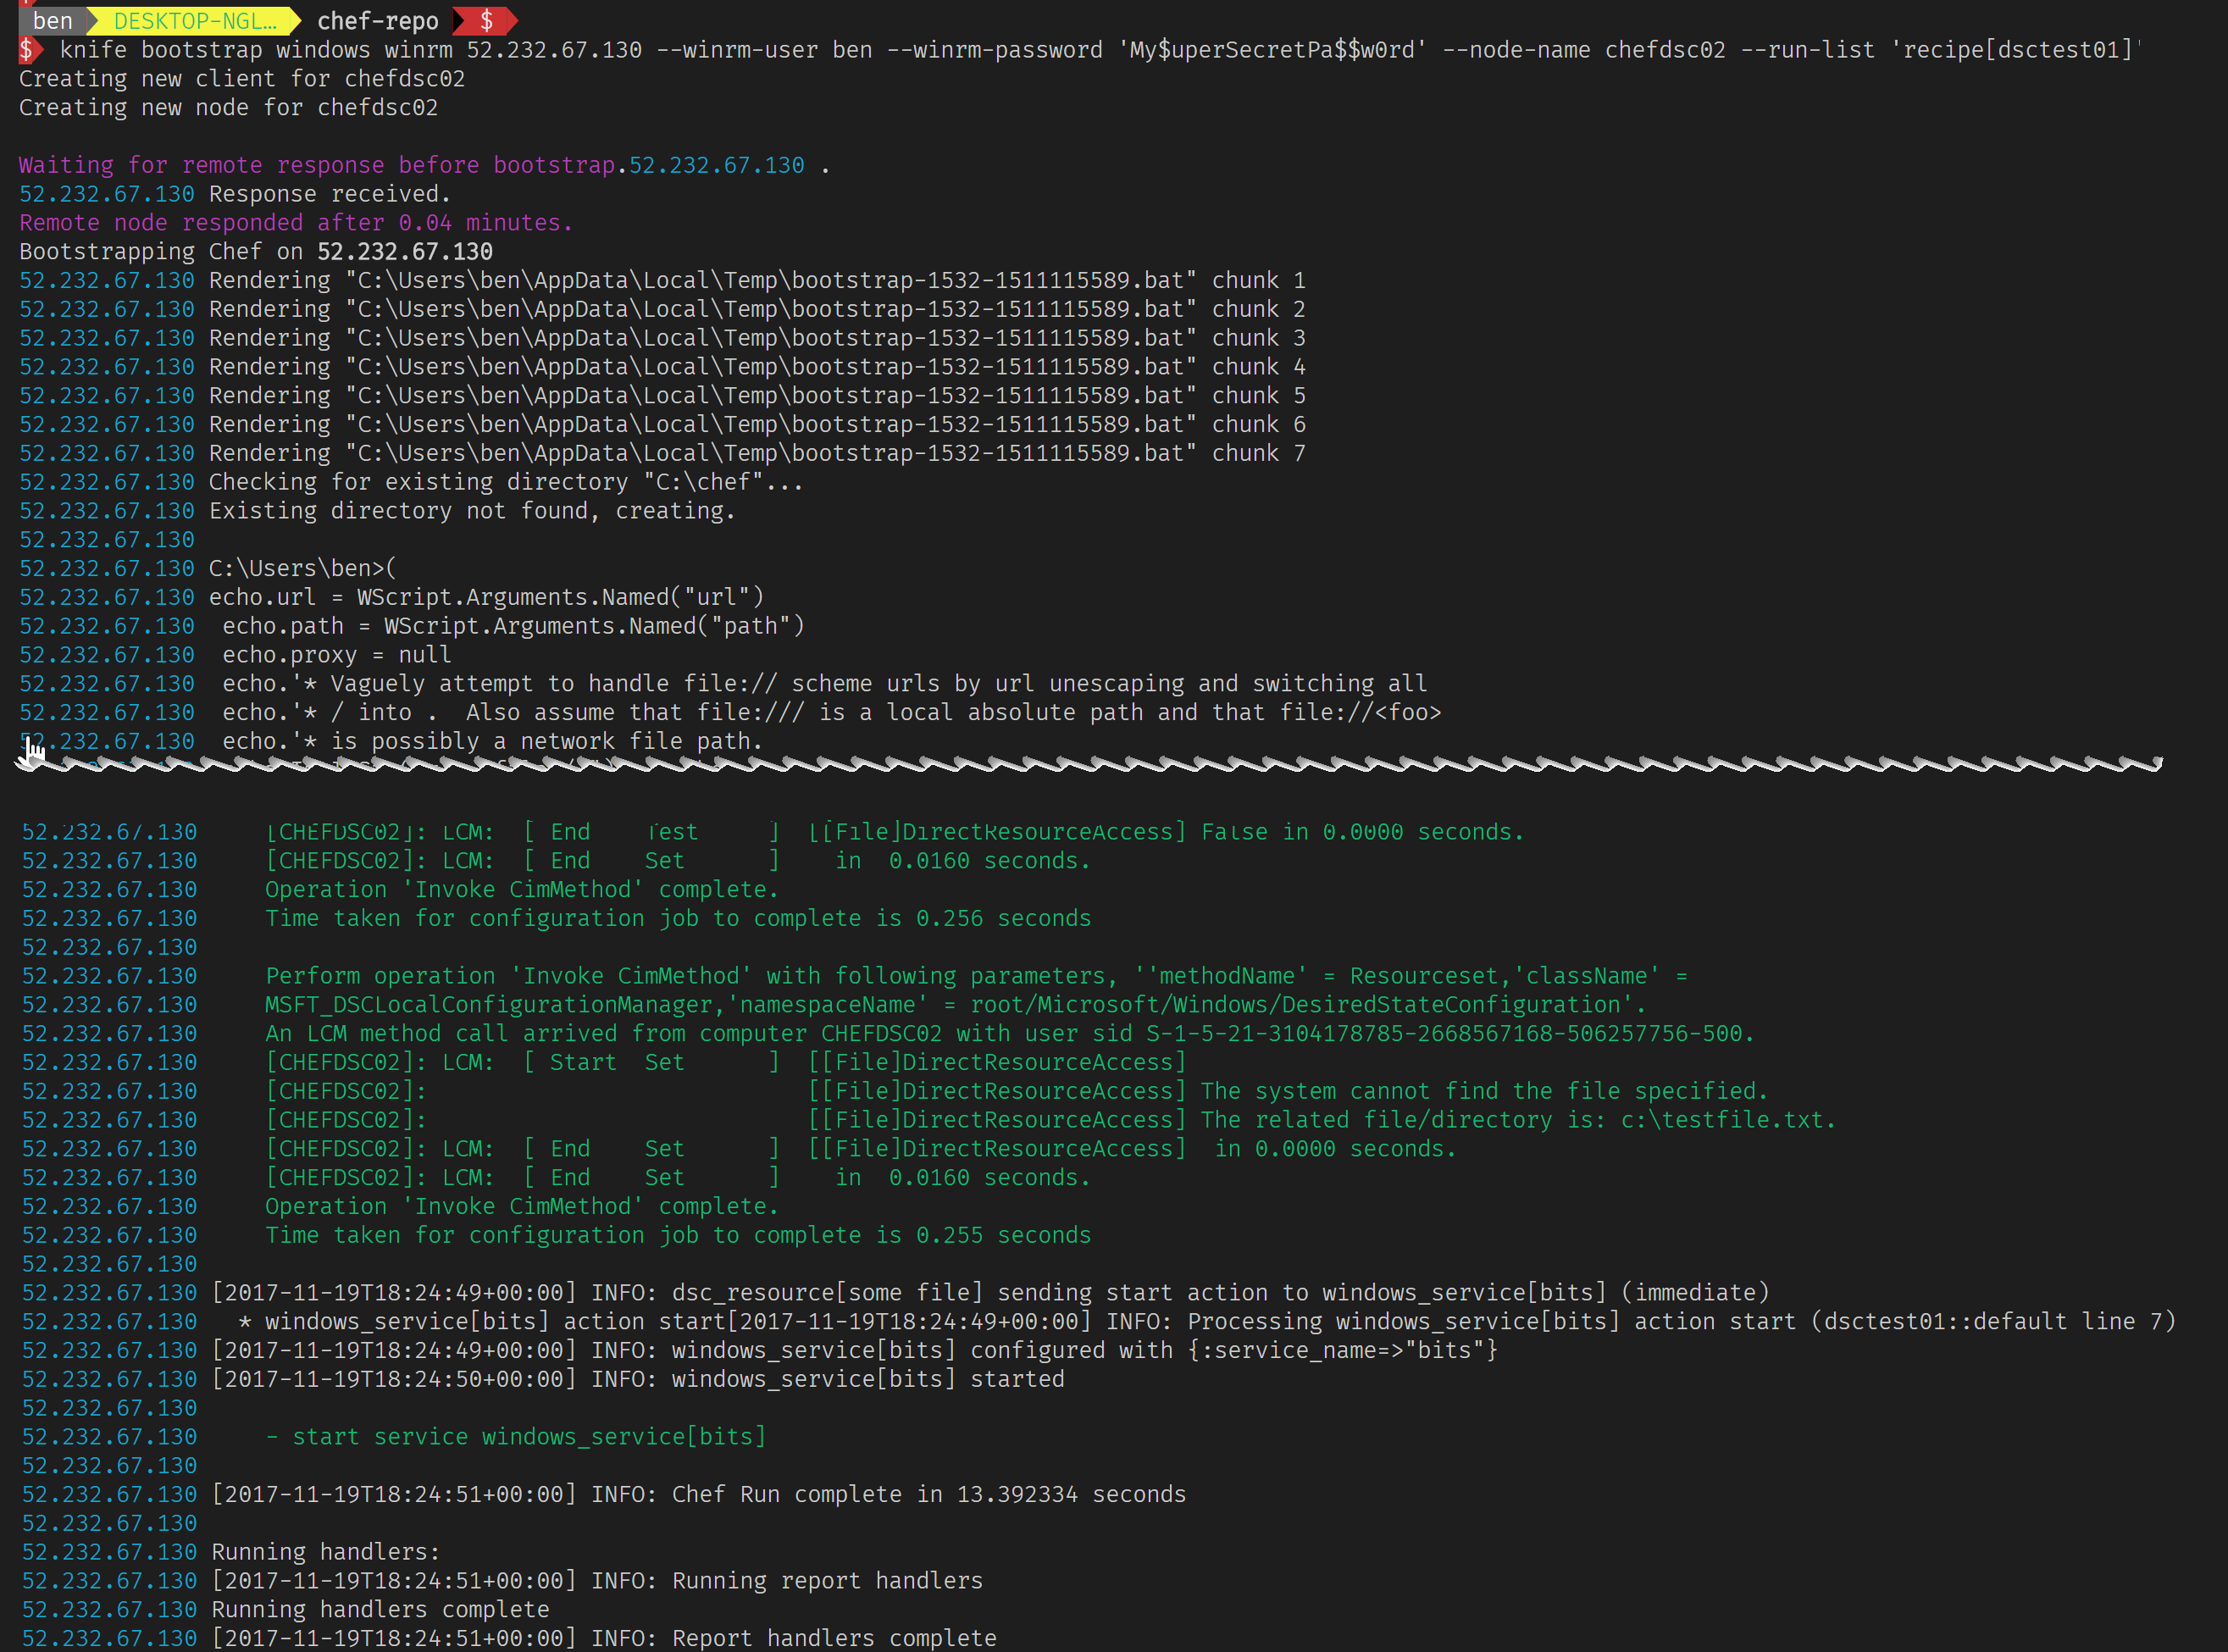
Above is a cutout from the entire output stream. Basically what is happening is that a node object is created on the chef server, the chef client is downloaded and installed and a chef run is started with the run list specified. Nice!
This chef client is however not configured to run periodically. It is not installed as a service and no scheduled task has been registered to trigger it after a certain amount of time. We’ll look into how to configure this a little bit later (first we’ll look at using the Chef VM extension).
Deploy a new VM with Chef extension
This time I’ll deploy a VM without a public ip and add the Chef VM extension to have it onboard and converge.
First, let’s create the VM (note I’m using Server 2016 instead of 1709 due to some issues I had with the latter):
az vm create -n chefdsc03 -g chefdsc --image MicrosoftWindowsServer:WindowsServer:2016-Datacenter:latest --no-wait --size Standard_DS1_V2 --admin-username ben --admin-password 'My$uperSecretPa$$w0rd' --public-ip-address ''
Note the --public-ip-address '' argument. This will prevent a new public ip resource to be created and associated.
Now let’s add the Chef VM extension.
We need to find the correct one first.
az vm extension image list --latest --location westeurope --name chefclient

As you can see, there is a linux and a windows version of the extension. Note the --latest argument which will only list the latest version.
Now we will add the VM extension to the VM. Special thanks to Stuart Preston for giving me the hint on using eval to get this to work!
#base64 encode user.pem (replace with your own pem, this could also be the orgvalidator.pem)
validationkeyb64=$(cat .chef/bgelens.pem | base64 -w 0)

#chef url
chefurl=$(cat .chef/knife.rb  | grep chef_server_url | tr -s ' ' | cut -d ' ' -f 2 | tr -d '"')

chefsettings=$(printf '{"bootstrap_options": { "chef_node_name":"chefdsc03","chef_server_url":"%s", "validation_client_name":"bgelens"},"daemon": "none","validation_key_format": "base64encoded","runlist":"recipe[dsctest01]"}' $chefurl)

protectedsettings=$(printf '{ "validation_key": "%s"}' $validationkeyb64)

eval "az vm extension set --name ChefClient --publisher Chef.Bootstrap.WindowsAzure --resource-group chefdsc --vm-name chefdsc03 \
    --settings '$chefsettings' \
    --protected-settings '$protectedsettings'"

Please note that the success state of provisioning the Chef VM extension isn’t linked to a success state of a Chef run. So success here, doesn’t mean the node onboarded or ran any recipe successfully. We need to check the Chef server if the node is onboarded.
knife node list
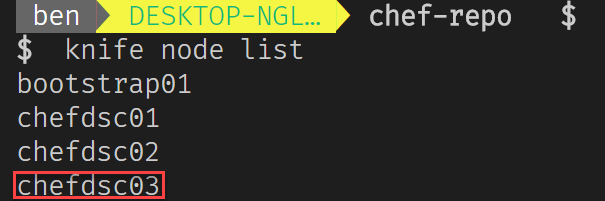
{: width="600px"}
Now how do we know if it ran successfully? We could go to the Chef portal but we could of course use knife for this as well.
knife node show chefdsc03

Now if we want to see the report of the last run, we need to install a knife plugin which is not shipped with the ChefDK by default: knife reporting.
chef gem install knife-reporting

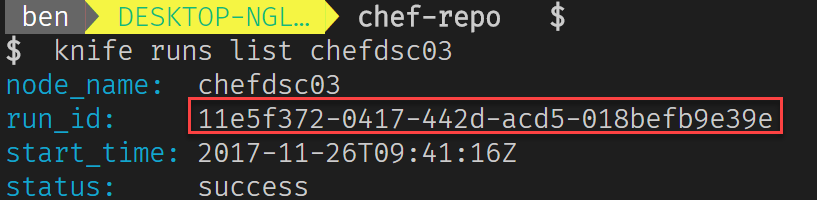
Once installed we need to figure out the run id of the last run (note that without installing the plugin, the runs sub command is not available).
knife runs list chefdsc03
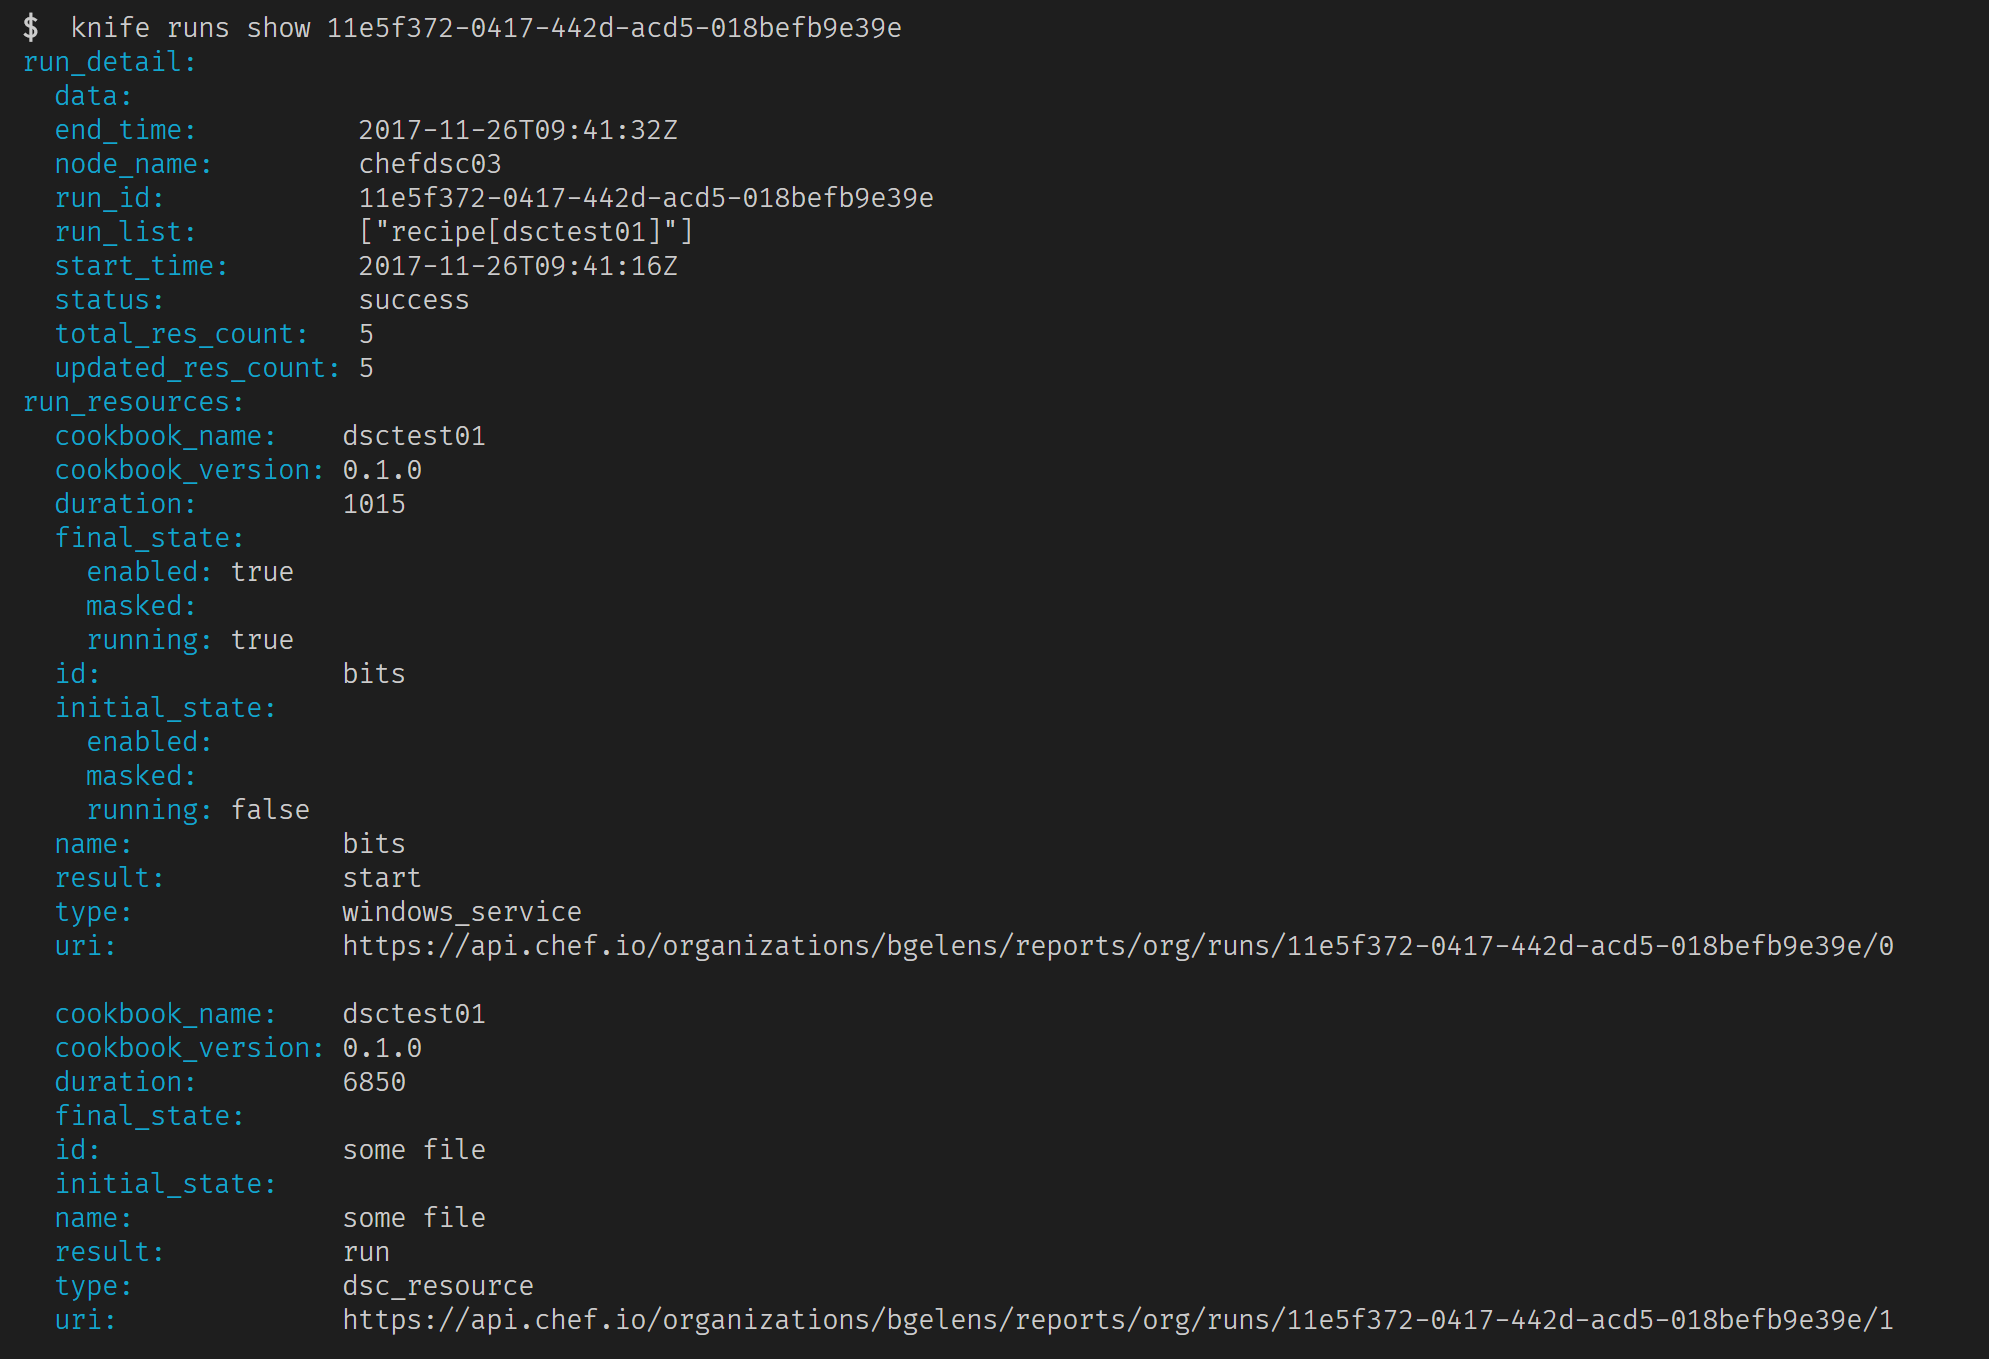
Finally we can see the entire report.
knife runs show 11e5f372-0417-442d-acd5-018befb9e39e
Nice! That is it for this post. To be continued!