This blog post is written and published on AzureStack.blog: https://azurestack.blog/2016/10/adding-and-using-dsc-for-linux-gallery-item-to-azure-stack-tp2/
In the previous post we added the DSC For Linux VM extension to Azure Stack and used it during deployments based from PowerShell and a JSON template. The VM extension however did not surface in the Portal which is something we will fix in this and the next blog post.
In this series:
Adding and using…
- CentOS 7.2 (or any other image) to Azure Stack TP2
- OS Gallery Items to Azure Stack TP2
- The DSC For Linux extension v2 to Azure Stack TP2
- DSC For Linux Gallery Item to Azure Stack TP2 (this post)
- DSC For Linux Azure Automation DSC Gallery Item to Azure Stack TP2
VM Extension Gallery Item
As with the OS disk, we need to create a Gallery item to make the VM extension surface in the Portal. TP2 shipped with only 2 Gallery Items for Linux VM Extension:
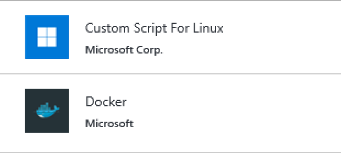
In Public Azure there is no exposure of the DSC For Linux VM Extension in the Portal so we have cart blanche for this and the next blog post.
We identified basically 2 generic use cases for the DSC For Linux VM extension we want to see in the Portal:
- Push (mof) / Pull (meta.mof) / Install (custom resources)
- Register
The other functionalities don’t make much sense for this blog series so I’m ignoring those a bit (sorry).
In this blog post, we’ll create a Gallery item to expose the DSC For Linux VM extension in regard to the first use case (Push/Pull/Install).
Don’t start from scratch
As with the OS Gallery Item, I did not start from scratch but instead first looked at the DSC For Windows VM Extension. You can find it here: C:\ClusterStorage\Volume1\Shares\SU1_TenantLibrary_1\GalleryImages\Microsoft.Compute\local\Microsoft.DSC-arm.2.0.7.azpkg
I won’t do a side by side comparison like last time but instead will discuss the end result.
Artifact structure
The artifact has the following structure and files:
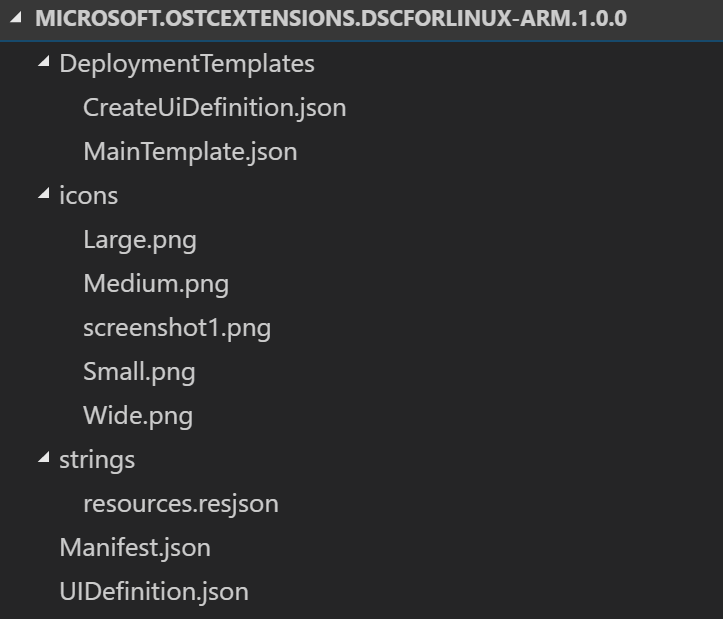
We have a root folder and 3 sub folders (DeploymentTemplates, icons and strings).
Root level documents folder
At the root level we have 2 json files:
- Manifest.json
- UIDefinition.json
Manifest.json
Just as with the OS Gallery item manifest file, the Manifest.json in this case contains a description of the gallery item (e.g. the name, publisher, version, etc). Which artifacts are contained within the package and of what type they are, which icon files are located, etc.
{
    "$schema": "https://gallery.azure.com/schemas/2015-10-01/manifest.json#",
    "name": "DSCForLinux-arm",
    "publisher": "Microsoft",
    "version": "1.0.0",
    "displayName": "ms-resource:displayName",
    "publisherDisplayName": "ms-resource:publisherDisplayName",
    "publisherLegalName": "ms-resource:publisherLegalName",
    "summary": "ms-resource:summary",
    "longSummary": "ms-resource:longSummary",
    "description": "ms-resource:description",
    "uiDefinition": {
        "path": "UIDefinition.json"
    },
    "metadata": [],
    "artifacts": [
        {
            "name": "MainTemplate",
            "type": "Template",
            "path": "DeploymentTemplates\\MainTemplate.json",
            "isDefault": true
        },
        {
            "name": "CreateUiDefinition",
            "type": "Custom",
            "path": "DeploymentTemplates\\CreateUiDefinition.json",
            "isDefault": false
        }
    ],
    "properties": [],
    "categories": [
        "compute-vmextension-linux"
    ],
    "links": [
        {
            "displayName": "ms-resource:linkDisplayName0",
            "uri": "https://github.com/Azure/azure-linux-extensions/tree/master/DSC"
        }
    ],
    "filters": [],
    "products": [],
    "images": [
        {
            "context": "ibiza",
            "items": [
                {
                    "id": "small",
                    "path": "icons\\Small.png",
                    "type": "icon"
                },
                {
                    "id": "medium",
                    "path": "icons\\Medium.png",
                    "type": "icon"
                },
                {
                    "id": "large",
                    "path": "icons\\Large.png",
                    "type": "icon"
                },
                {
                    "id": "wide",
                    "path": "icons\\Wide.png",
                    "type": "icon"
                },
                {
                    "id": "screenshot1",
                    "path": "icons\\screenshot1.png",
                    "type": "screenshot"
                }
            ]
        }
    ]
}
I’ve added a link to the GitHub repository for more information which will be displayed at the overview page for the VM Extension.

The publisher name is actually taken from the strings\resources.resjon (described later).
UIDefinition.json
The UIDefinition.json controls which blade type is used in the portal. In this case, the AddVmExtension is used which corresponds to the blade type we need.
{
  "$schema": "https://gallery.azure.com/schemas/2015-02-12/uiDefinition.json#",
  "createDefinition": {
    "createBlade": {
      "name": "AddVmExtension",
      "extension": "Microsoft_Azure_Compute"
    }
  }
}
DeploymentTemplates folder
The DeploymentTemplates folder contains two json files:
- CreateUiDefinition.json
- MainTemplate.json
CreateUiDefinition.json
CreateUiDefinition describes the way the Portal generates the user input fields as elements.
{
  "handler": "Microsoft.Compute.VmExtension",
  "version": "0.0.1-preview",
  "parameters": {
    "elements": [
      {
        "name": "FileUri",
        "type": "Microsoft.Common.FileUpload",
        "label": "Configuration Modules or Compiled configurations",
        "toolTip": "URL for the DSC compiled configurations (MOF), meta configuration (meta.MOF) or Resources (ZIP)",
        "constraints": {
          "required": true,
          "accept": [".zip", ".mof"]
        },
        "options": {
          "multiple": false,
          "uploadMode": "url",
          "openMode": "binary",
          "encoding": "UTF-8"
        }
      },
      {
        "name": "Mode",
        "type": "Microsoft.Common.DropDown",
        "label": "LCM Mode",
        "toolTip": "Mode of Local Configuration Manager",
        "defaultValue": "Push",
        "constraints": {
          "allowedValues": [
            {
              "label": "Push",
              "value": "Push"
            },
            {
              "label": "Pull",
              "value": "Pull"
            },
            {
              "label": "Install",
              "value": "Install"
            }
          ]
        }
      }
    ],
    "outputs": {
      "vmName": "[vmName()]",
      "location": "[location()]",
      "FileUri": "[elements('FileUri')]",
      "Mode": "[elements('Mode')]"
    }
  }
}
In this case I have defined 2 elements:
- FileUri
- Mode
FileUri
"name": "FileUri",
"type": "Microsoft.Common.FileUpload",
"label": "Configuration Modules or Compiled configurations",
"toolTip": "URL for the DSC compiled configurations (MOF), meta configuration (meta.MOF) or Resources (ZIP)",
"constraints": {
    "required": true,
    "accept": [".zip", ".mof"]
},
"options": {
    "multiple": false,
    "uploadMode": "url",
    "openMode": "binary",
    "encoding": "UTF-8"
}
FileUri is the most interesting part of this document as it tells you something on how Azure works when users are allowed to upload content as part of a deployment.
First look at the type “Microsoft.Common.FileUpload”, it instructs the portal to generate a “select a file” control box where the user can click on a folder icon, browse to a supported artifact and upload it (we’ll see where it is uploaded when we use the Extension Gallery Item).

You can also see the label being generated in the Ui.
The tooltip is displayed when the user clicks/hovers over the I icon.

The constrains will be passed to the user’s explorer Ui:
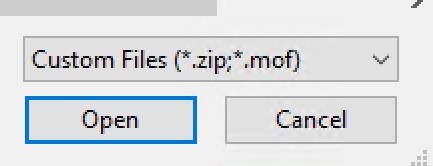
We define this control as being required as we need either a mof, meta.mof or zip file to continue with one of the supported modes (push, pull, install).
In the options some additional options like allowing only a single file upload and upload mode is specified as Url (this will create and send the blob Uri as output).
Mode
"name": "Mode",
"type": "Microsoft.Common.DropDown",
"label": "LCM Mode",
"toolTip": "Mode of Local Configuration Manager",
"defaultValue": "Push",
"constraints": {
    "allowedValues": [
    {
        "label": "Push",
        "value": "Push"
    },
    {
        "label": "Pull",
        "value": "Pull"
    },
    {
        "label": "Install",
        "value": "Install"
    }
    ]
}
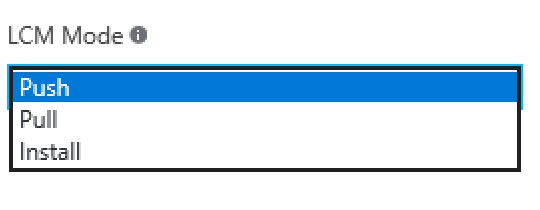
The type of the “Mode” element is “Microsoft.Common.DropDown”. It instructs the portal to generate a dropdown list.

The label and tooltip are generated the same as the previous control. The default value is set to “Push”. The allowed values are specified as a constraint. Push, Pull and Install are allowed values.
Outputs
At the end of the CreateUiDefinition.json, outputs are specified. These outputs are used to send as values for the parameters of MainTemplate.json which is used by the Portal to add the VM Extension to an already deployed VM or merge into the overall JSON generated for a VM from scratch deployment.
"outputs": {
    "vmName": "[vmName()]",
    "location": "[location()]",
    "FileUri": "[elements('FileUri')]",
    "Mode": "[elements('Mode')]"
}
MainTemplate.json
MainTemplate is basically a JSON template you would create yourself to add the DSC For Linux VM Extension to an already deployed VM.
{
  "$schema": "http://schema.management.azure.com/schemas/2015-01-01/deploymentTemplate.json",
  "contentVersion": "1.0.0.0",
  "parameters": {
    "vmName": {
      "type": "string"
    },
    "location": {
      "type": "string"
    },
    "FileUri": {
      "type": "string"
    },
    "Mode": {
      "type": "string",
      "defaultValue": "Push",
      "allowedValues": [
        "Push",
        "Pull",
        "Install"
      ]
    }
  },
  "resources": [
    {
      "name": "[concat(parameters('vmName'),'/Microsoft.OSTCExtensions.DSCForLinux')]",
      "type": "Microsoft.Compute/virtualMachines/extensions",
      "location": "[parameters('location')]",
      "apiVersion": "2015-06-15",
      "properties": {
        "publisher": "Microsoft.OSTCExtensions",
        "type": "DSCForLinux",
        "typeHandlerVersion": "2.0",
        "autoUpgradeMinorVersion": false,
        "settings": {
          "FileUri": "[parameters('FileUri')]",
          "Mode": "[parameters('Mode')]"
        },
        "protectedSettings": {
        }
      }
    }
  ]
}
I created parameters which correspond with the outputs from the CreateUiDefinition.json and mapped those to the resource properties where applicable. As you can see this template only has the public settings FileUri and Mode specified, no other operational tasks will be supported by this Ui.
Icons
I took the liberty of creating some nice looking graphics for this extension :-). The screenshot image is required for VM Extensions, if you don’t add one, the Gallery Packager will bark at you.
| Name | px | image |
|---|---|---|
| Large.png | 115 x 115 |  |
| Medium.png | 90 x 90 |  |
| Small.png | 40 x 40 |  |
| Wide.png | 255 x 115 |  |
| Screenshot1.png | 533 x 324 |  |
Strings
The strings from strings\resources.resjson are used by the manifest file.
{
    "displayName": "Desired State Configuration for Linux",
    "publisherDisplayName": "Ben Gelens.",
    "publisherLegalName": "Ben Gelens.",
    "summary": "Desired State Configuration for Linux",
    "longSummary": "Desired State Configuration for Linux",
    "description": "<p>DSC is a management platform that enables deploying and managing configuration data for software services and managing the environment in which these services run.</p>",
    "linkDisplayName0": "Learn more about DSC for Linux"
}
Packaging Gallery Item
If you haven’t done so in the previous blog posts, Download the Azure Gallery Packager and extract it somewhere you can find it. Let’s move the folder containing the files to the root of C. Now open a command prompt or PowerShell console and navigate to the packager and run: .\AzureGalleryPackageGenerator\AzureGalleryPackager.exe -m C:\Microsoft.OSTCExtensions.DSCForLinux-arm.1.0.0\Manifest.json -o C:\MyMarketPlaceItems
You should now have a marketplace item in azpkg format. If the packager did not work out, you probably have made some sort of typo somewhere or it just doesn’t like the paths you provide. In any case, you can download the azpkg I created here.
Adding the Gallery Item to Azure Stack
We are going to use the same storage account again from the first blog post, if you did not create it, please go back to that one and create it.
Run the following script to add the azpkg to Azure Stack (I assume you already setup the Azure Stack connection in PowerShell).
$subscriptionid = (Get-AzureRmSubscription -SubscriptionName 'Default Provider Subscription').SubscriptionId
$StorageAccount = Get-AzureRmStorageAccount -ResourceGroupName tenantartifacts -Name tenantartifacts
$GalleryContainer = Get-AzureStorageContainer -Name gallery -Context $StorageAccount.Context
$DSCazpkg = $GalleryContainer | Set-AzureStorageBlobContent -File C:\MyMarketPlaceItems\Microsoft.DSCForLinux-arm.1.0.0.azpkg
Add-AzureRMGalleryItem -SubscriptionId $subscriptionid -GalleryItemUri $DSCazpkg.ICloudBlob.StorageUri.PrimaryUri.AbsoluteUri  -Apiversion "2015-04-01"
You should see a message with StatusCode Ok.
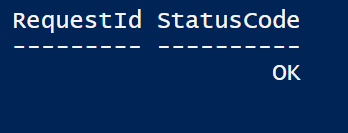
Now we login to the portal, wait a bit, refresh a couple of times and eventually we get:
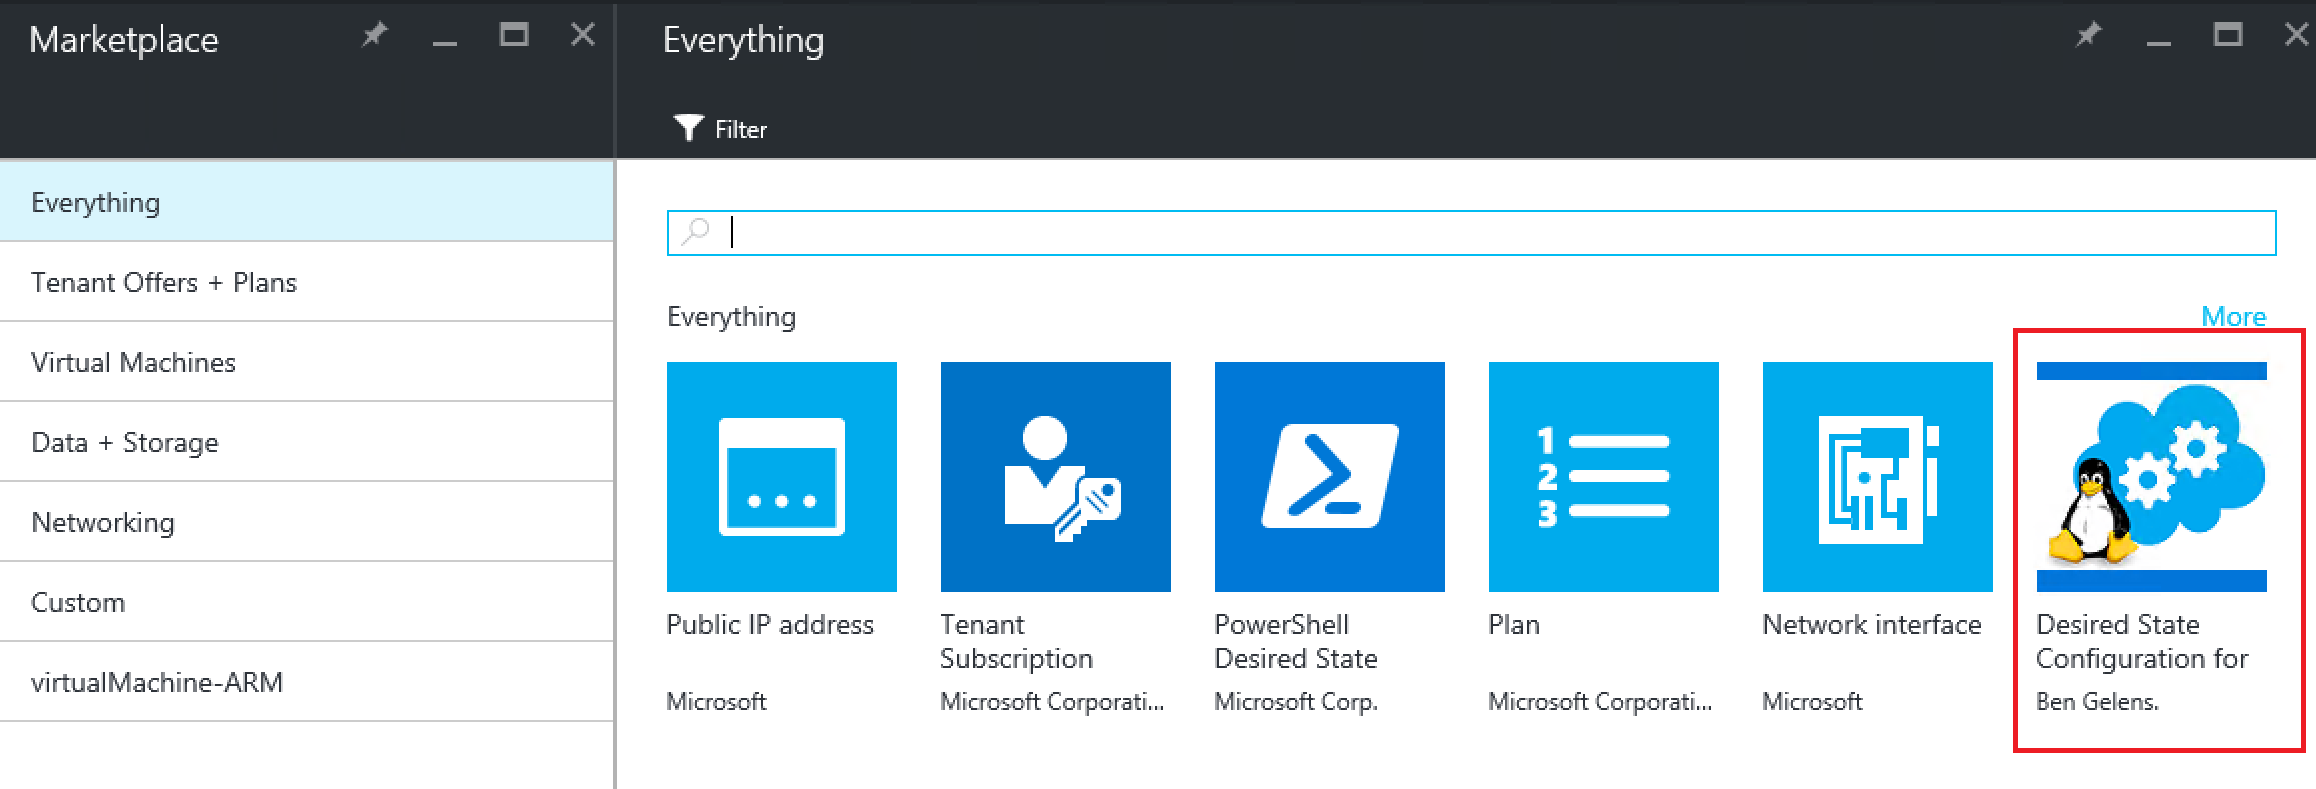
If it does not show here, see if it is listed under More.
Note, if you made an error somewhere (wrong text or something) and want to re-add the Gallery item. You should remove it first.
Remove-AzureRMGalleryItem -Name 'Microsoft.DSCForLinux-arm.1.0.0' -ApiVersion 2015-04-01
Using the Gallery Item
Now we made the Gallery Item available, let’s put it to work. We use the same mof file as in the previous blog (if you don’t have it, please compile it according the instructions there).
Let’s start to create a new VM based on our CentOS 7.2 Gallery Item.
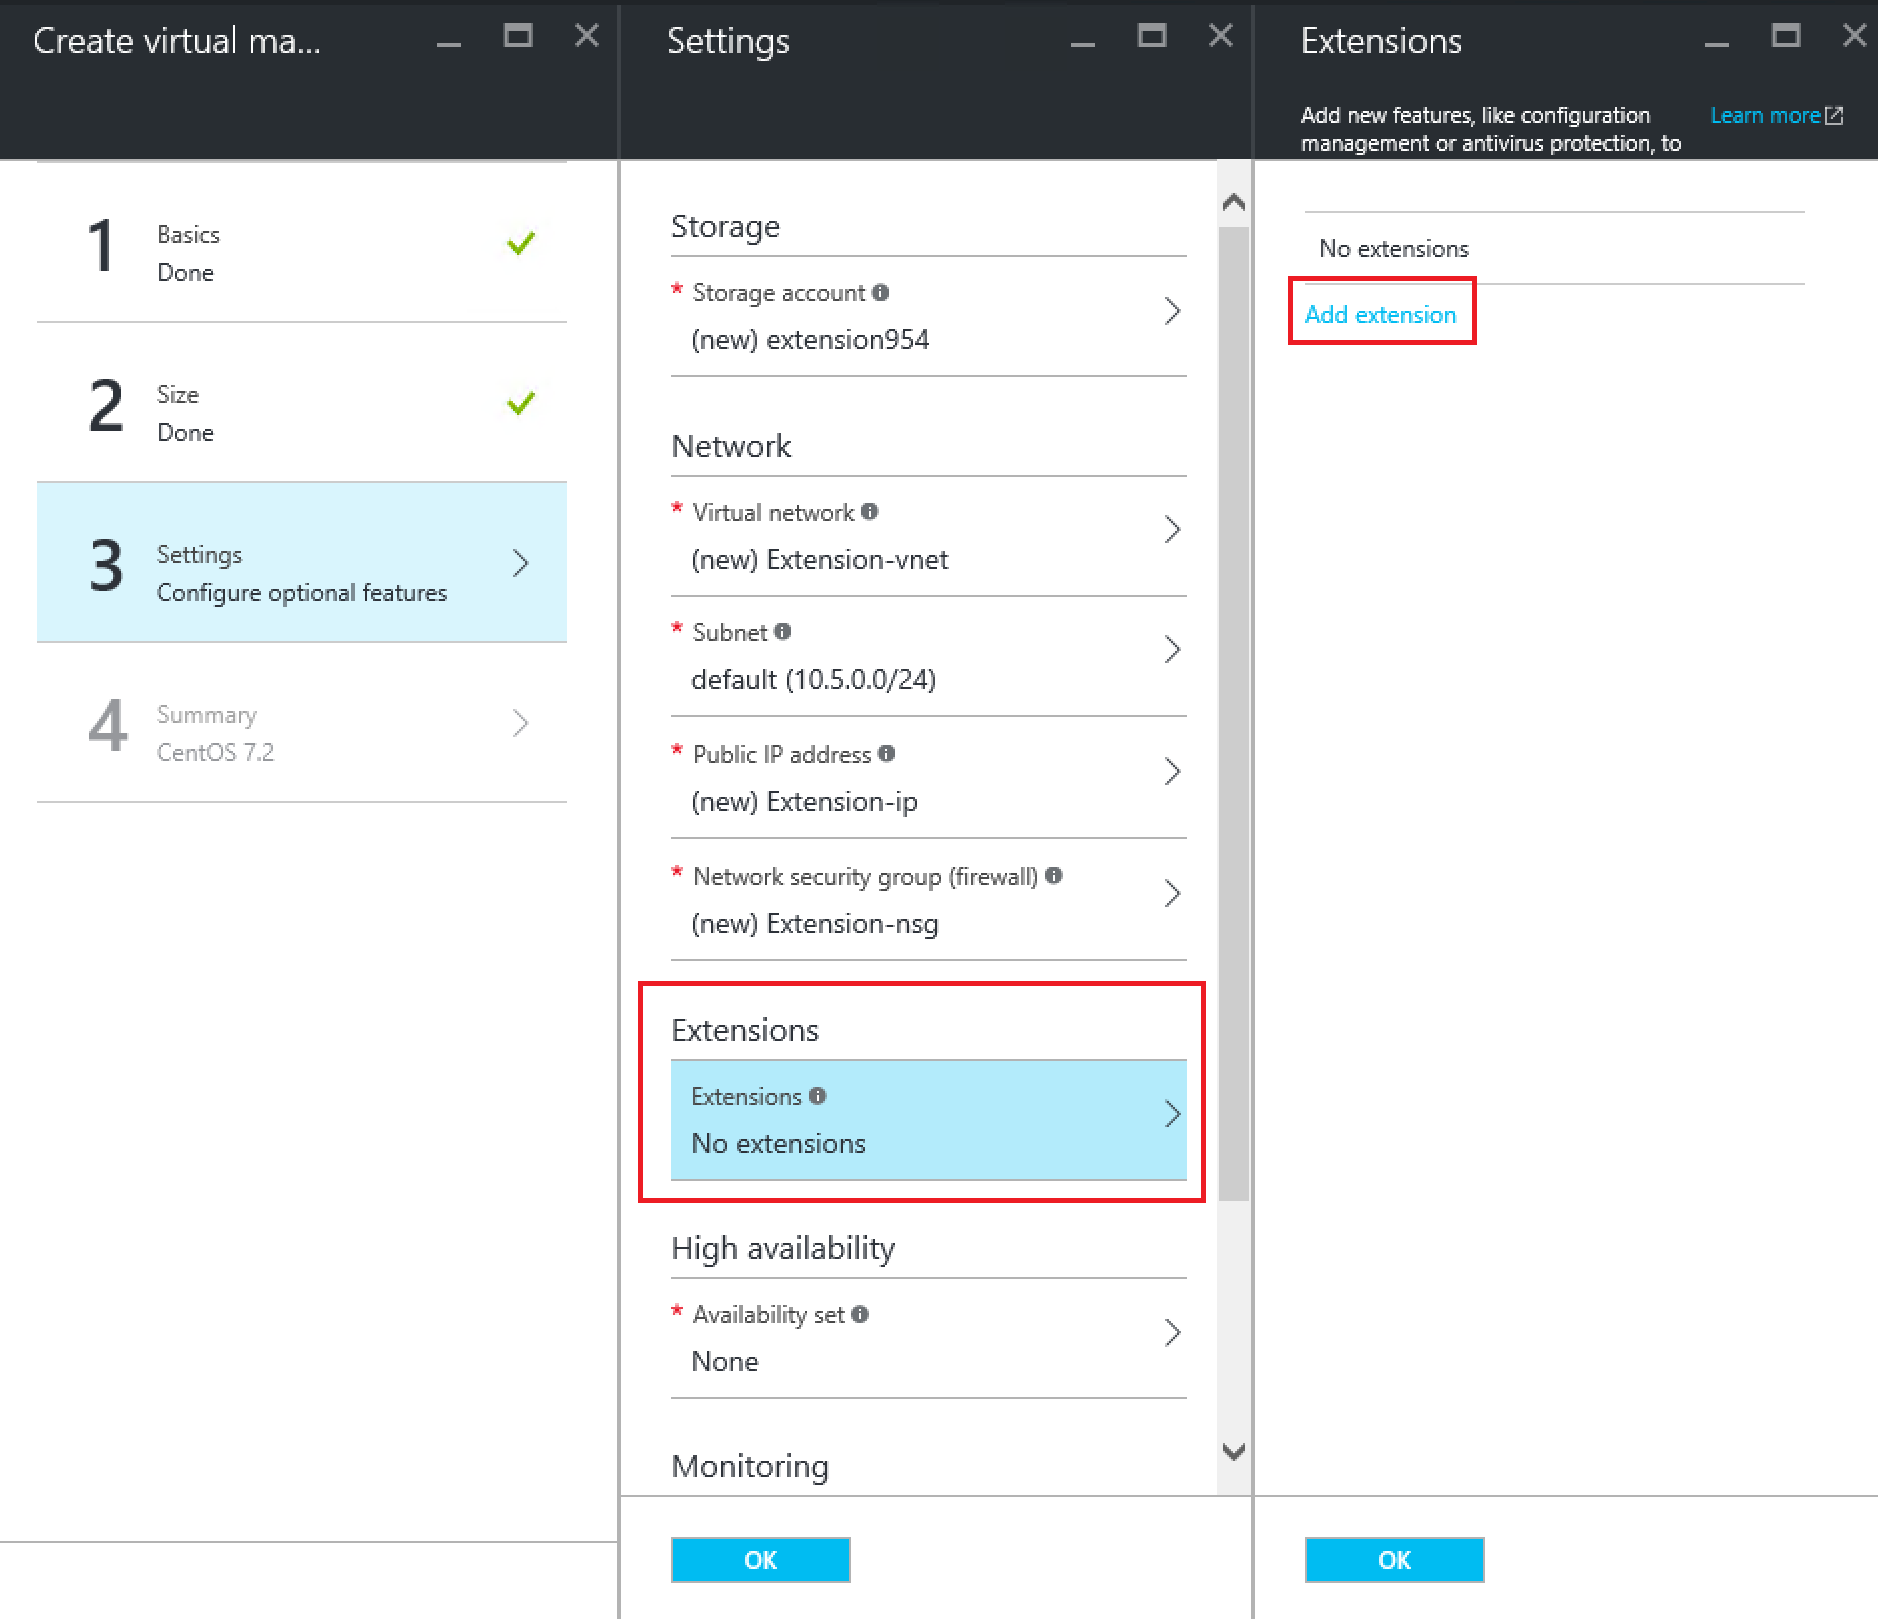
At step 3 select the Extensions blade and then Add Extension.
Now we should see the DSC For Linux VM Extension Gallery Item.
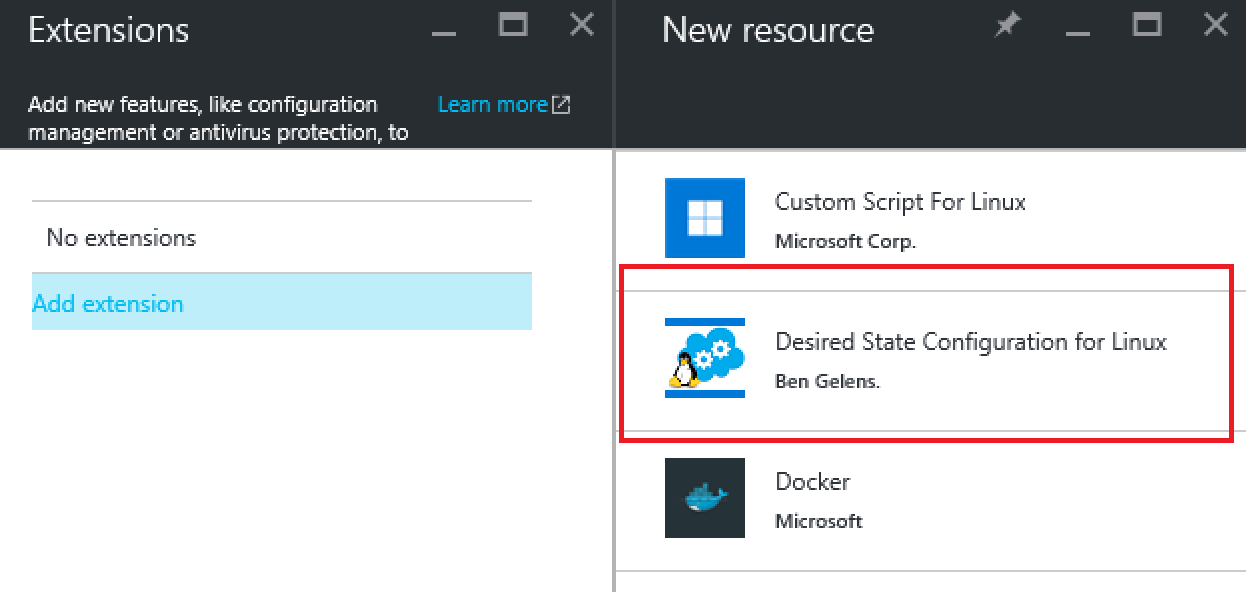
Select it and hit create.
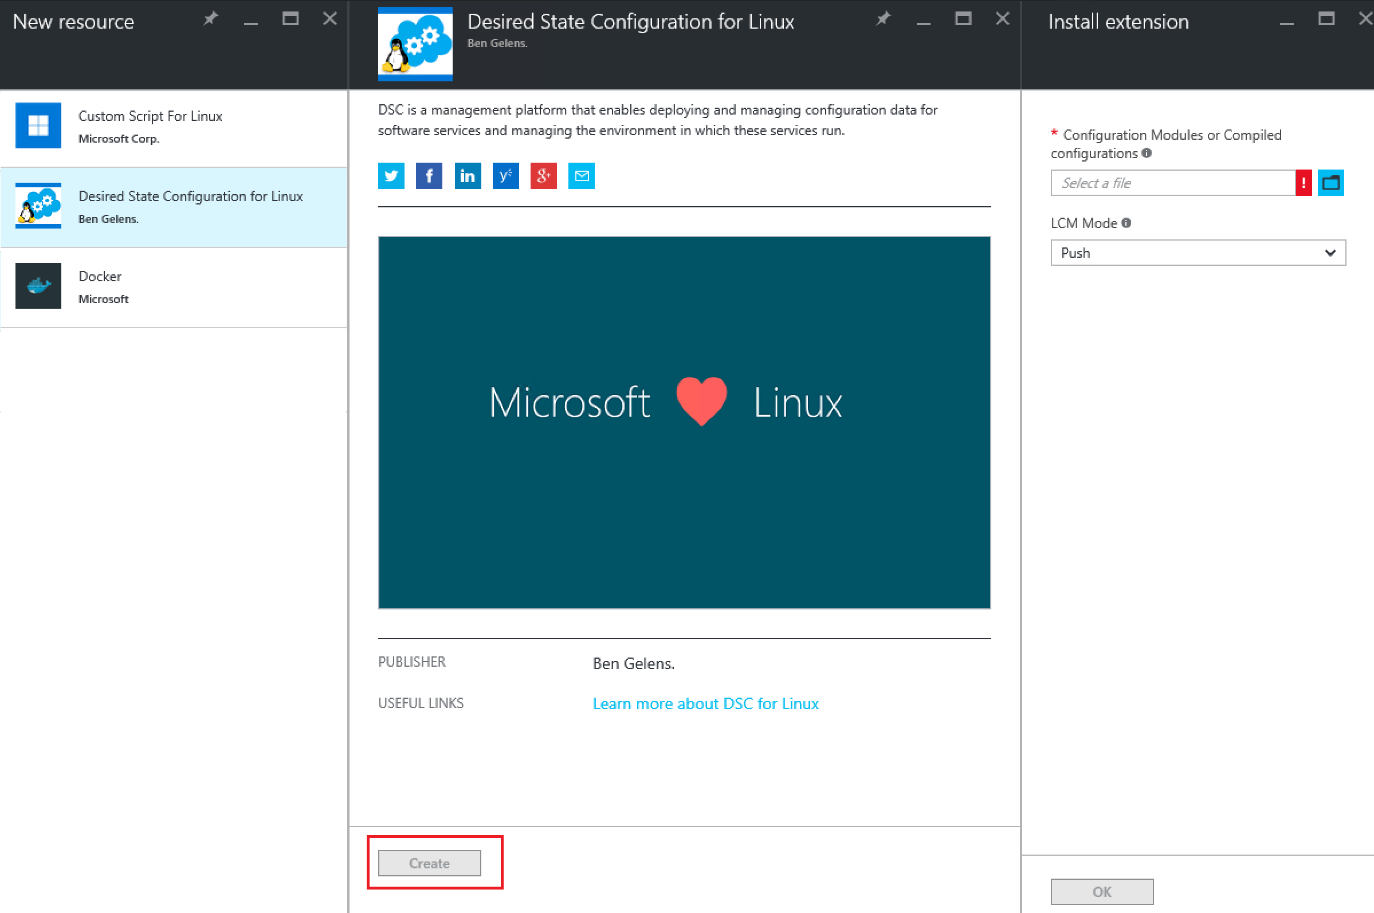
We can now see the fields we made available. Let’s provide it with the mof file.
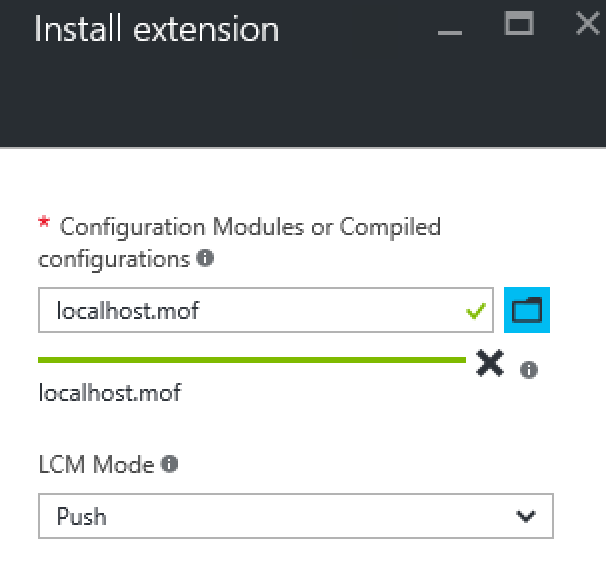
The localhost.mof file has been uploaded to a generic storage account used by the Portal called “tenantextaccount”. You can find the blob using this code:
Get-AzureRmStorageAccount |?{$_.StorageAccountName -eq 'tenantextaccount'} |
    Get-AzureStorageContainer | Sort-Object -Property LastModified -Descending |
        Select-Object -First 1 | Get-AzureStorageBlob

The blob is stored in a non-public container. Once uploaded a Uri including a SAS token appended to it will be returned and passed to the maintemplate by the output element described earlier in this blog. In effect, only the user which uploaded the file would have access to it because, he or she is the only one with a valid Uri including a sas token.
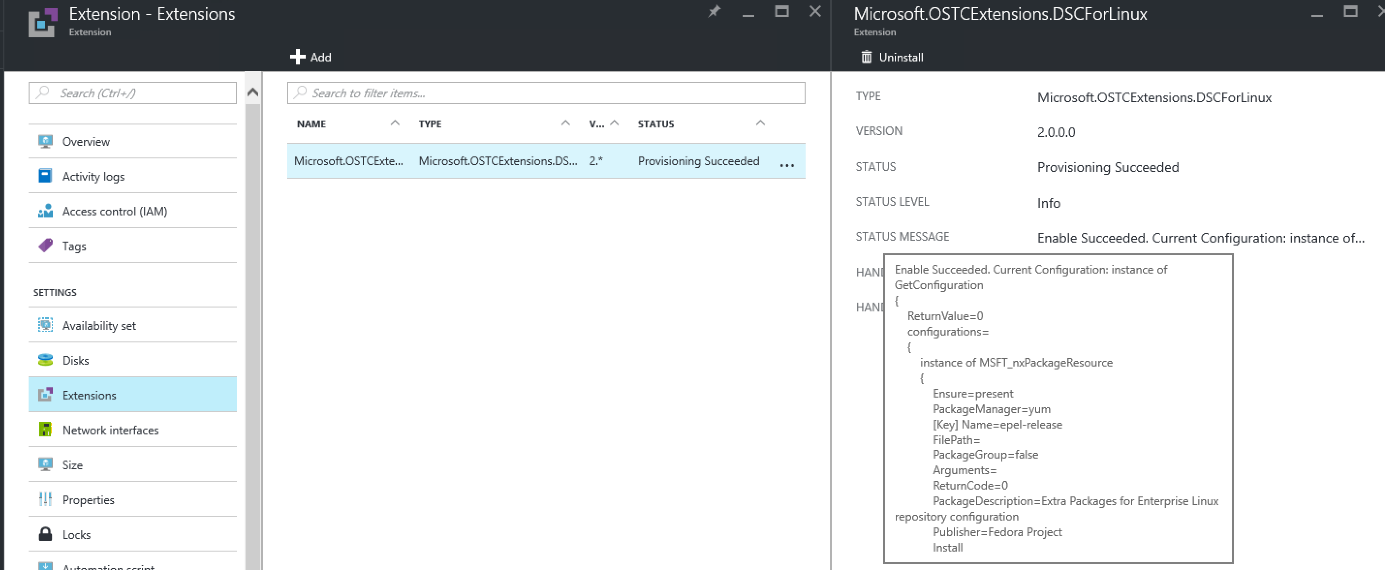
Now we have the extension configured, proceed as normal and deploy the VM. Once finished we should see the following in the VM Extension blade:
In the next blog we will repeat the steps from this post but target the register mode instead.
