
This blog post is written and published on AzureStack.blog: https://azurestack.blog/2016/09/adding-and-using-centos-7-2-or-any-other-image-to-azure-stack-tp2/
Finally, Azure Stack TP2 has been released! When TP1 came out I wrote a couple of blog post on adding CentOS 7 and the DSC for Linux extension. So much has changed with TP2 so I figured to write a couple of follow up posts to help you get started!
Adding and using…
- CentOS 7.2 (or any other image) to Azure Stack TP2 (this post)
- OS Gallery Items to Azure Stack TP2
- The DSC For Linux extension v2 to Azure Stack TP2
- DSC For Linux Gallery Item to Azure Stack TP2
- DSC For Linux Azure Automation DSC Gallery Item to Azure Stack TP2
In this blog series, assume I’m working from the Admin perspective unless explicitly specified I’m using a tenant account.
How to get your images?
Creating an image from scratch
You can still create your own custom image if you want. You can follow the previous blog I wrote on the subject or check out the Azure documentation which is of course valid for Stack as well.
Download a vendor pre-created image
Microsoft published a list of vendors who have pre-created Azure Stack compatible images. For your ease, I’ve duplicated the links here:
For this blog post I go with CentOS again. When you follow the link you’ll see 2 available images:
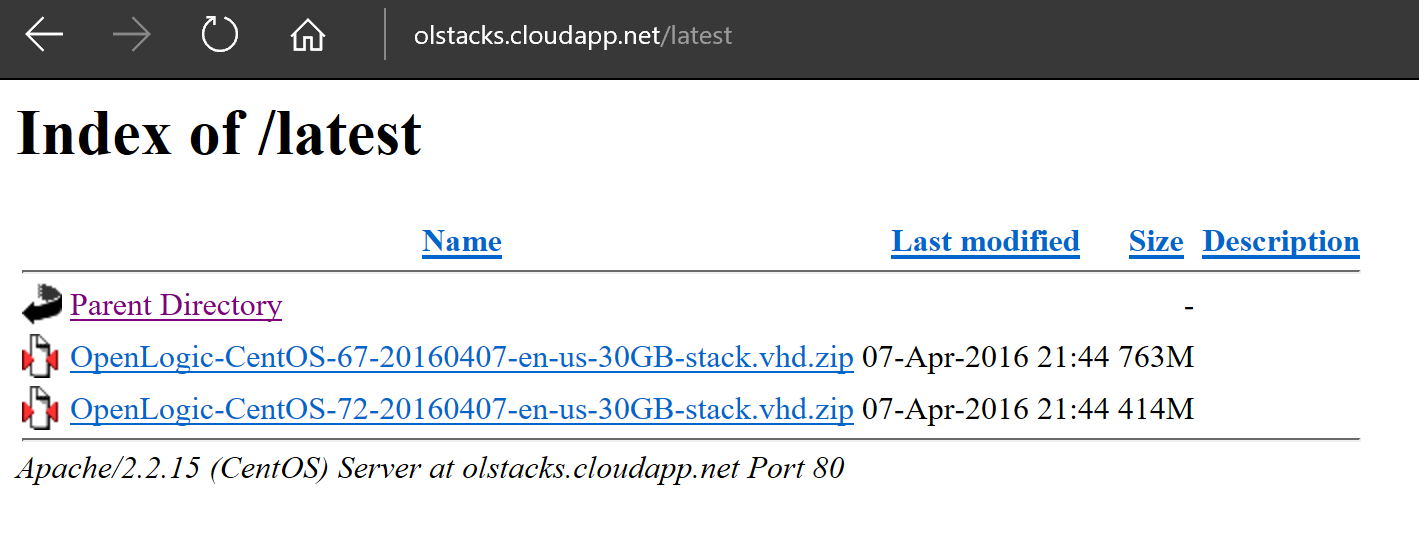
If you want to follow along, download the 7.2 image, but you’ll be fine with any image from any distribution if you can read through the lines 🙂
Direct download to your desktop folder using PowerShell:
Invoke-WebRequest -UseBasicParsing -Uri http://olstacks.cloudapp.net/latest/OpenLogic-CentOS-72-20160407-en-us-30GB-stack.vhd.zip -OutFile ~\Desktop\OpenLogic-CentOS-72-20160407-en-us-30GB-stack.vhd.zip
Importing the image through the Portal
In TP1 we imported images by copy pasting them into the CRP PlatformImages directory directly using either a manual approach or by using the CopyImageToPlatformImageRepository.ps1 PowerShell script. Although this still works, it is not a recommended route anymore. Instead we have to follow on of two approaches which both feel like a far better and formal approach to me.
Upload vhd to a temporary storage account
The Portal UI used for adding the images can be accessed via Region Management.
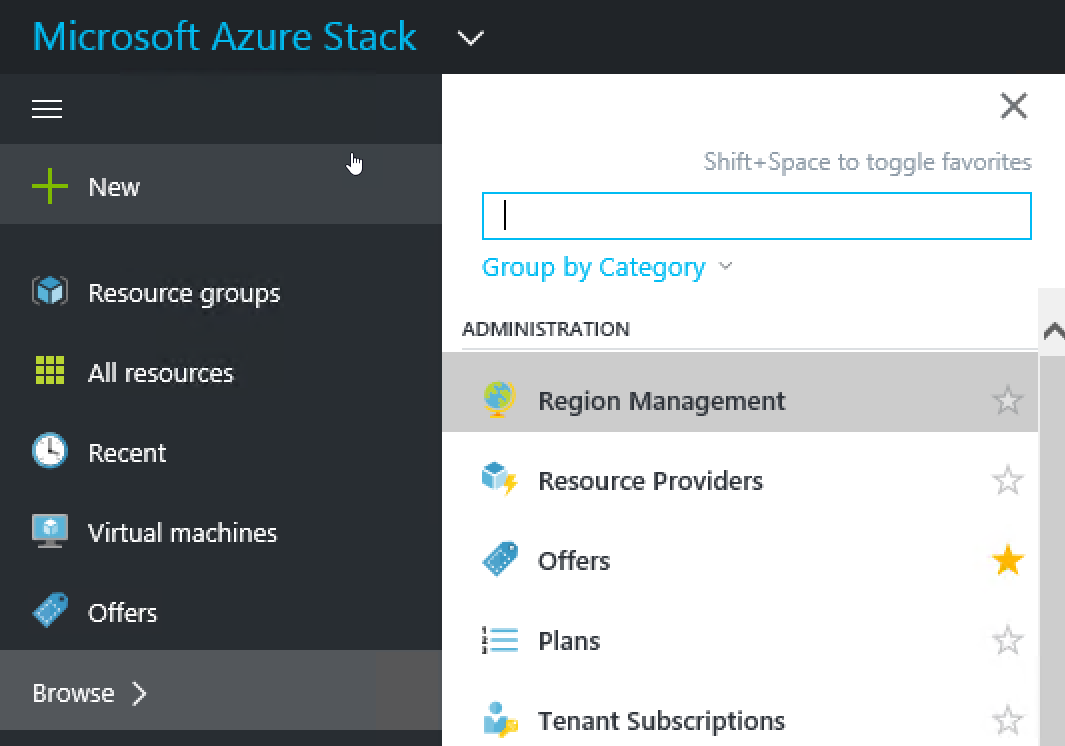
Open the local region blade, and select the Compute Resource Provider. Here you can see the current amount of VM Images for this region.
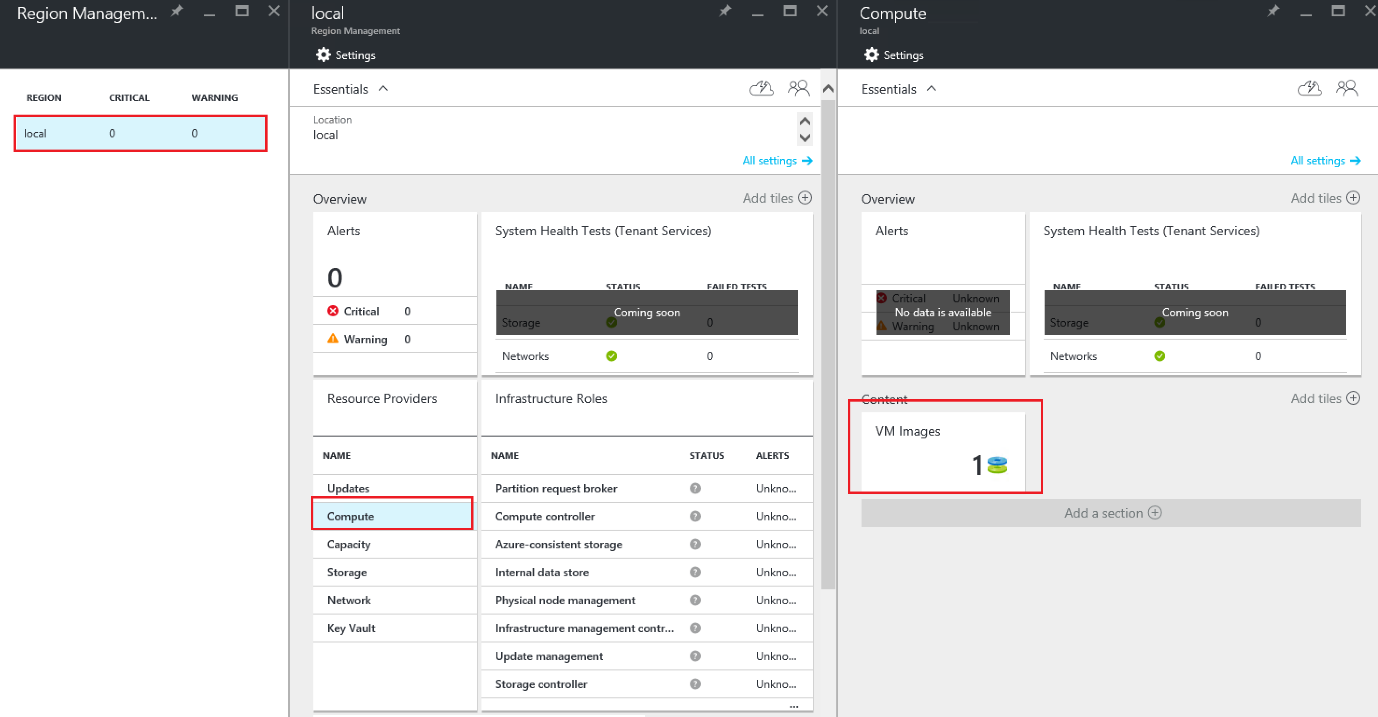
When you select the VM Images tile, another blade will open which shows you the details of the VM Images currently available. It also allows you to add or remove images.
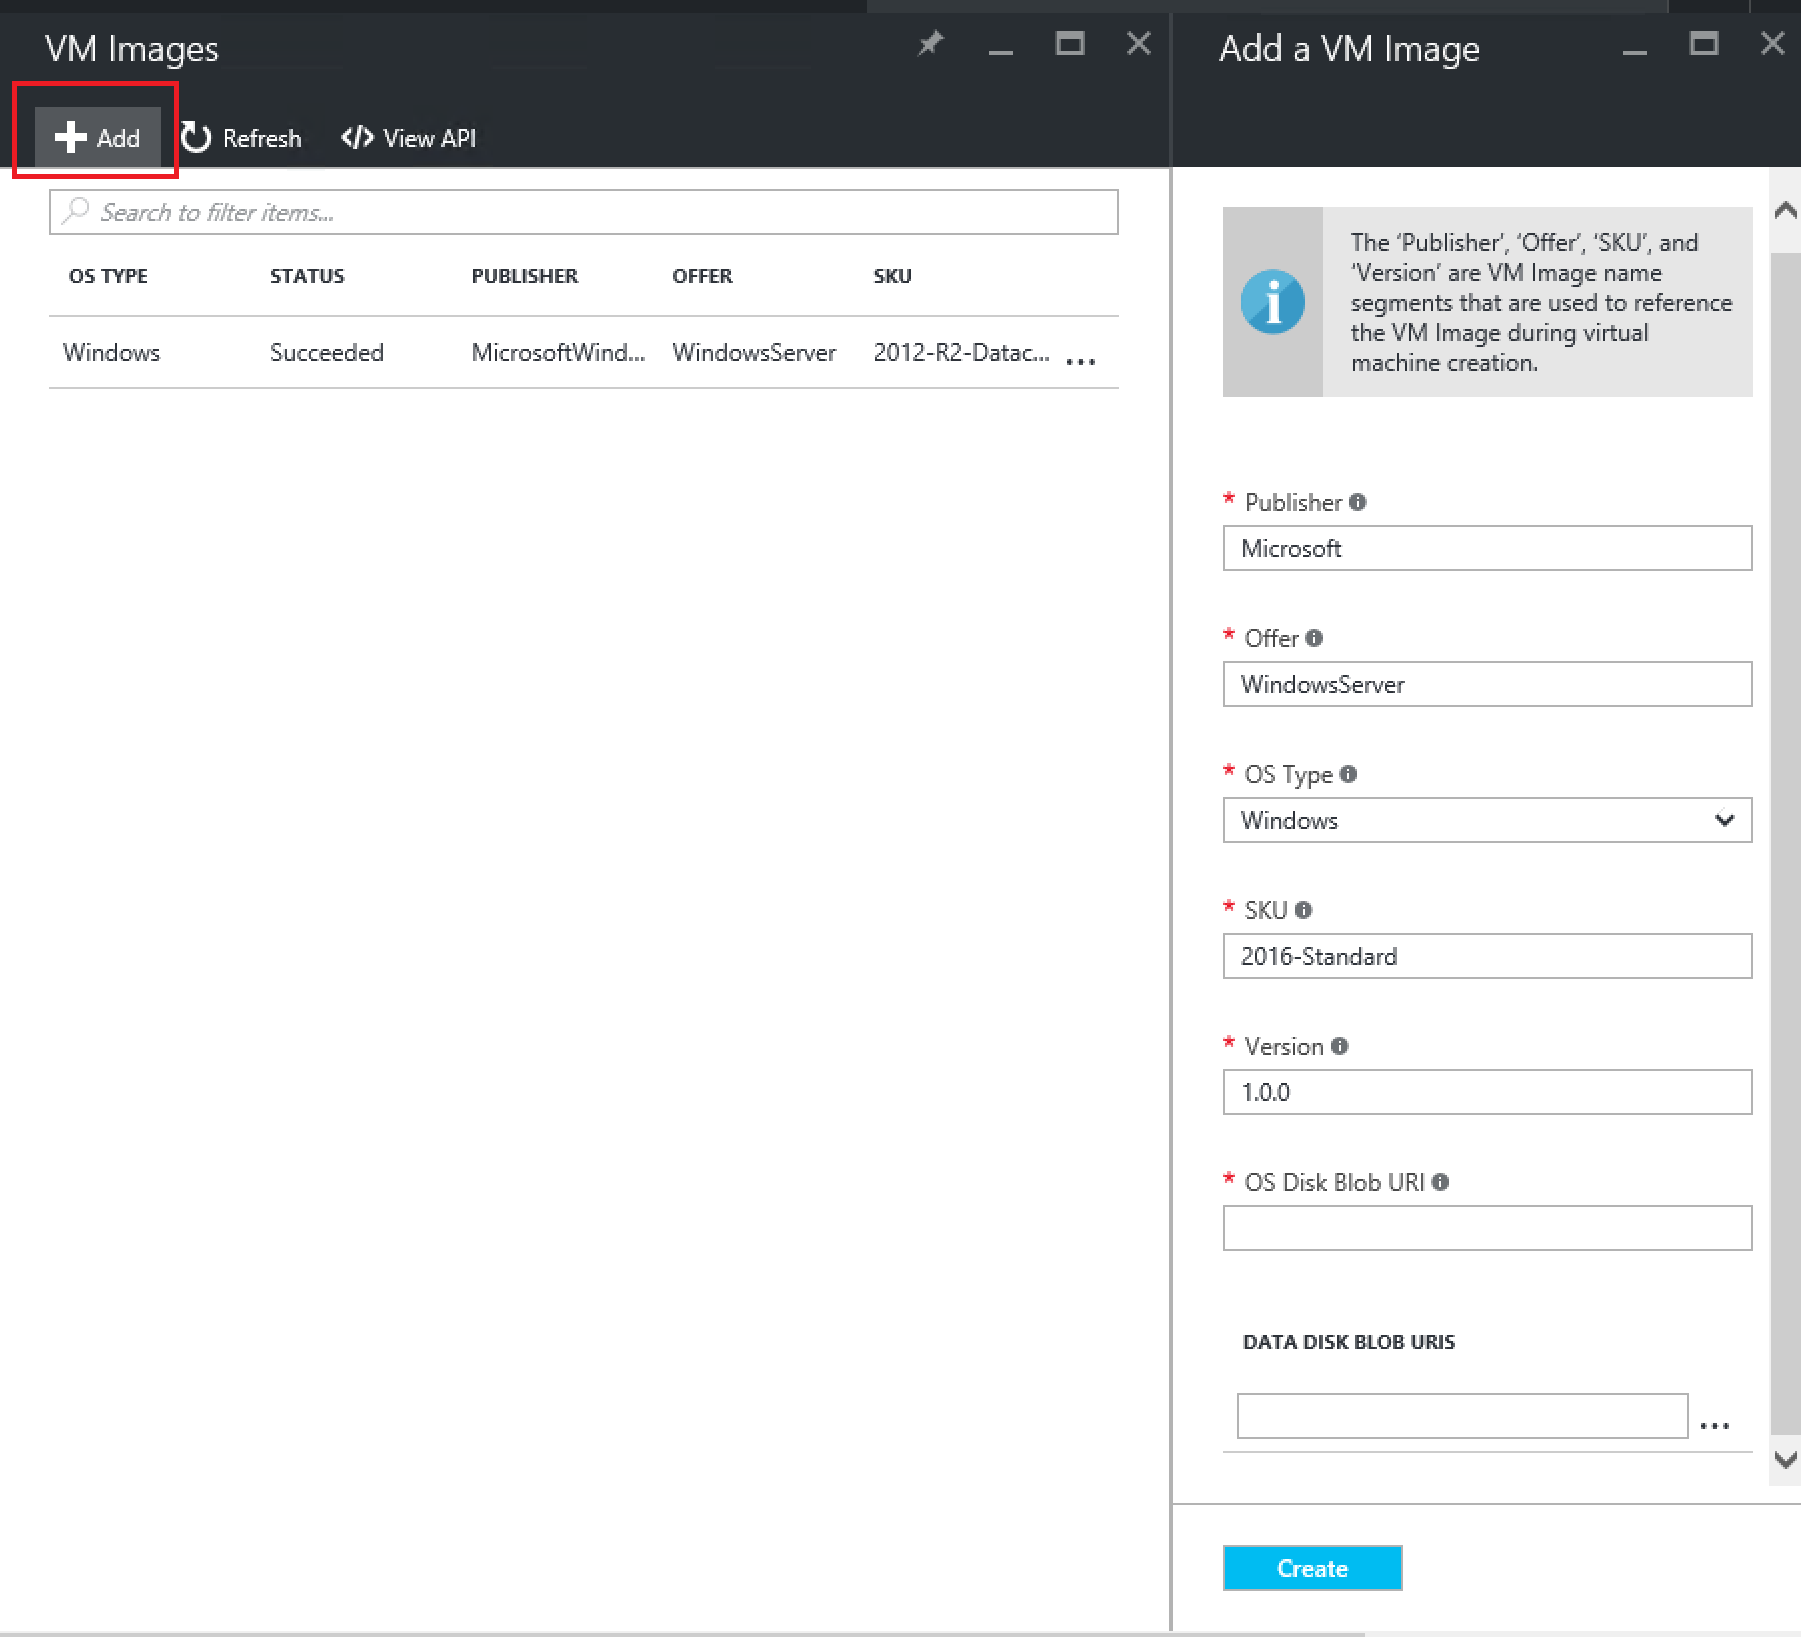
As you can see, adding an image can only be done when the vhd is available on a URI.
To fulfill this requirement, I’m going to create a storage account on which I will upload the VHD. Let’s run some PowerShell to make this happen (I’m assuming you are already have the correct version of Azure PowerShell installed and are connected using an Admin account, if not see this link.)
$RG = New-AzureRmResourceGroup -Name tenantartifacts -Location local
$StorageAccount = $RG | New-AzureRmStorageAccount -Name tenantartifacts -Type Standard_LRS
$ImagesContainer = New-AzureStorageContainer -Name image -Permission Blob -Context $StorageAccount.Context
$CentOSUpload = $ImagesContainer | Set-AzureStorageBlobContent -File ~\Desktop\OpenLogic-CentOS-72-20160407-en-us-30GB-stack.vhd\OpenLogic-CentOS-72-20160407-en-us-30GB-stack.vhd
$CentOSUpload.ICloudBlob.StorageUri.PrimaryUri.AbsoluteUri | Set-Clipboard
This code will create a new Resource Group called tenantartifacts and creates a new Storage Account in it, also called tenantartifacts. Then a container called image is created with which allows anonymous access (just to make this a bit easier for now). Finally, if you stored the vhd on your desktop, the vhd is uploaded and the resulting URI is copied to your clipboard.
Now we have the URI available, let’s move back to the blade and fill out all requirements:
| Field | Value |
|---|---|
| Publisher | OpenLogic |
| Offer | CentOS |
| OS Type | Linux |
| SKU | 7.2 |
| Version | 1.0.0 |
| OS Disk Blob URI | https://tenantartifacts.blob.azurestack.local/image/OpenLogic-CentOS-72-20160407-en-us-30GB-stack.vhd |
| Data Disk Blob URIs |
And hit Create:

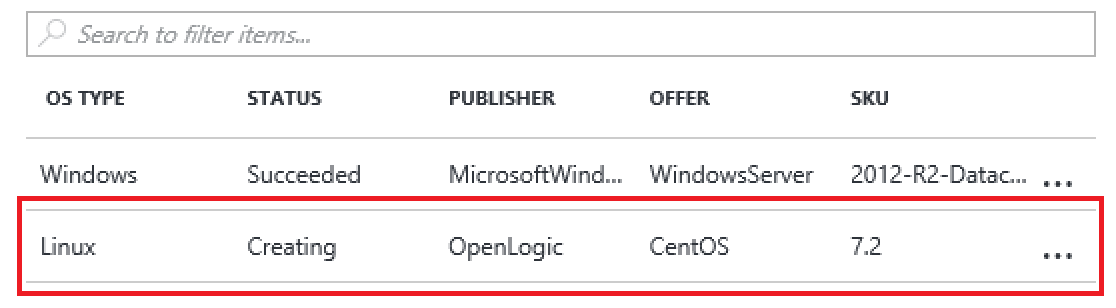
The CRP is now downloading the image and creating a manifest file for you. When the status is Succeeded, you can at the CRP storage on the host to see the result.
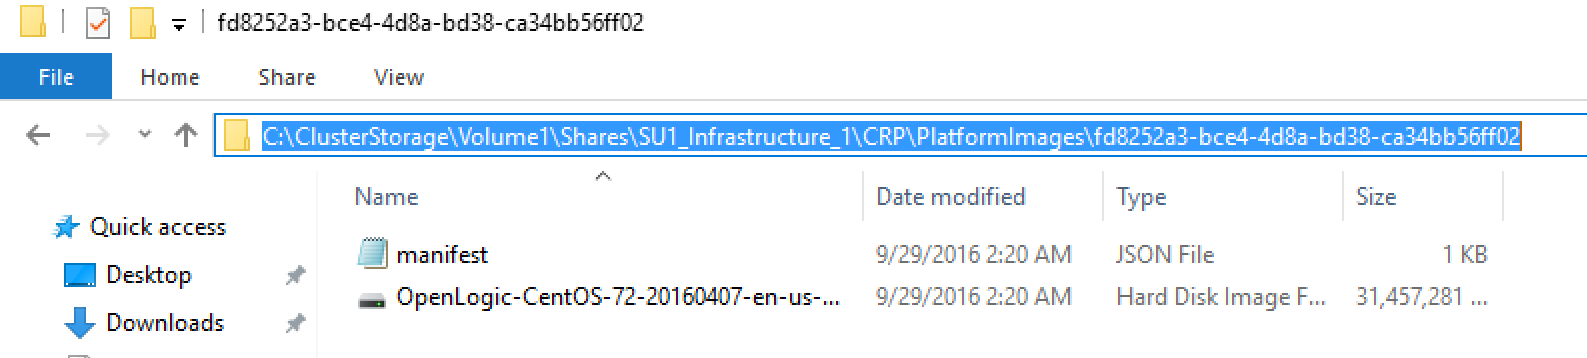
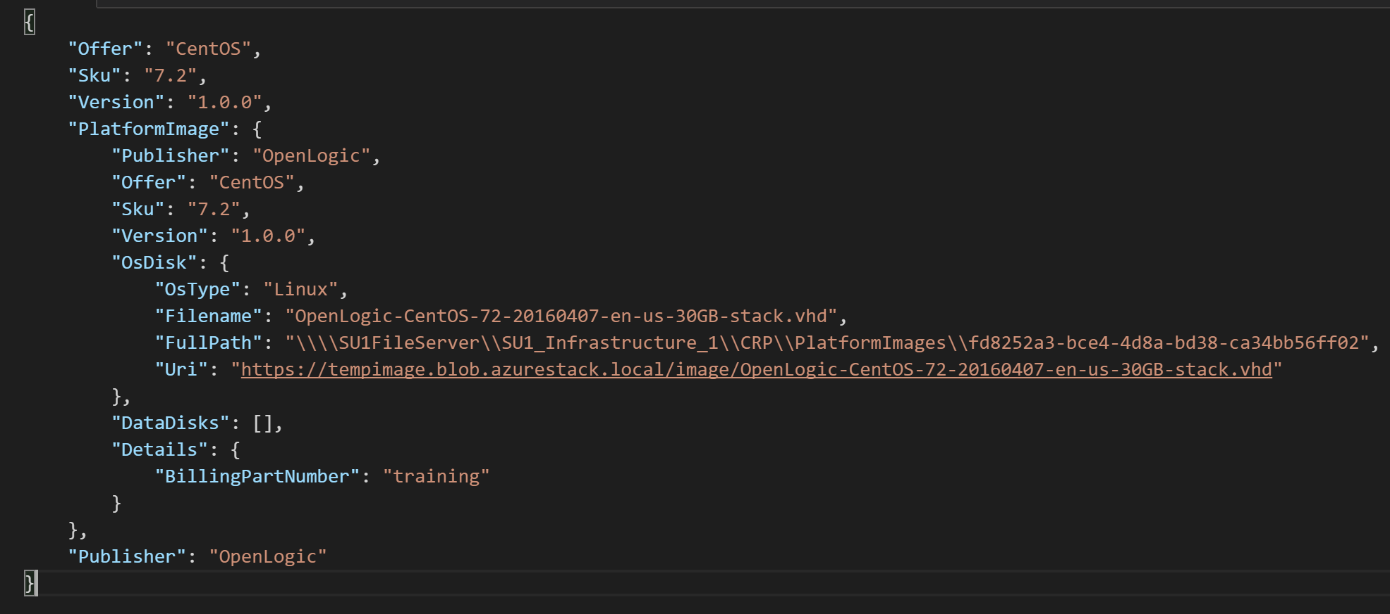
The manifest is generated for you now:
With TP1, the image would now be surfaced in the portal with a nice Windows Server logo. This is not the case anymore.
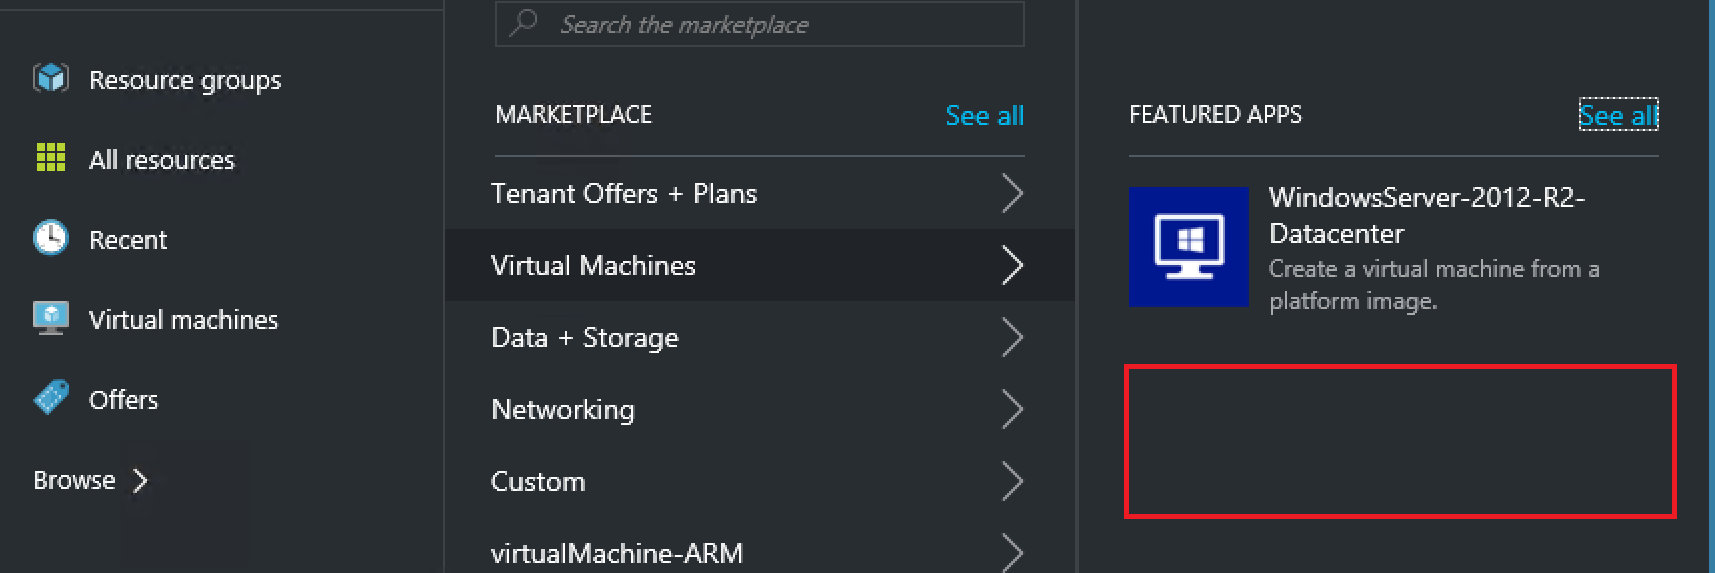
At this point in time, the image is only deployable through PowerShell or via a JSON template.

If you want it surfaced in the Gallery, we need to create and add corresponding gallery items which will be the subject of the next 2 blog post.
Importing the image through PowerShell
Now you have seen the route through the UI, let’s investigate the same steps by using a PowerShell module called AzureStack.ComputeAdmin made available here: https://github.com/Azure/AzureStack-Tools.
Run the following code to install the modules from this toolkit:
Invoke-WebRequest -UseBasicParsing -Uri https://github.com/Azure/AzureStack-Tools/archive/master.zip -OutFile master.zip
Expand-Archive -Path .\master.zip -DestinationPath . -Force
$Folder = New-Item -ItemType Directory -Path ~\Documents\WindowsPowerShell\Modules -Force
Get-ChildItem -Path .\AzureStack-Tools-master -Directory | ForEach-Object -Process {
    if (Get-ChildItem -Path $_.FullName -Filter *.psm1) {
        $PSM1 = Get-ChildItem -Path $_.FullName -Filter *.psm1
        Copy-Item -Path $_.FullName -Destination "$($Folder.FullName)\$($PSM1.BaseName)" -Recurse
        New-ModuleManifest -Path "$($Folder.FullName)\$($PSM1.BaseName)\$($PSM1.BaseName).psd1" -RootModule $PSM1.BaseName
    }
}
The code inside these modules are dependent on the presence of the correct version of AzureRM PowerShell modules. Again, I assume these are already present.
Now we have the modules available and created a manifest file for them, we can use the Add-VMImage function directly. Let’s have a look at the supported Parameter Sets:
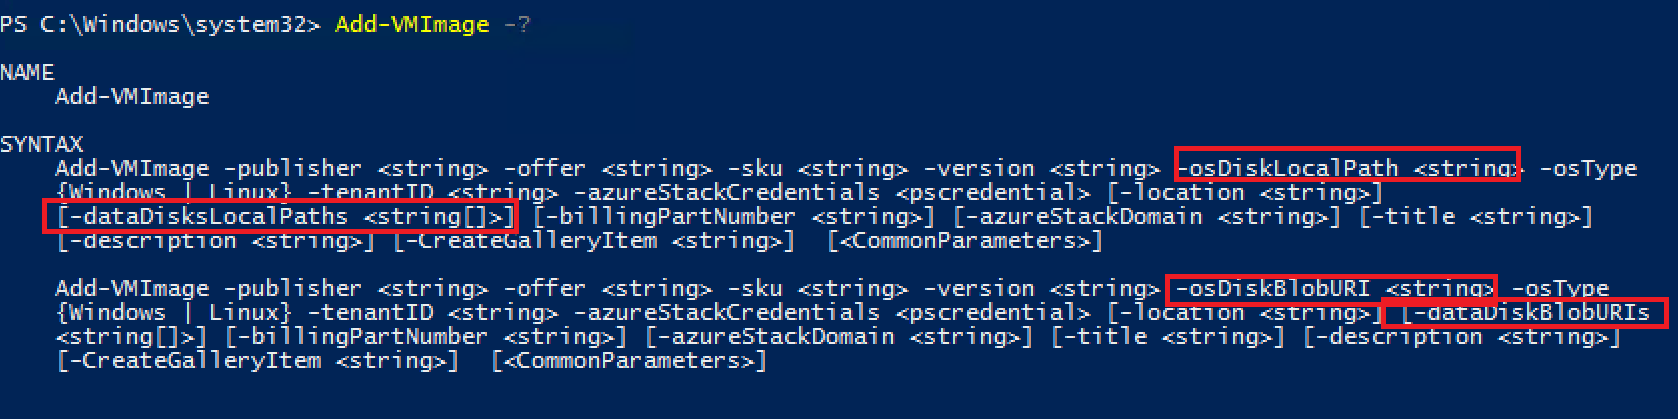
This function is capable of bringing in an image from local storage or URI location to the CRP gallery and optionally generate and add a basic gallery VM artifact as well (making it available in the Portal for deployment).
The gallery item is generated based on the azpkg file which came with the module. It uses this azpkg (it’s basically just a zip with content) as a template, changing some values as you have provided them to the function and creating a new azpkg file by using the Azure Gallery Package Generator. Please note that the function will download the package generator externally so internet connectivity is required.
Let’s run it (please note to remove the image first if it is already present):
$VMImgArgs = @{
    publisher = 'OpenLogic'
    offer = 'CentOS'
    sku = '7.2'
    version = '1.0.0'
    osType = 'Linux'
    osDiskLocalPath = '~\Desktop\OpenLogic-CentOS-72-20160407-en-us-30GB-stack.vhd'
    tenantID = 'yourtenantid.onmicrosoft.com'
    azureStackCredentials = (Get-Credential)
}

Add-VMImage @VMImgArgs
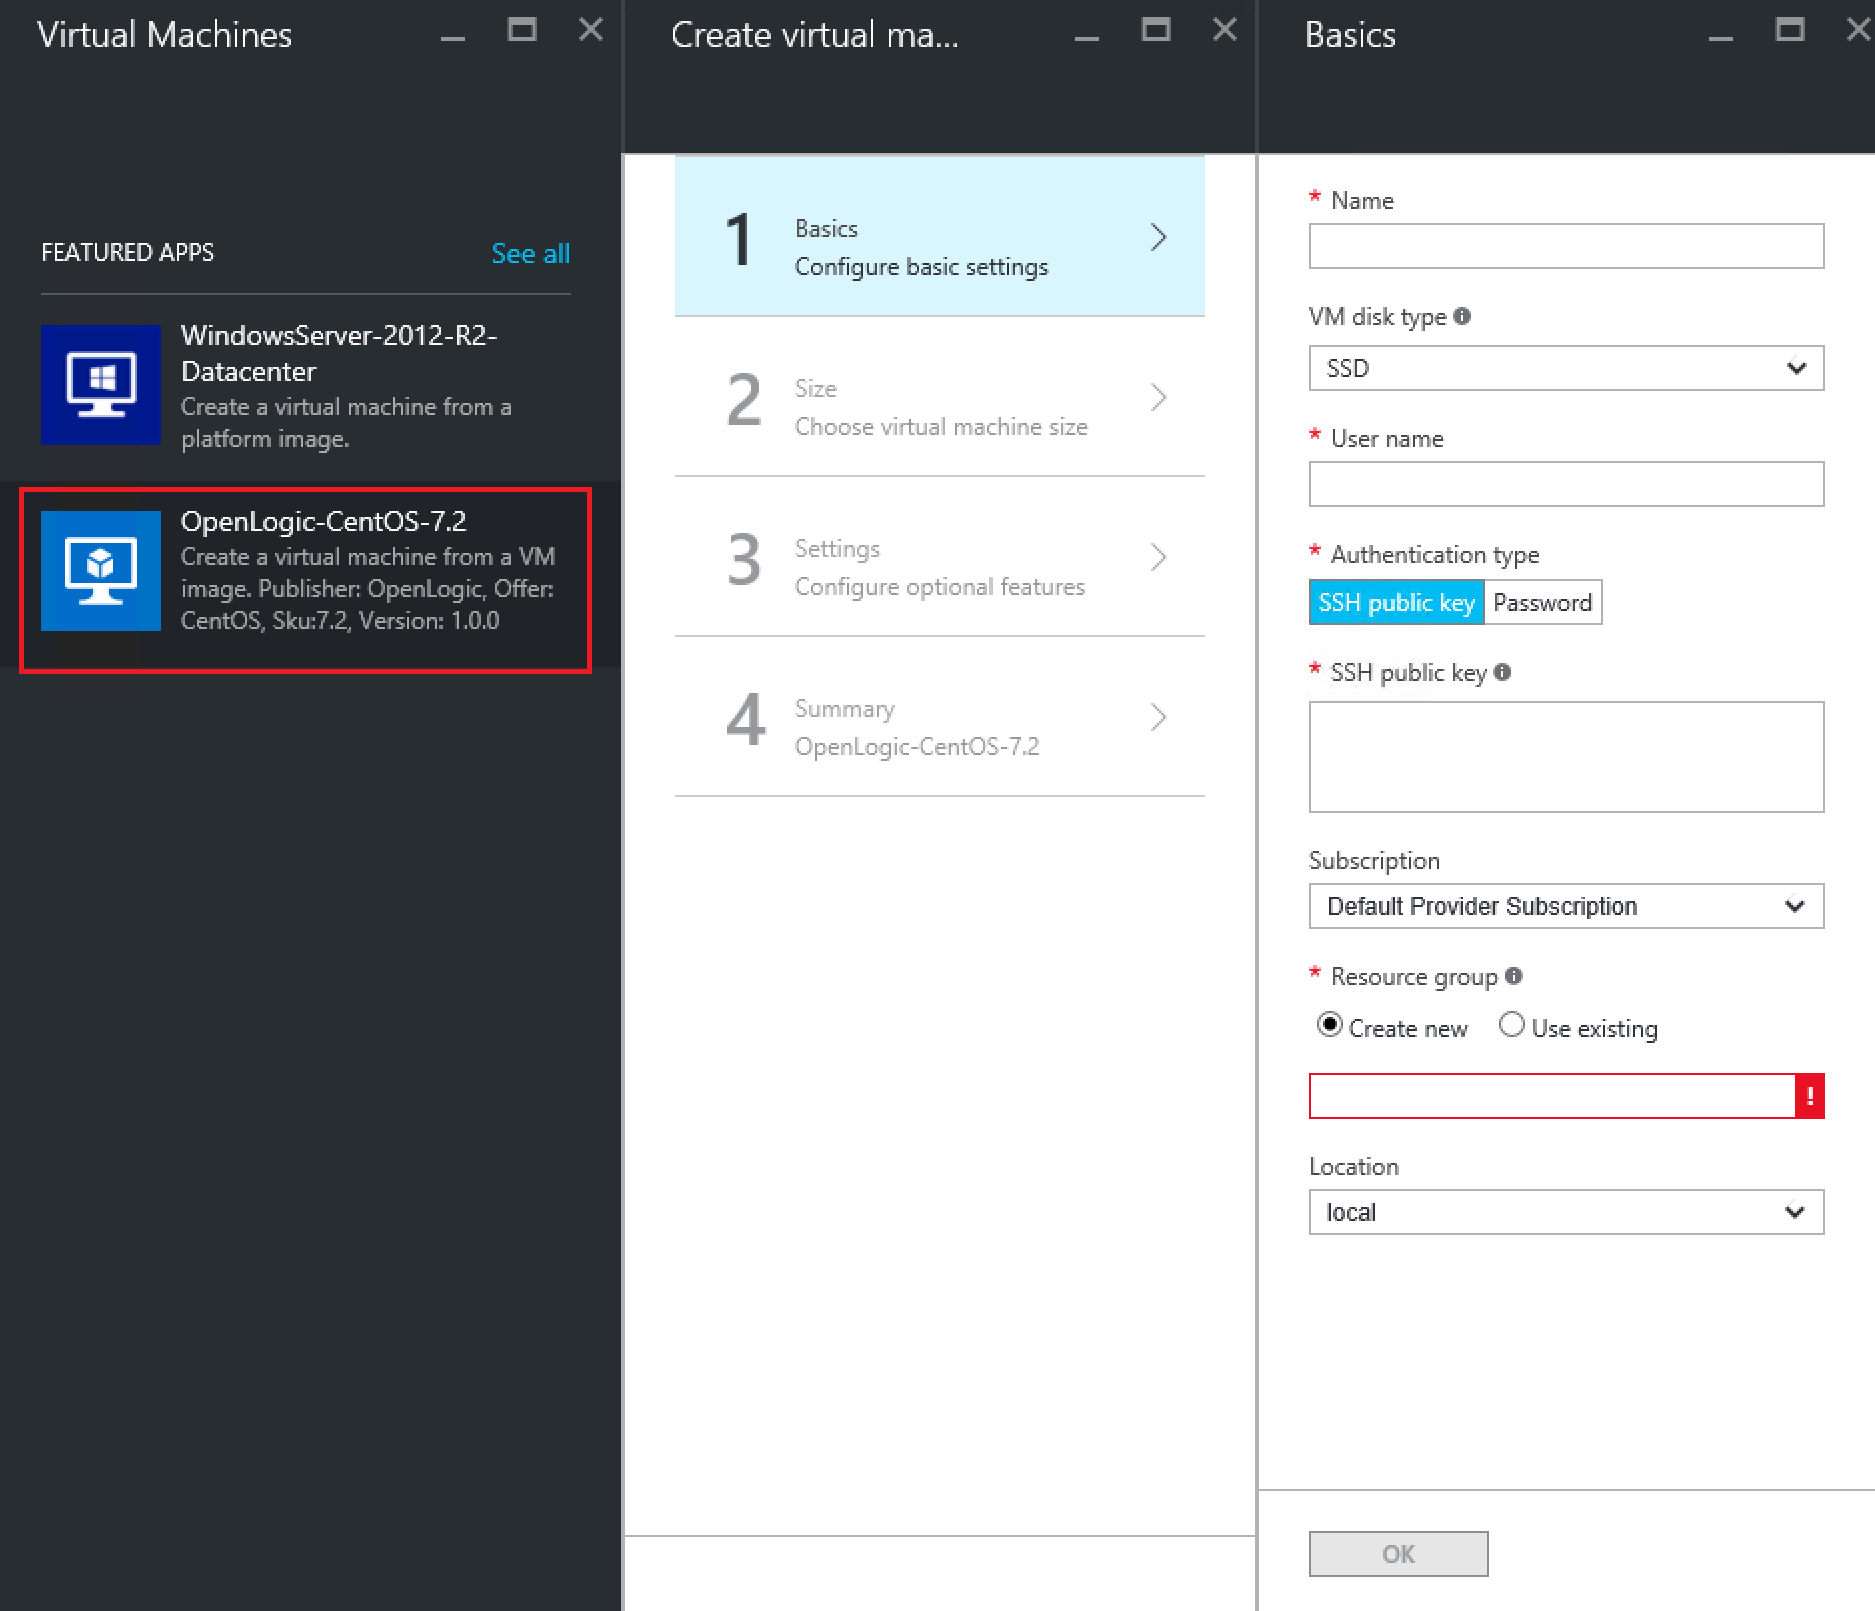
If everything worked out, you should have ended up with the image being available and a gallery item being present.
Pretty good end result! I can imagine though that if you have a CentOS image, you would want some CentOS Icons right? In the next blog, I’ll show you how to construct your own gallery item customized to your needs!