
This blog post is written and published on AzureStack.blog: https://azurestack.blog/2016/10/adding-and-using-os-gallery-items-to-azure-stack-tp2/
In the previous post we added the CentOS 7.2 image to the stack and if you took the PowerShell deployment scenario, we ended up with a gallery item as well (if you did not follow the PowerShell deployment method, don’t worry as it’s not needed to follow along).
In this blog, we’ll create a custom gallery item for our CentOS image.
In this series:
Adding and using…
- CentOS 7.2 (or any other image) to Azure Stack TP2
- OS Gallery Items to Azure Stack TP2 (this post)
- The DSC For Linux extension v2 to Azure Stack TP2
- DSC For Linux Gallery Item to Azure Stack TP2
- DSC For Linux Azure Automation DSC Gallery Item to Azure Stack TP2
Creating a gallery item
As seen in the previous blog, we can add “things” to Azure Stack which become available for PowerShell and JSON template based deployments immediately. But if we want those “things” to surface in the portal as well, we need to add gallery items corresponding to our “things”. I keep saying “things” as VM Images are not the only artifacts on which this applies.
Don’t start from scratch
Not much is documented currently on how to create gallery items and what the possibilities are. So my advice is, not to start from scratch but take an existing gallery item and go from there.
In this case, I’m using the gallery item used to surface the Windows Server 2012 R2 image in the portal as a building block. Copy it somewhere you can find it (I’m copying it to my desktop) from: C:\ClusterStorage\Volume1\Shares\SU1_TenantLibrary_1\GalleryImages\Microsoft.Compute\local\MicrosoftWindowsServer.WindowsServer-2012-R2-Datacenter.1.0.0.azpkg

Now you have copied it, you can extract it. Rename the azpkg extension to zip and extract.
Rename-Item -Path .\MicrosoftWindowsServer.WindowsServer-2012-R2-Datacenter.1.0.0.azpkg -NewName MicrosoftWindowsServer.WindowsServer-2012-R2-Datacenter.1.0.0.zip
Expand-Archive -Path .\MicrosoftWindowsServer.WindowsServer-2012-R2-Datacenter.1.0.0.zip
Now let’s do some housekeeping. We will cleanup everything that will be generated by the packager later.
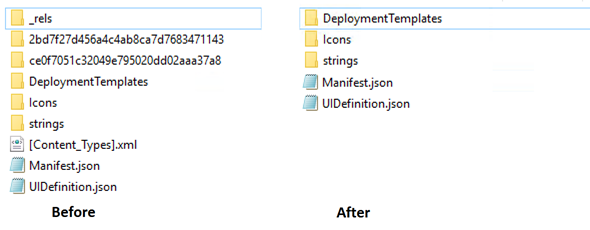
We get rid of the _rels folder, the guid named folders and the [Content_Types].xml. Also in DeploymentTemplates there is another _rels folder to remove.
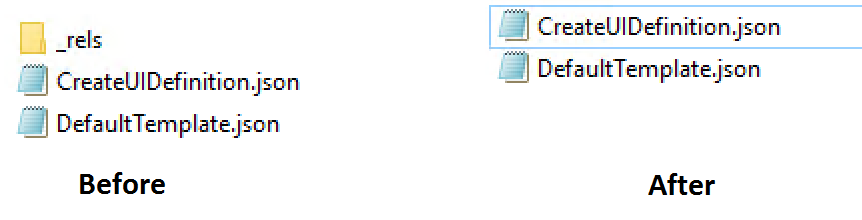
Ok, now we cleaned up, we have a good template to start working on.
For good measure, the file and folder structure should now look like this:
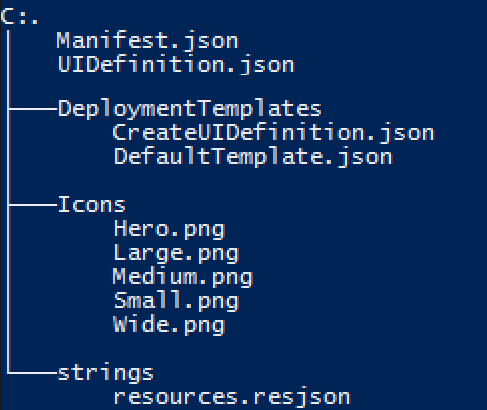
The files:
| FileName | Location | Size |
|---|---|---|
| Manifest.json | Root | |
| UIDefinition.json | Root | |
| CreateUIDefinition.json | Root\DeploymentTemplates | |
| DefaultTemplate.json | Root\DefaultTemplate.json | |
| Hero.png | Root\Icons | 815 x 290 px |
| Large.png | Root\Icons | 115 x 115 px |
| Medium.png | Root\Icons | 90 x 90 px |
| Small.png | Root\Icons | 40 x 40 px |
| Wide.png | Root\Icons | 255 x 115 px |
| Resources.resjson | Root\strings |
We explore what these files mean and are mend for when we start to edit them.
Use VS Code
Although not a must, I highly advise the use of VS Code to modify the files. I’m going to use VS Code, so if you want to follow along, download it here: https://code.visualstudio.com/Download
Editing the files
With vs code, you can open the Root folder and have a navigation pane on the left.
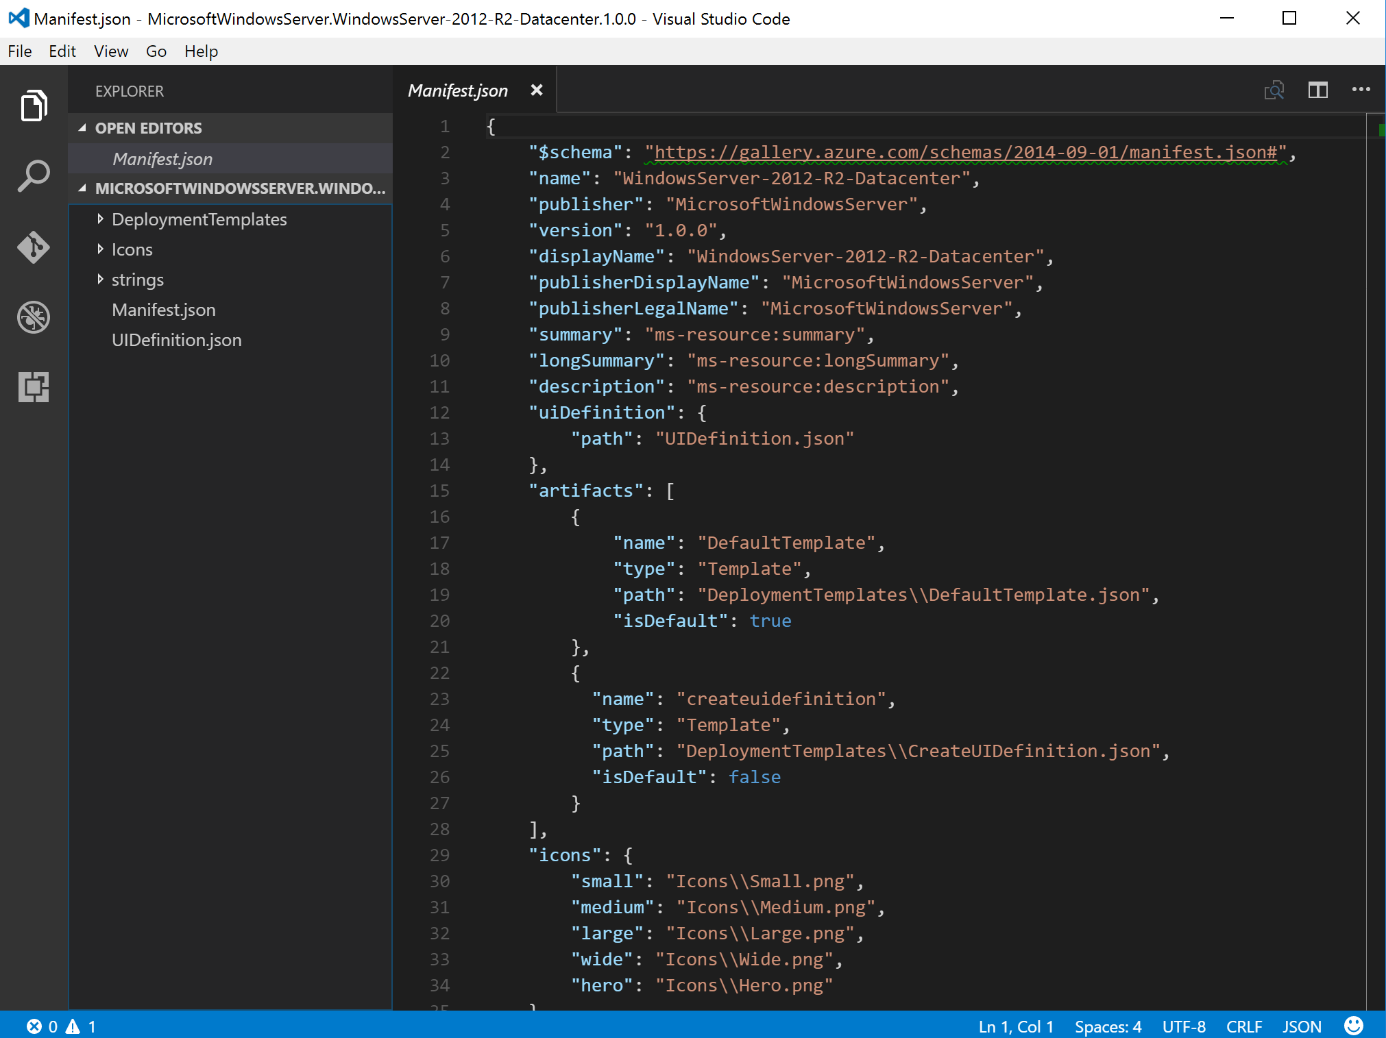
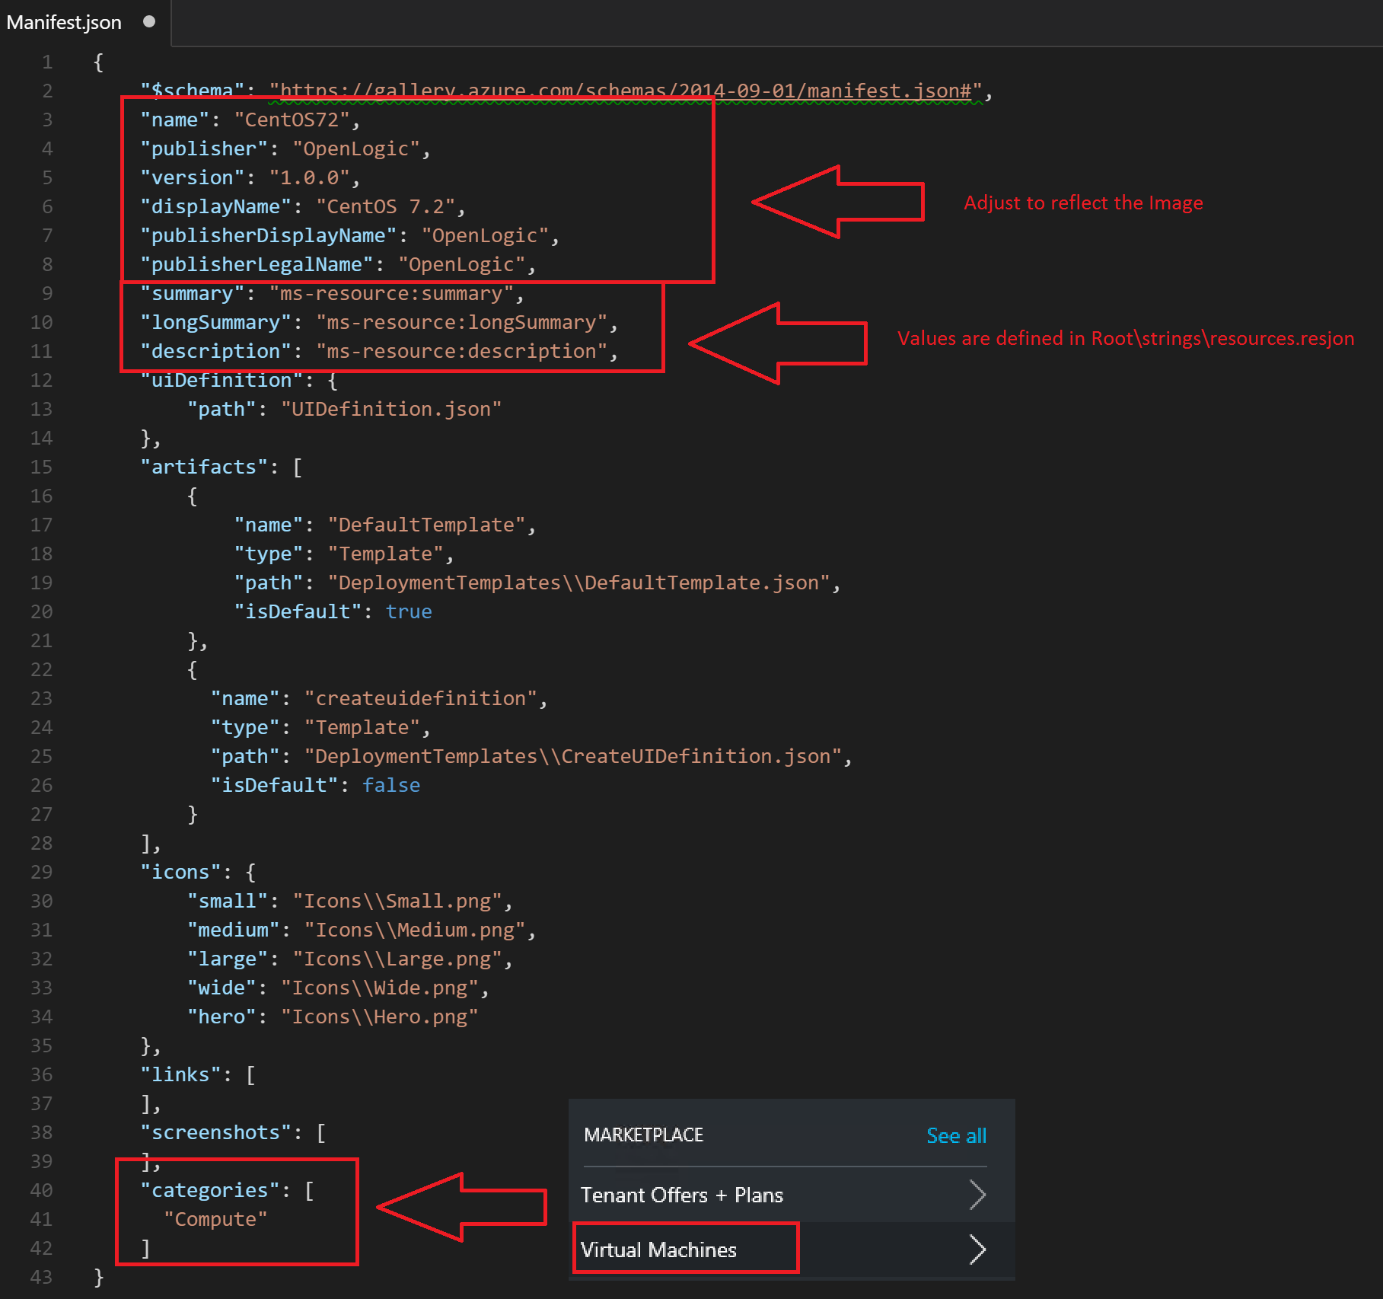
Manifest.json
Currently Manifest.json has values concerning the Windows Server 2012 R2 image.
{
    "$schema": "https://gallery.azure.com/schemas/2014-09-01/manifest.json#",
    "name": "WindowsServer-2012-R2-Datacenter",
    "publisher": "MicrosoftWindowsServer",
    "version": "1.0.0",
    "displayName": "WindowsServer-2012-R2-Datacenter",
    "publisherDisplayName": "MicrosoftWindowsServer",
    "publisherLegalName": "MicrosoftWindowsServer",
    "summary": "ms-resource:summary",
    "longSummary": "ms-resource:longSummary",
    "description": "ms-resource:description",
    "uiDefinition": {
        "path": "UIDefinition.json"
    },
    "artifacts": [
        {
            "name": "DefaultTemplate",
            "type": "Template",
            "path": "DeploymentTemplates\\DefaultTemplate.json",
            "isDefault": true
        },
        {
          "name": "createuidefinition",
          "type": "Template",
          "path": "DeploymentTemplates\\CreateUIDefinition.json",
          "isDefault": false
        }
    ],
    "icons": {
        "small": "Icons\\Small.png",
        "medium": "Icons\\Medium.png",
        "large": "Icons\\Large.png",
        "wide": "Icons\\Wide.png",
        "hero": "Icons\\Hero.png"
    },
    "links": [
    ],
    "screenshots": [
    ],
    "categories": [
      "Compute"
    ]
}
As you can see, the manifest contains a description of the gallery item (e.g. the name, publisher, version, etc). Which artifacts are contained within the package and of what type they are, which icon files are located, etc.
Let’s look at the adjusted version:
UIDefinition.json
The UIDefinition.json controls which blade type is used in the portal. In this case, the CreateVMWizardBlade is used which corresponds to the 4 step VM creation wizard.
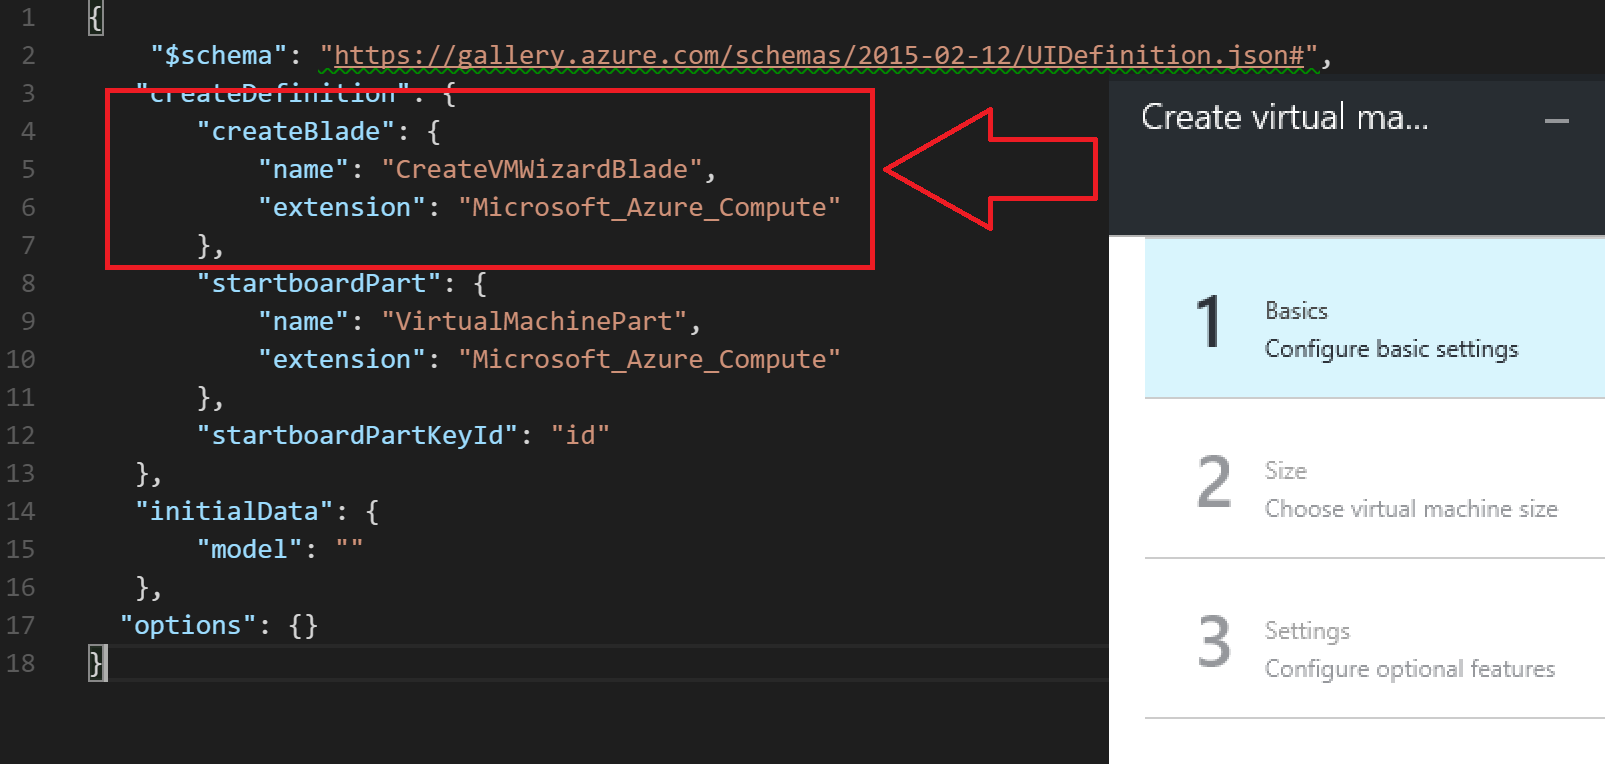
Another known blade type is the DeployFromTemplateBlade which surfaces the parameters defined in a template instead of the 4 step wizard.
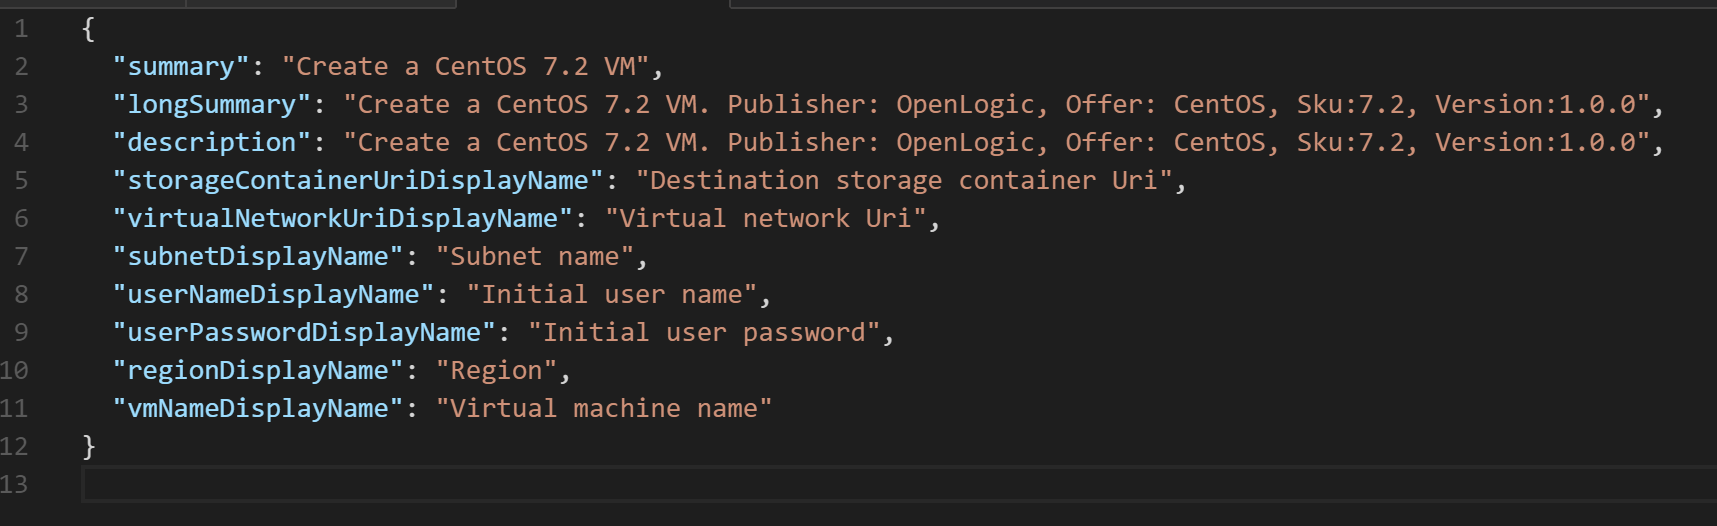
Strings\resources.resjon
Currently strings\resources.resjson has values concerning the Windows Server 2012 R2 image.
{
  "summary": "Create a virtual machine from a platform image.",
  "longSummary": "Create a virtual machine from a platform image. Publisher: MicrosoftWindowsServer, Offer: WindowsServer, Sku:2012-R2-Datacenter, Version:1.0.0",
  "description": "Create a virtual machine from a platform image. Publisher: MicrosoftWindowsServer, Offer: WindowsServer, Sku:2012-R2-Datacenter, Version:1.0.0",
  "storageContainerUriDisplayName": "Destination storage container Uri",
  "virtualNetworkUriDisplayName": "Virtual network Uri",
  "subnetDisplayName": "Subnet name",
  "userNameDisplayName": "Initial user name",
  "userPasswordDisplayName": "Initial user password",
  "regionDisplayName": "Region",
  "vmNameDisplayName": "Virtual machine name"
}
These are the values referenced by the manifest.json. Let’s look at the adjusted version.
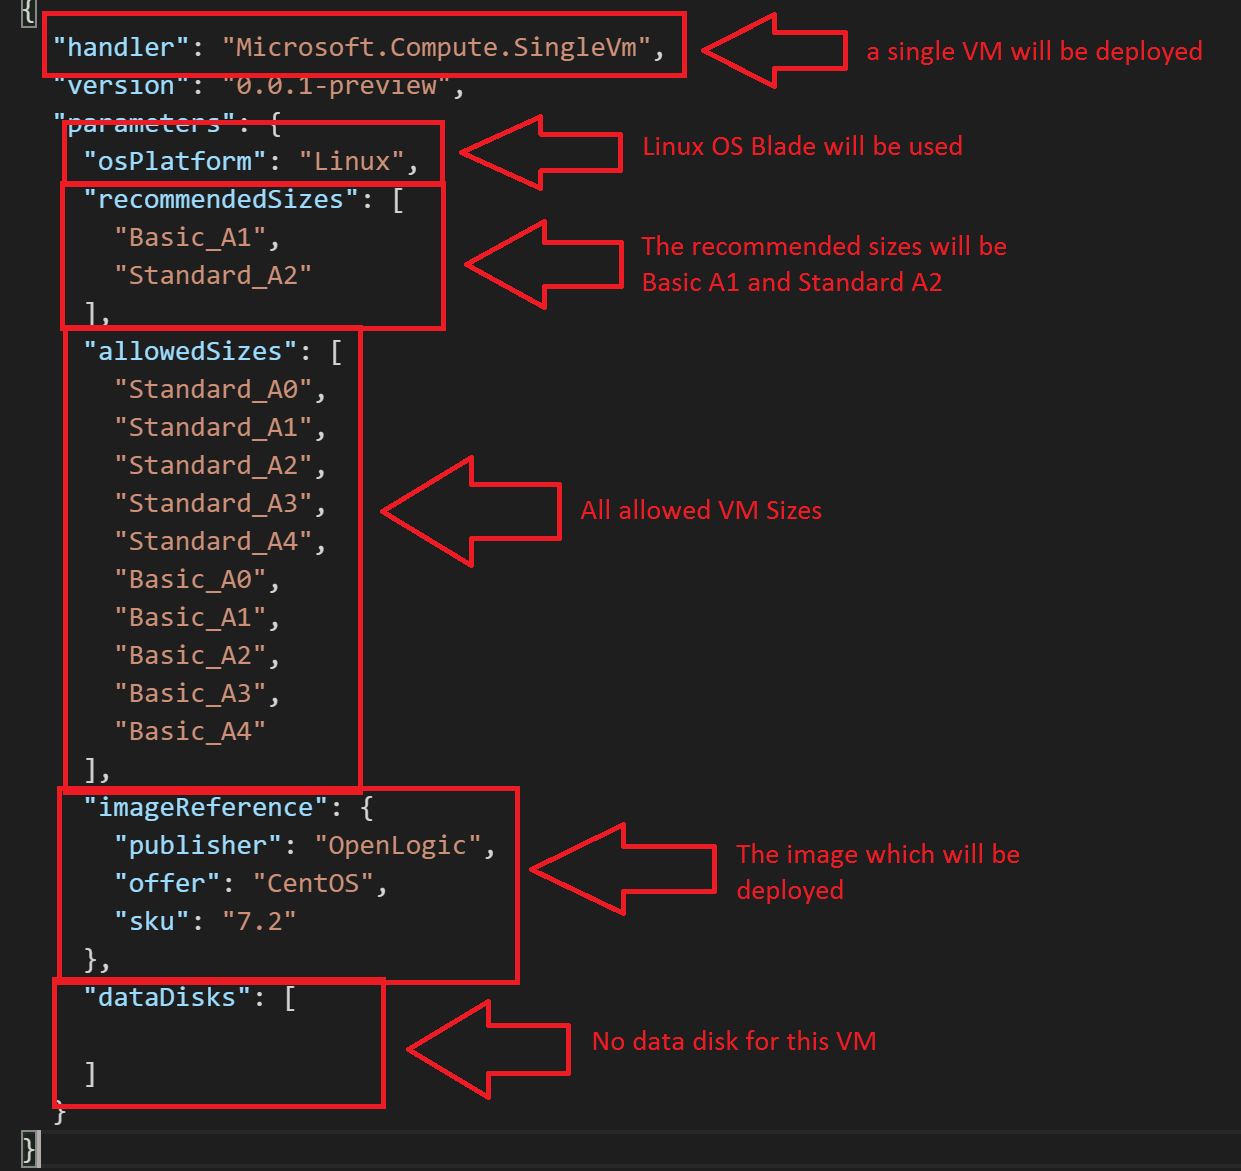
DeploymentTemplates\CreateUIDefinition
CreateUIDefinition is controlling which VM Image is used, what type of OS blade will be surfaced and what constraints are made concerning VM sizes. It also is the place where the recommended sizes are coded. It can probably do a lot more but currently I’m swimming in the dark a bit.
Currently has values concerning the Windows Server 2012 R2 image.
{
  "handler": "Microsoft.Compute.SingleVm",
  "version": "0.0.1-preview",
  "parameters": {
    "osPlatform": "Windows",
    "recommendedSizes": [
      "Basic_A1",
      "Standard_A2"
    ],
    "allowedSizes": [
      "Standard_A0",
      "Standard_A1",
      "Standard_A2",
      "Standard_A3",
      "Standard_A4",
      "Basic_A0",
      "Basic_A1",
      "Basic_A2",
      "Basic_A3",
      "Basic_A4"
    ],
    "imageReference": {
      "publisher": "MicrosoftWindowsServer",
      "offer": "WindowsServer",
      "sku": "2012-R2-Datacenter"
    },
    "dataDisks": [

    ]
  }
}
Let’s adjust the values for our CentOS image.
DeploymentTemplates\DefaultTemplate.json
The default template is empty. I’m not sure if there is a situation where it would be useful to supply a full blown template. For now let’s keep it as is.
{
  "$schema": "http://schema.management.azure.com/schemas/2014-04-01-preview/deploymentTemplate.json",
  "contentVersion": "1.0.0.0",
  "parameters": {},
  "resources": []
}
Icons
I’ve binged a descent CentOS image and replaced the images.
| Size | Image |
|---|---|
| Wide |  |
| Large |  |
| Medium |  |
| Small |  |
I did not replace the Hero icon as it does not surface anywhere yet.
Creating the azpkg
Now we edited the files, it’s time to create the azpkg we need to add the Gallery item to the portal. Download the Azure Gallery Packager and extract it somewhere you can find it. Let’s rename the root folder of our gallery item to something that makes more sense to us as well (e.g. OpenLogic.CentOS.72) and move it to the root of C. Now open a command prompt or PowerShell console and navigate to the packager and run: .\AzureGalleryPackageGenerator\AzureGalleryPackager.exe -m C: \OpenLogic.CentOS.72\Manifest.json -o C:\MyMarketPlaceItems
You should now have a marketplace item in azpkg format. If the packager did not work out, you probably have made some sort of typo somewhere or it just doesn’t like the paths you provide. In any case, you can download the azpkg I created here.
Adding the Gallery Item to Azure Stack
In the previous blog, I created a storage account which I’m going to use again. If you did not create the storage account, please do so now by following the instructions in the previous blog.
Run the following script to add the azpkg to Azure Stack (I assume you already setup the Azure Stack connection in PowerShell).
$subscriptionid = (Get-AzureRmSubscription -SubscriptionName 'Default Provider Subscription').SubscriptionId
$StorageAccount = Get-AzureRmStorageAccount -ResourceGroupName tenantartifacts -Name tenantartifacts
$GalleryContainer = New-AzureStorageContainer -Name gallery -Permission Blob -Context $StorageAccount.Context
$CentOSazpkg = $GalleryContainer | Set-AzureStorageBlobContent -File C:\MyMarketPlaceItems\OpenLogic.CentOS72.1.0.0.azpkg
Add-AzureRMGalleryItem -SubscriptionId $subscriptionid -GalleryItemUri $CentOSazpkg.ICloudBlob.StorageUri.PrimaryUri.AbsoluteUri  -Apiversion "2015-04-01"
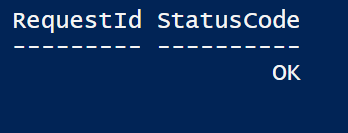
You should see a message with StatusCode Ok.
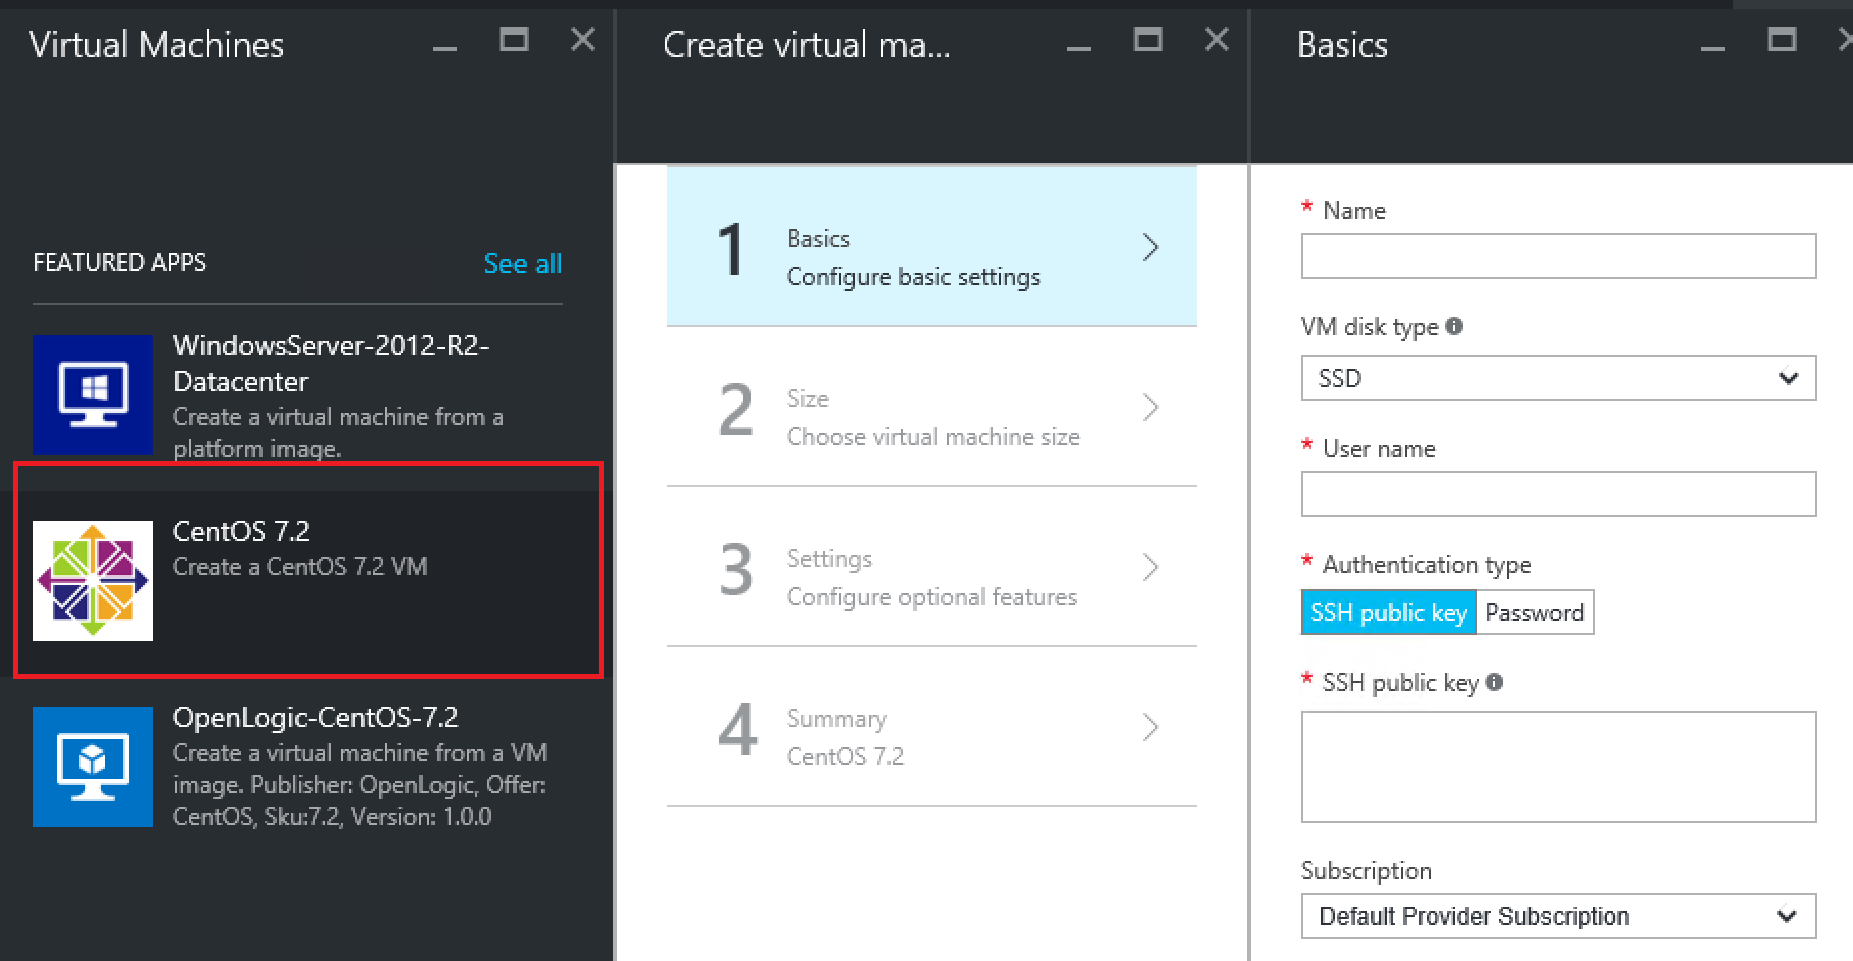
Now we login to the portal, wait a bit, refresh a couple of times and eventually we get:
Now if you deploy this CentOS image using the gallery item, it will default to enabling the Diagnostics extension. This extension did not come with Azure Stack TP2 out of the box so we need to add it ourselves. I’ve gone ahead and deployed a VM in public Azure and copied the VM Extension from there to my GitHub account. You can download it here: https://raw.githubusercontent.com/bgelens/BlogItems/master/Microsoft.OSTCExtensions.LinuxDiagnostic_2.3.9009.zip
After you have downloaded it, we need to place it on the host in the C:\ClusterStorage\Volume1\Shares\SU1_Infrastructure_1\CRP\GuestArtifactRepository directory.
Let’s create a new folder here called: IaaSDiagnosticsLinux and copy in the zip file we just downloaded.
Now we need to add a manifest file so this VM extension will be available. Create a file called manifest.json and copy in the following:
{
    "publisher":  "Microsoft.OSTCExtensions",
    "Type":  "LinuxDiagnostic",
    "Version":  "2.3.9009",
    "GuestArtifact":  {
                          "ExtensionHandlerFilePath":  "Microsoft.OSTCExtensions.LinuxDiagnostic_2.3.9009.zip",
                          "OsType":  "Linux",
                          "ComputeRole":  "N/A",
                          "VMScaleSetEnabled":  false,
                          "SupportsMultipleExtensions":  false
                      }
}
You can validate if you have added it correctly by running:
Get-AzureRmVMExtensionImage -PublisherName Microsoft.OSTCExtensions -Location local -Type LinuxDiagnostic
If you get output instead of an exception, your good to go!

Deploying the VM
Now let’s validate if the VM will actually deploy via this gallery item.
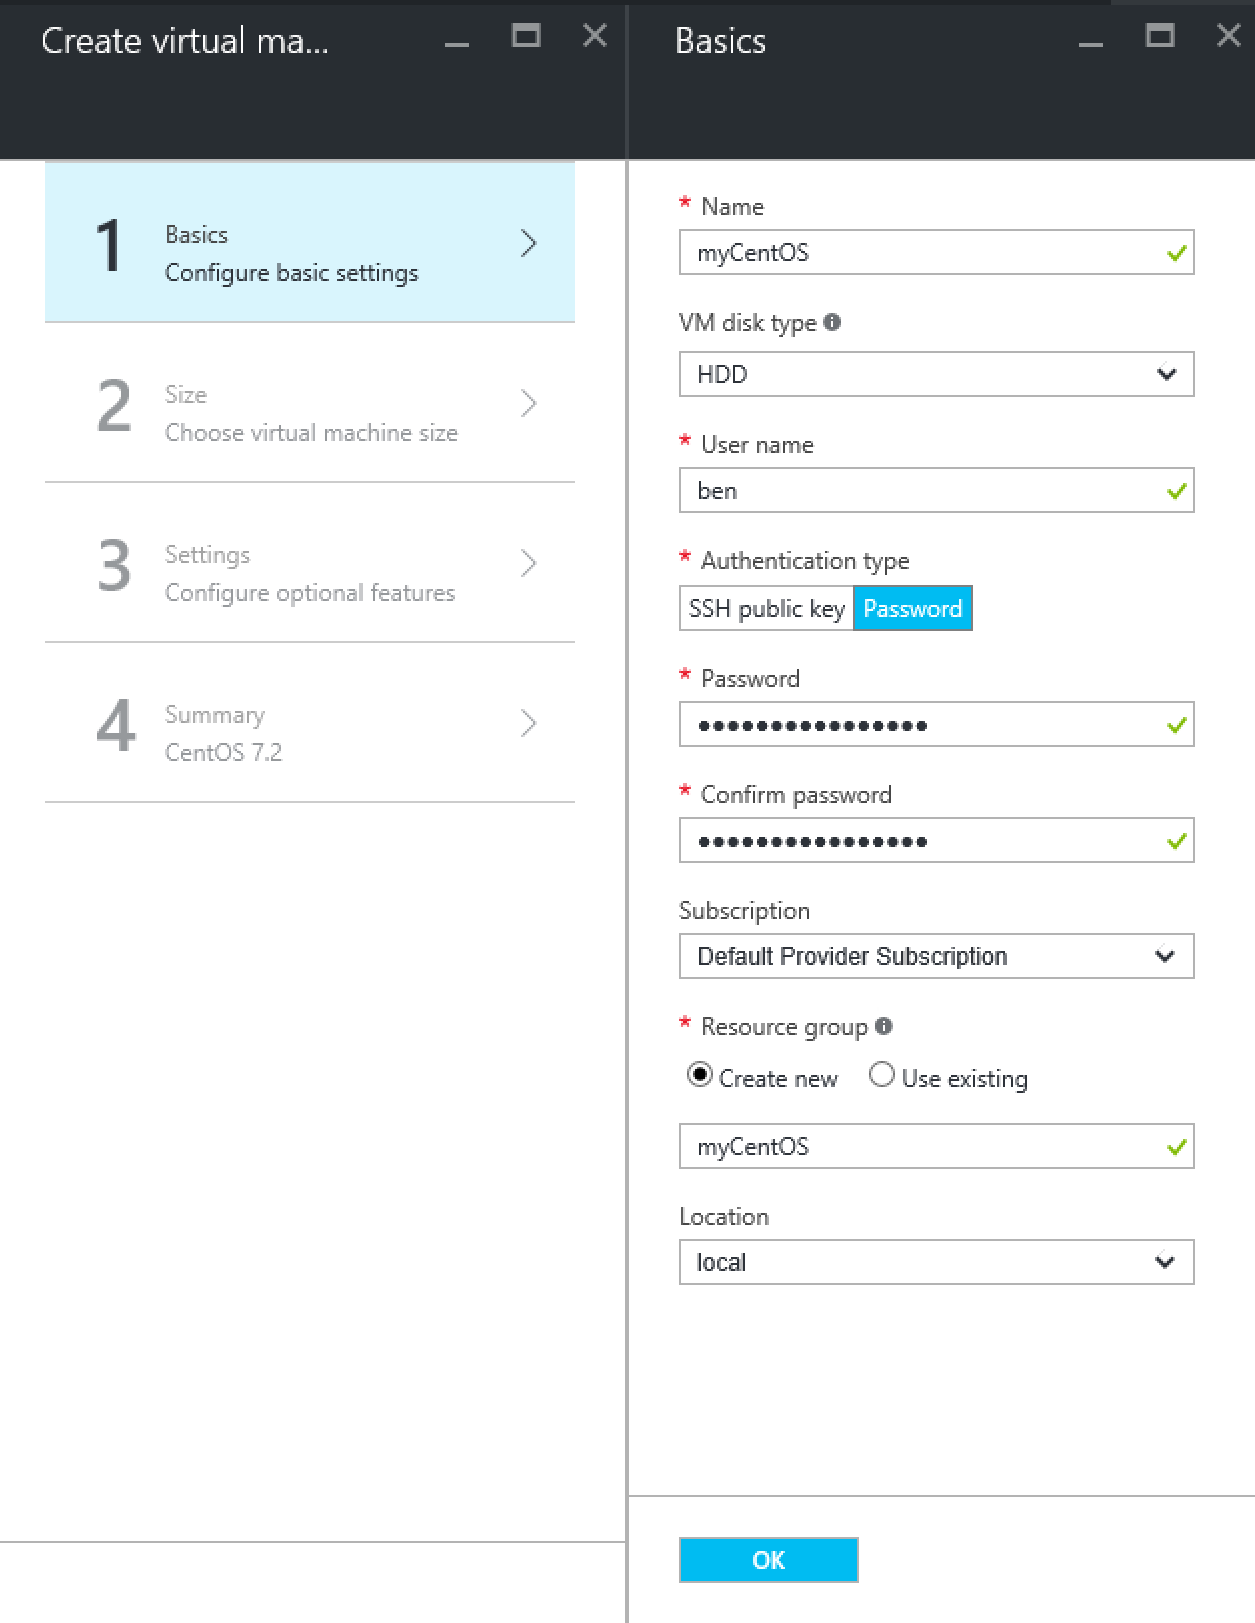
Fist configure the basics. VM disk type should be HDD or you won’t see any VM size.
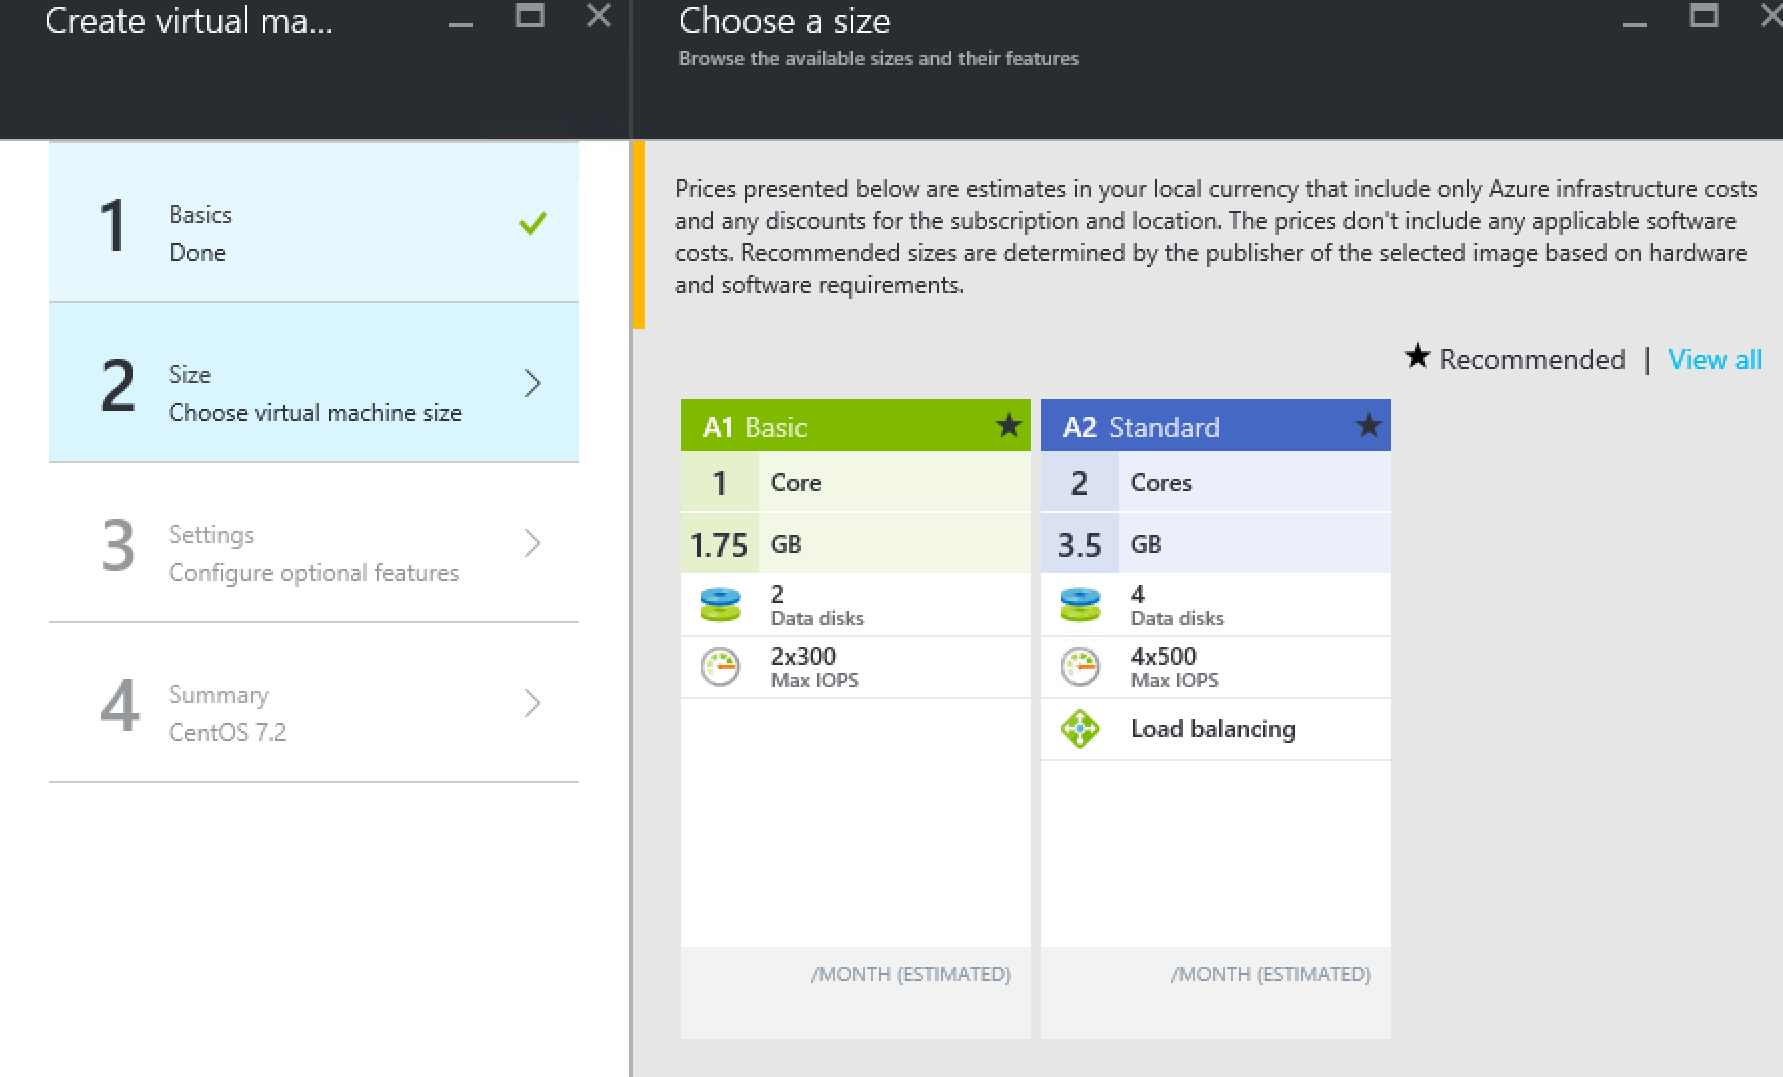
Next we see the recommended VM size as defined in CreateUIDefinition earlier. If we select View All, we will see all supported VM Sizes as defined in the CreateUIDefinition.
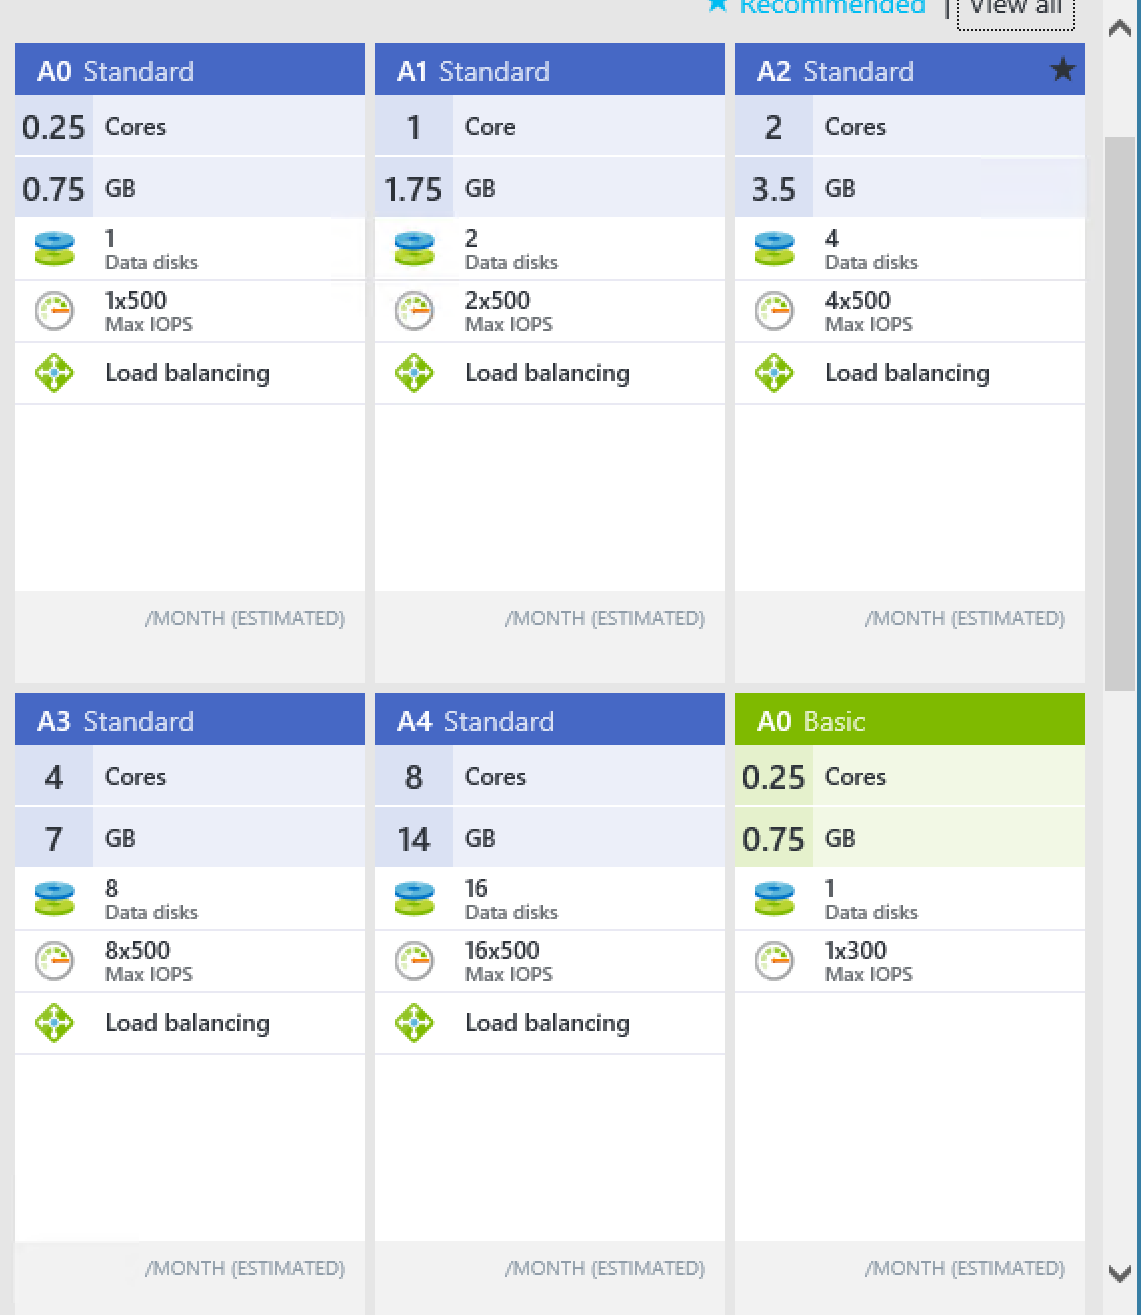
Select an appropriate size and move on.
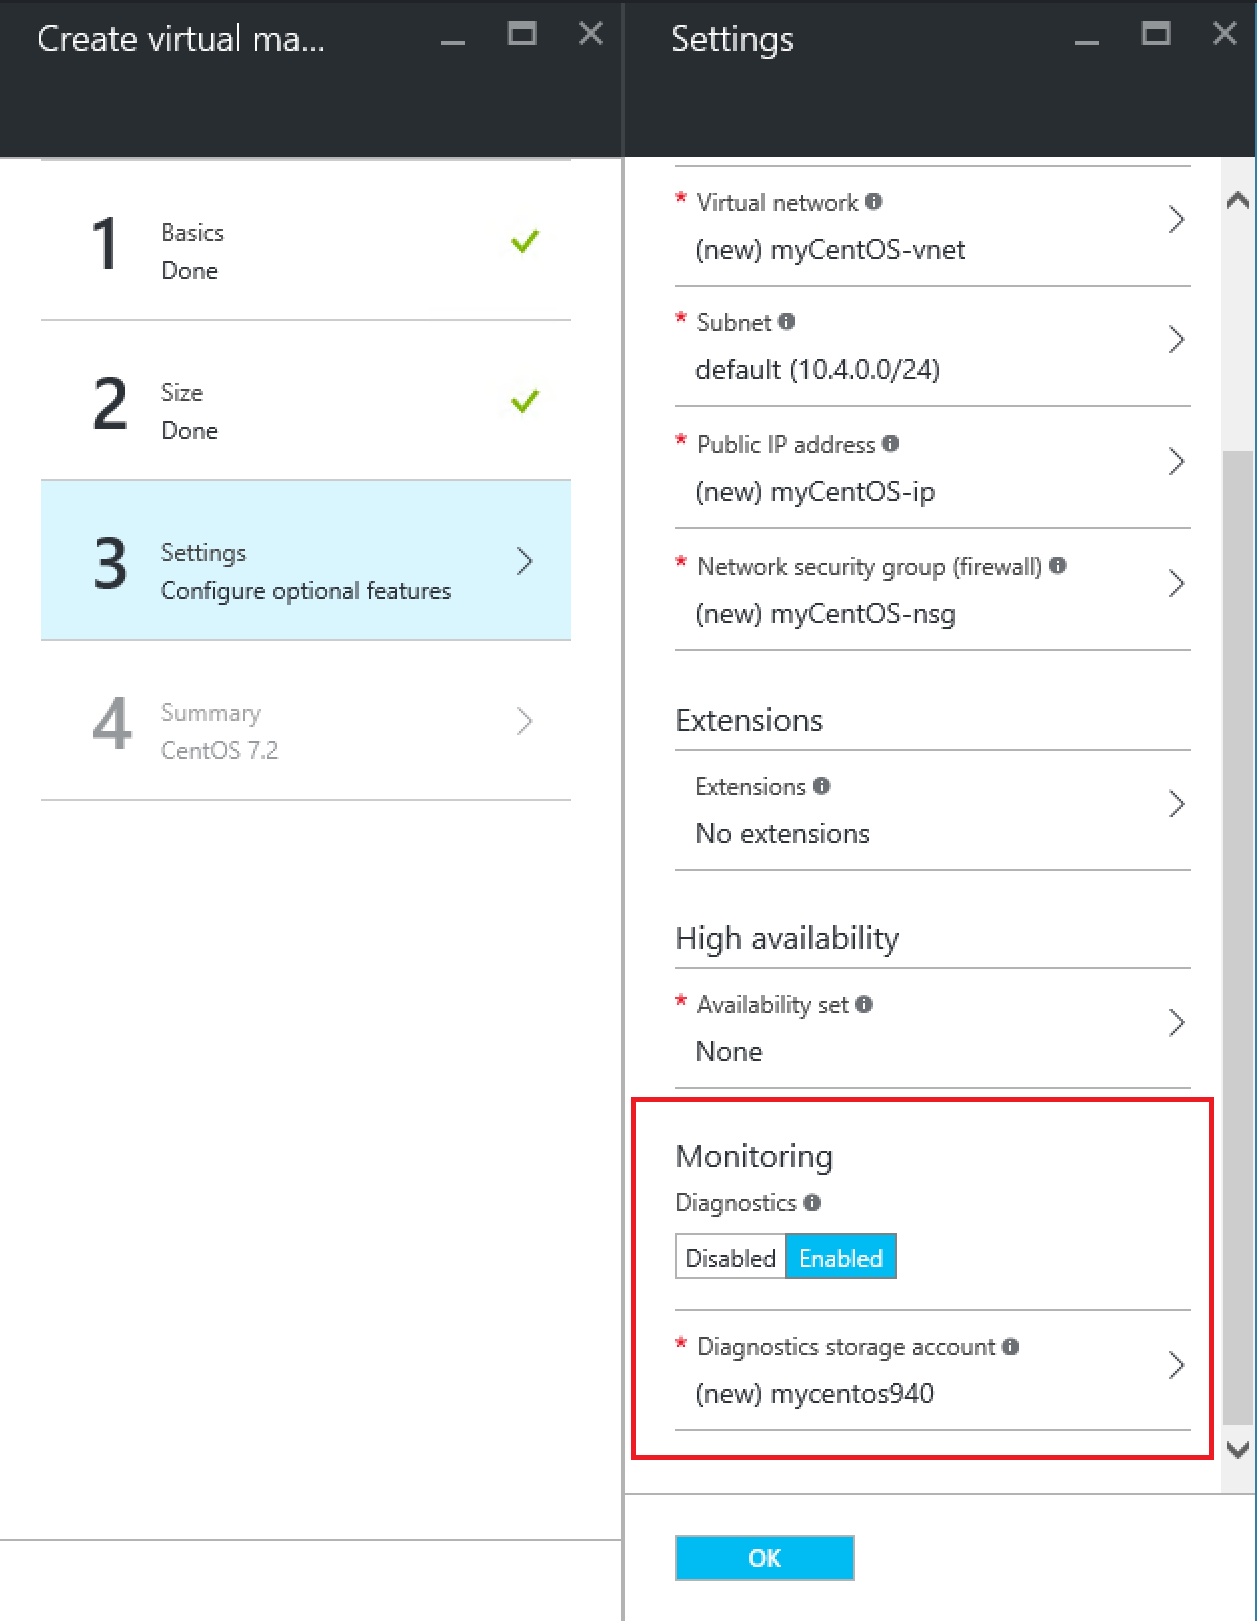
For the settings I leave everything default including the Diagnostics Enabled toggle. If you did not add the Linux Diagnostics extension yourself, your deployment will fail if you leave this enabled.
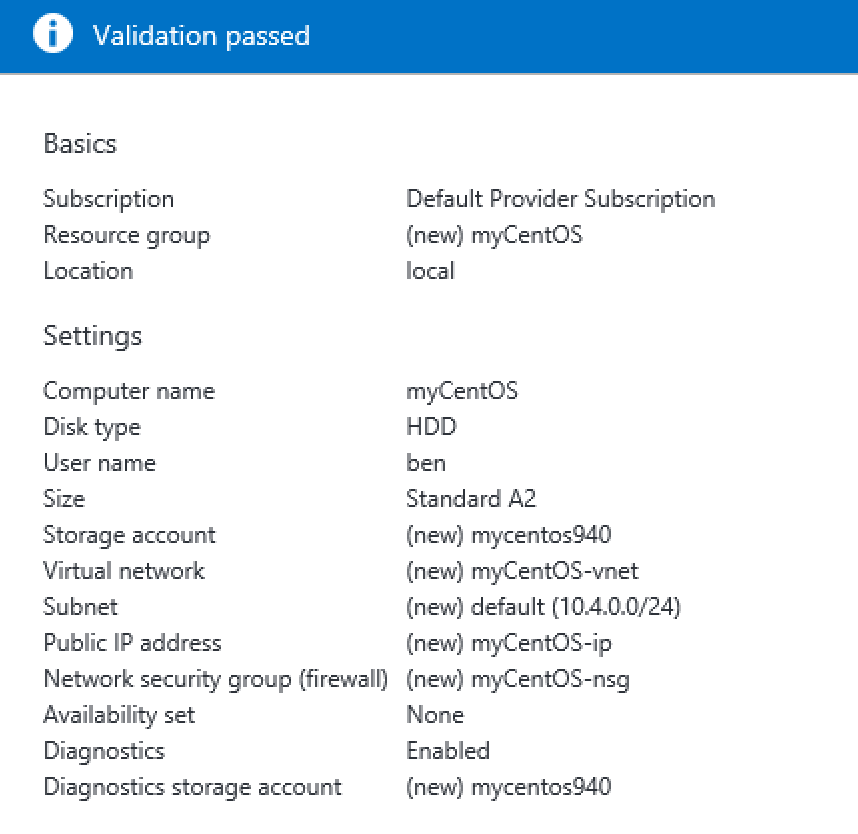
The portal does a final validation and everything should pass just fine. Now deploy it and wait for the end result.
In the meantime, you can see the deployment status by going to the resource group and checking out the deployments.
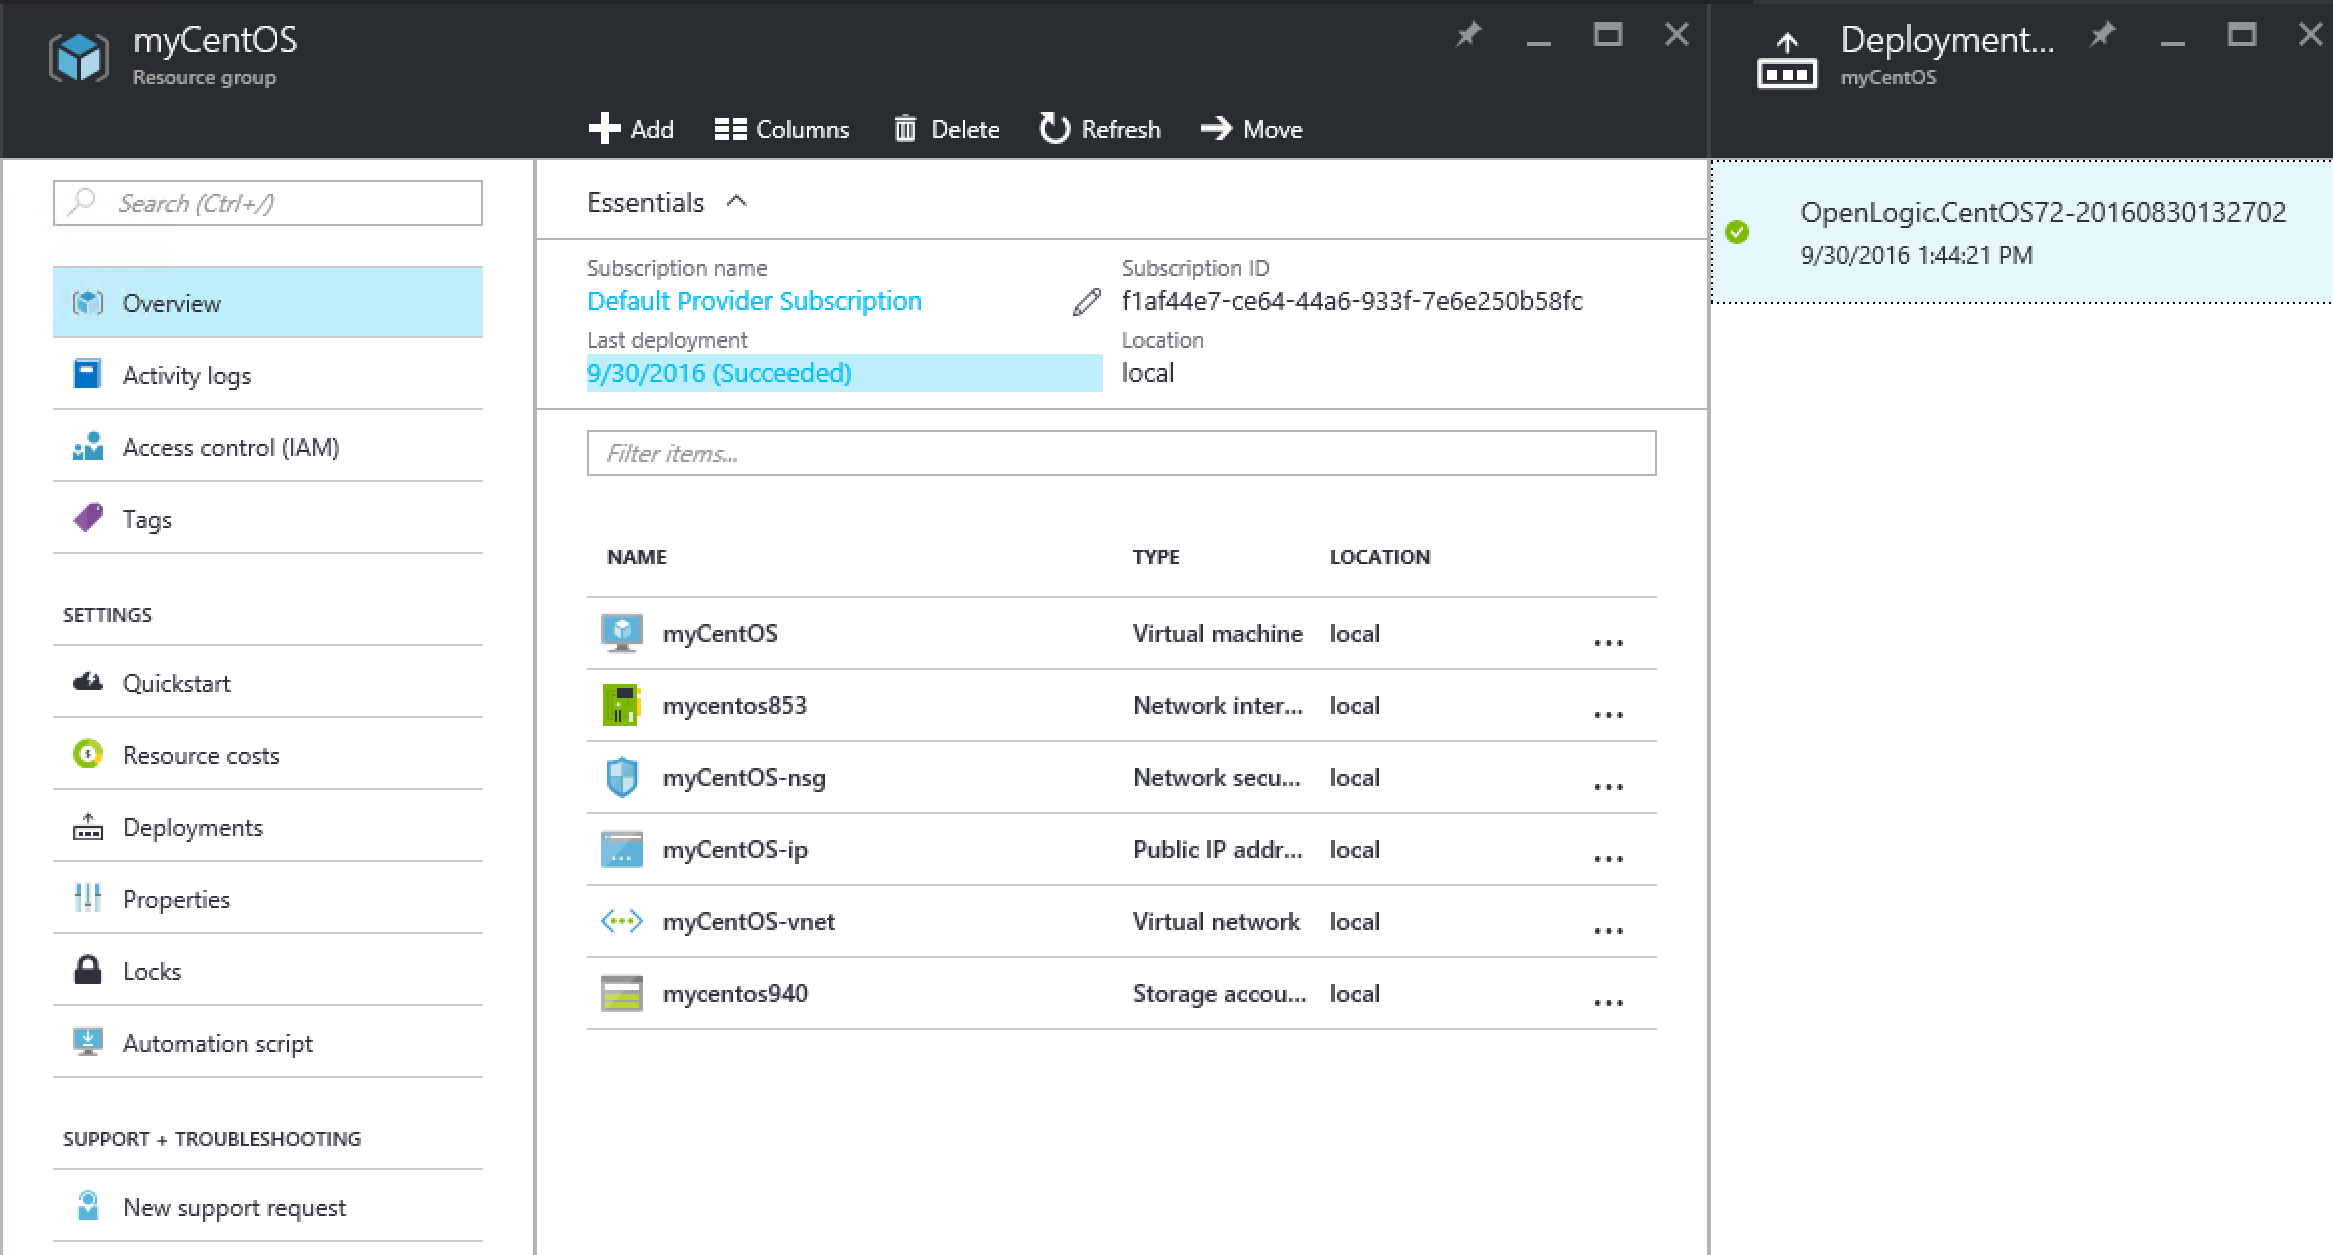
And there it is! Just like in Azure :-)
In the next blog, we’ll be adding and using the DSC For Linux v2.0 extension!