
This blog post is written and published on Hyper-V.nu: https://hyper-v.nu/archives/bgelens/2015/02/integrating-vm-role-with-desired-state-configuration-part-3-creating-the-vm-role-step-1-and-2/
Series Index:
- Introduction and Scenario
- PKI
- Creating the VM Role (step 1 and 2)
- Pull Server
- Resource Kit
- PFX Repository Website
- Creating a configuration document with encrypted content
- Create, deploy and validate the final VM Role
- Create a Domain Join DSC resource
- Closing notes
In this post the VM Role Resource Definition and Resource Extension will be created. Functionality wise it will handle step 1 and 2.
At a later post the VM Role will be extended to handle the remaining steps as well.
If you don’t know what a VM Role is or you wish to deepen your understanding about it, I advise you to take a look at my colleagues’ Marc van Eijk blog series. You can find the first post here: http://blogs.technet.com/b/privatecloud/archive/2014/07/17/the-windows-azure-pack-vm-role-introduction.aspx. Marc explains the VM Role resource definition and extension in great detail.
Because there is already a lot of content about creating VM Roles I won’t go into depth in this series. I will show every step I took in creating the VM Role but I won’t elaborate on why I use a certain property types and how this reflects in the user experience, etc.
Windows Image
As a prerequisite you need a sysprepped Windows Server 2012 R2 VHDX file in the SCVMM library. The Image should have the latest WMF5 preview (or RTM when its released) installed. I follow Azure in deploying WMF5 preview because some of the DSC resources already require it.
The Image should have been configured with a familyname, a version and with the some tags: WindowsServer2012, R2 and WMF5. You can assign tags using PowerShell only. Run the following command replacing values with your own.
Get-SCVirtualHardDisk -Name "Srv_2012_R2_GUI_WMF5_VMRole.vhdx" |
    Set-SCVirtualHardDisk -Tag "WindowsServer2012","R2","WMF5" -FamilyName "Windows Server 2012 R2 GUI VMRole WMF5" -Release "1.0.0.0"
Resource Extension
We will start building the Resource Extension. To follow along you will be needing the VM Role Authoring tool which you can download here: https://vmroleauthor.codeplex.com/.
So let’s start by opening the tool.
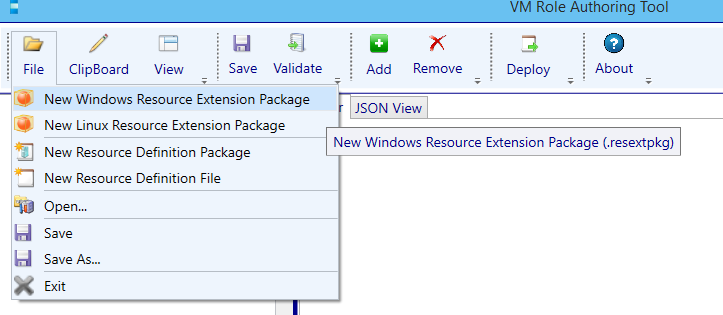
Open the file menu and select New Windows Resource Extension Package.
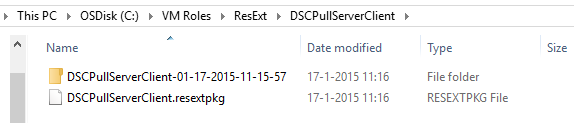
Enter a name and a select a folder where to save the resource extension. Press OK.

The Resource Extension working directory is created. Modify the Publisher and press the save button.
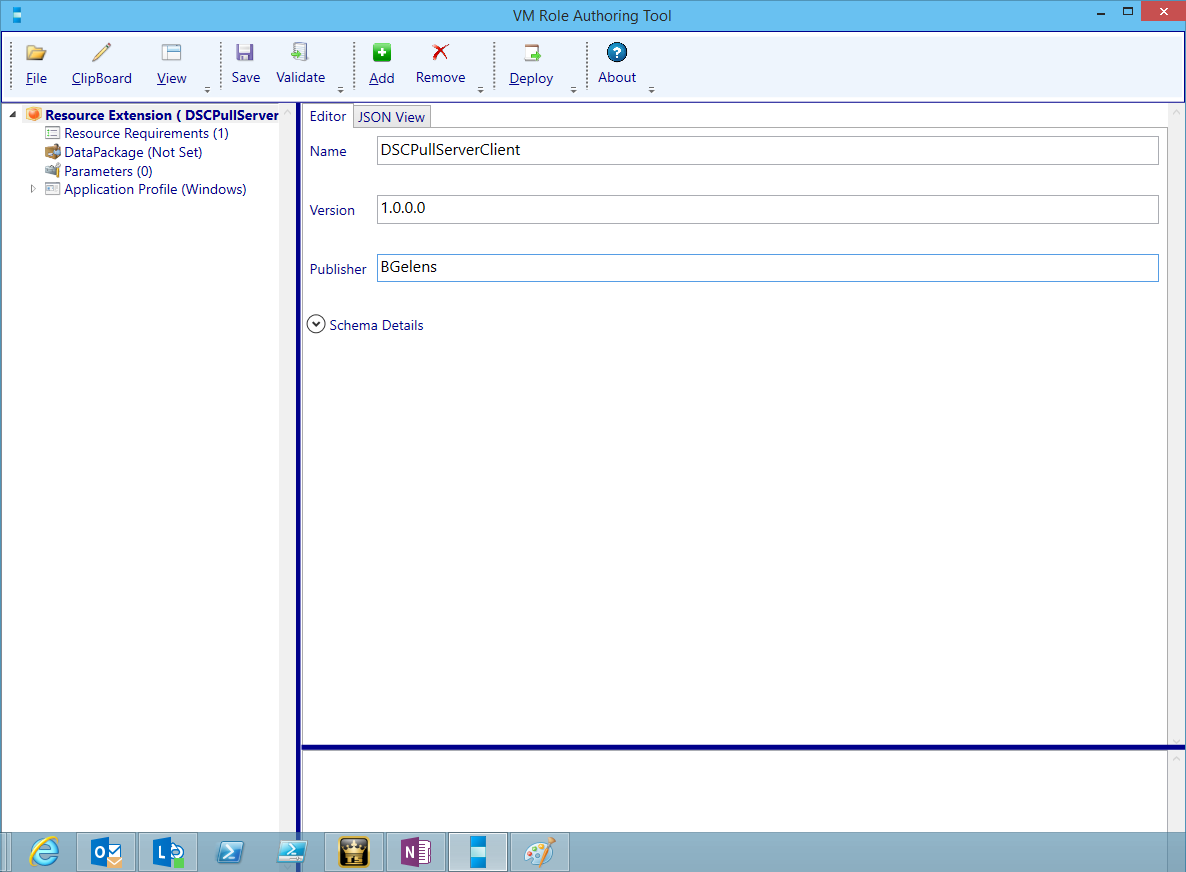
The save action will actually create the resextpkg file. Save often as the tool is known to easily crash.
Navigate to the Resource Requirements node and remove the default OS Virtual Hard Disk Tag of Windows and add WindowsServer2012, R2 and WMF5 as valid tags.

Navigate to the Application Profile (Windows) node.
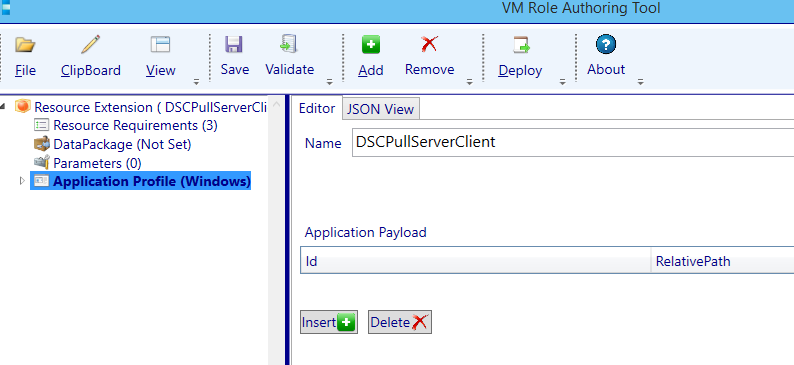
We are going to add Provisioning scripts to handle steps 1 and 2. Provisioning Scripts only run during deployment, Script Application run every time an instance get serviced / updated (e.g. DSC GUID is updated).
If you think about steps 1 and 2, the Root CA has to be downloaded and imported only once. No need to re-download it if the VM Role gets serviced / updated. The client authentication certificate has to be requested only once every 4 years, again no need to re-request one if the VM Role gets serviced / updated later on. The authentication certificate will have to be refreshed / replace manually by an Administrator when it expires.
Click the Add button and select Provisioning Script.
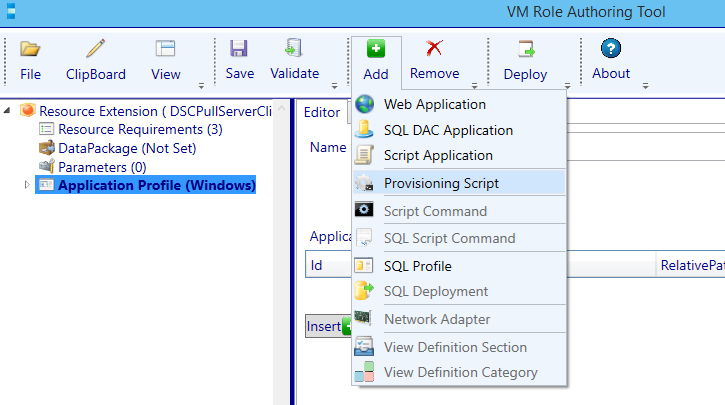
A Provisioning Script is added under the Application Profile (Windows).

Now we need to add the Application Payload. As we didn’t create any beforehand, let’s create the scripts which will handle step 1 and 2 first.
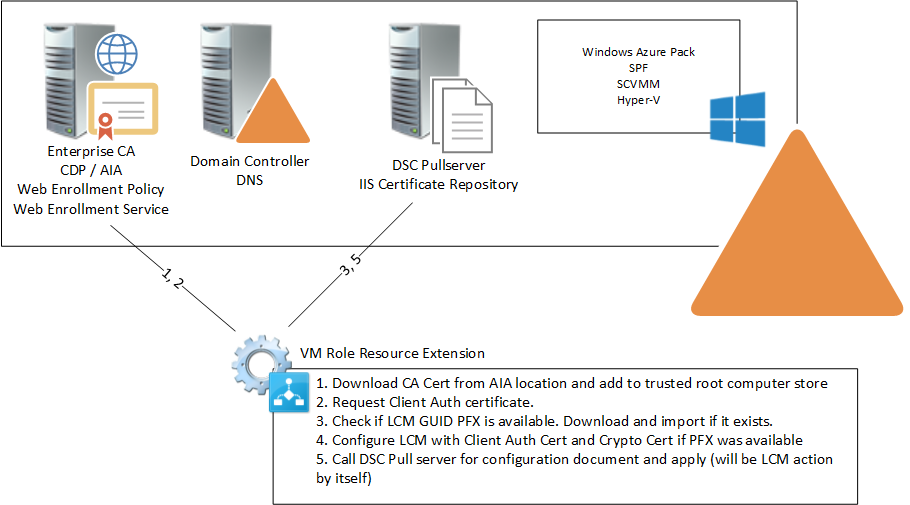
To recap the steps:
- Step one will download the Root CA certificate from the AIA location (in my case cdp.hyperv.nu) and import it into the Trusted Root Certificate Authorities container of the Computer Certificate store.
- Step two will request a certificate from the Certificate Authority and once acquired, will populate the FriendlyName property with a value we can reference later on.
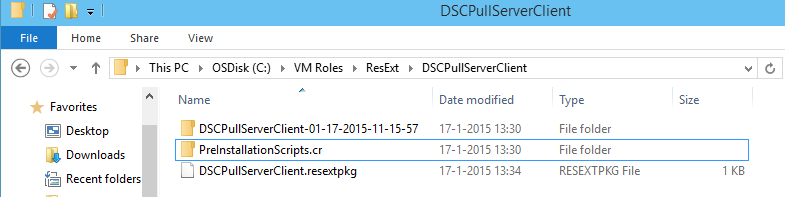
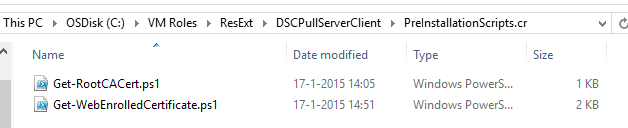
First create an empty folder (custom resource) in the Resource Extension working directory. I call it PreInstallationScripts.cr. The .cr extension is a mandatory requirement.
Next we will save the following scripts inside the custom resource folder just created:
Get-RootCACert.ps1
param
(
    [Parameter(Mandatory=$true)]
    [String]$RootCACertURL
)
$ErrorActionPreference = 'Stop'
[String]$CertificateName = $RootCACertURL.Split('/')[-1]
try
{
    Write-Output -InputObject "Downloading Root cA Certificate from: $RootCACertURL"
    Invoke-WebRequest $RootCACertURL -OutFile .\$CertificateName -Verbose
    Write-Output -InputObject "Succesfully downloaded Certificate"
}
catch
{
    Write-Error -Message "Failed Downloading Root CA Certificate from: $RootCACertURL" -Exception $_.exception
    throw $_
}
try
{
    Write-Output -InputObject "Importing Root CA Certificate $CertificateName in Trusted Root Computer Store"
    Import-Certificate -FilePath .\$CertificateName -CertStoreLocation Cert:\LocalMachine\Root -Verbose
    Write-Output -InputObject "Succesfully imported certificate"
}
catch
{
    Write-Error -Message "Failed Importing Root CA Certificate: $CertificateName" -Exception $_.exception
    throw $_
}
This script takes a the CA AIA URL as a parameter. It will try to download the certificate file and import it in the Computers Root CA certificate store. If one of the actions fails, it will throw an error which is picked up by the SCVMM agent which in it turn will fail the VM Role deployment job (this technique is used in all scripts deployed via the Resource Extension).
Get-WebEnrolledCertificate.ps1
param
(
    [Parameter(Mandatory=$true)]
    [String]$Credential,

    [Parameter(Mandatory=$true)]
    [String]$WebenrollURL,

    [Parameter(Mandatory=$true)]
    [String]$Template
)

$SecPassword = ConvertTo-SecureString $Credential.Split(':')[-1] -AsPlainText -Force
$cred = New-Object System.Management.Automation.PSCredential ($Credential.Split(':')[0], $SecPassword)
$PSBoundParameters.Credential = $Credential.Split(':')[0] + ':*******'

try
{
    Write-Output -InputObject "Requesting Certificate using parameters:"
    Write-Output -InputObject $PSBoundParameters
    $Certificate = Get-Certificate -Url $WebenrollURL -Template $Template -SubjectName "CN=$env:COMPUTERNAME" -Credential $Cred -CertStoreLocation Cert:\LocalMachine\My -Verbose
    Write-Output -InputObject "Successfully Requested Certificate: $($Certificate.Certificate.Thumbprint)"
}
catch
{
    Write-Error -Message "Failed Requesting Certificate from: $WebenrollURL" -Exception $_.exception
    throw $_
}
try
{
    Write-Output -InputObject "Setting Certificate FriendlyName property"
    $Cert = Get-Item Cert:\LocalMachine\My\$($Certificate.Certificate.Thumbprint)
    $Cert.FriendlyName = 'DSCPullServerAuthentication'
    Write-Output -InputObject "Successfully Set Certificate FriendlyName property"
}
catch
{
    Write-Error -Message "Failed Setting Certificate FriendlyName property for: $($Certificate.Certificate.Thumbprint)" -Exception $_.exception
    throw $_
}
This script takes a few parameters:
- Credential: to request the certificate with (The credential will be taken as a string because the Resource Extension will pass credentials in the format “username:password”).
- WebEnrollURL: to request the certificate at.
- Template: the template name of the certificate to request.
It will convert the credentials passed as a string to a credential object. Then it will replace the password value in the PSBoundParameters.Credential key with ***** as the PSBoundParameters are send to the output stream for logging purposes. It will request the desired certificate using the provided template name and credentials at the webenrollment URL. If it succeeds, it will configure the friendlyname property of the certificate.
Note that we won’t do any logging at the script level as the error and output streams will be redirected to a log file which will be defined later on.
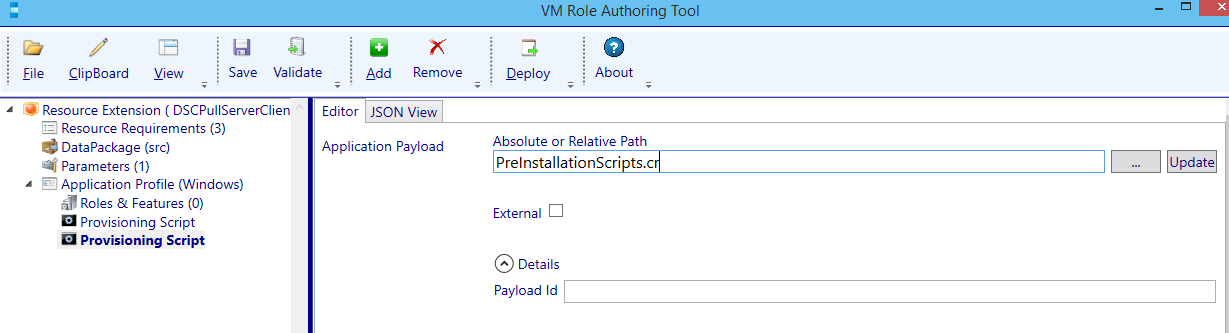
The custom resource is now ready to be imported. Browse to the folder location using the …. button.

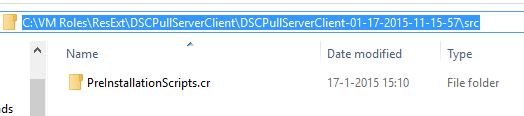
Next select update.
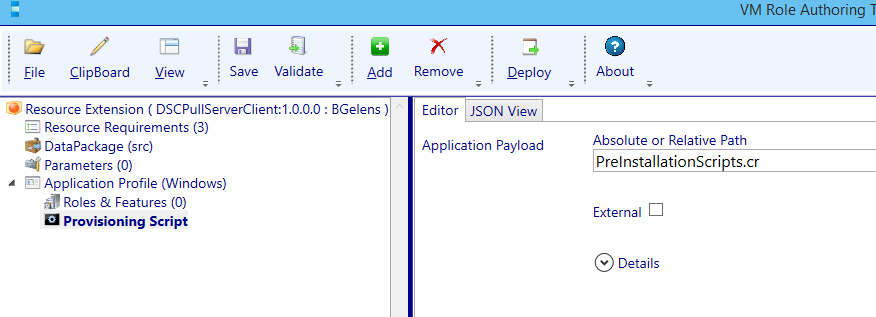
This will actually import the custom resource into the temporary working directory (If you need to add or adjust the scripts later on, just open the resource extension in the designer, navigate to the extraction folder and update / add content. Then save the resource extension which will add the files / updates into the ResExt package).
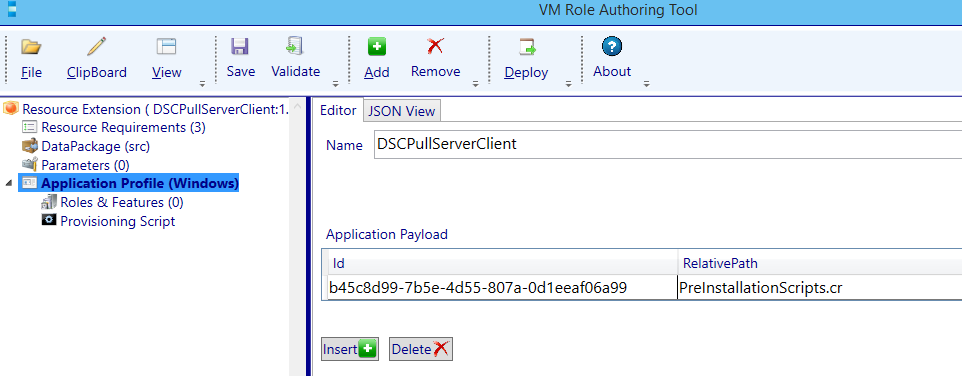
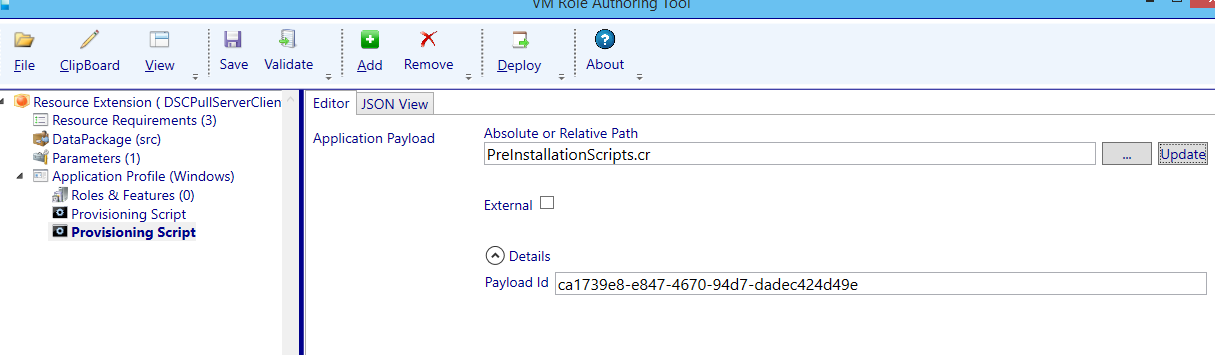
Just for info: when navigating back to the Application Profile (Windows) node you will see the Payload has been assigned a GUID.
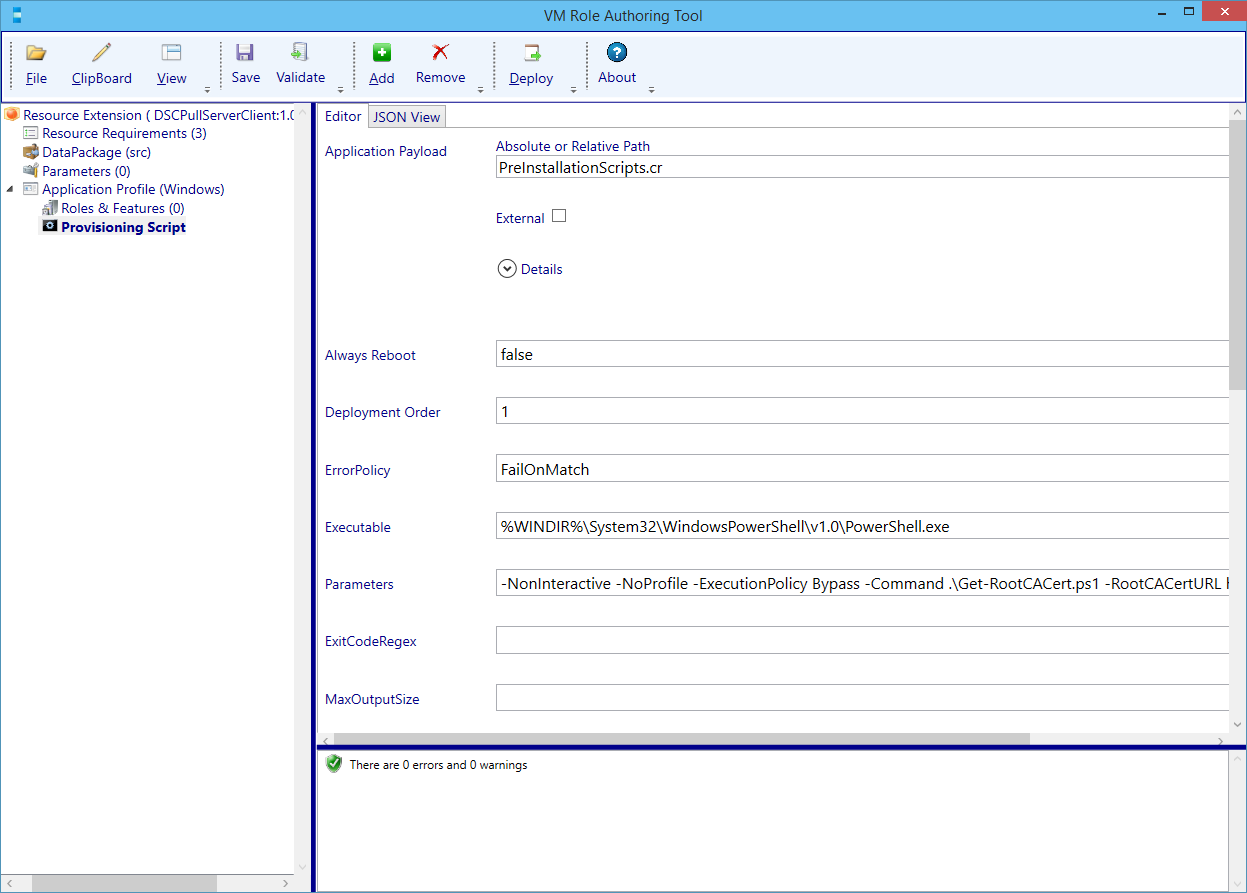
Now we will configure the first Provisioning Script. Navigate back to the Provisioning Script Node and enter values as the following table describes (the [Param.RootCaCertUrl] will automatically populate a Resource Extension Parameter which we will visit a bit later on).
| Name | Value |
|---|---|
| Always Reboot | False |
| Deployment Order | 1 |
| ErrorPolicy | FailOnMatch |
| Executable | %WINDIR%\System32\WindowsPowerShell\v1.0\PowerShell.exe |
| Parameters | -NonInteractive -NoProfile -ExecutionPolicy Bypass -Command .\Get-RootCACert.ps1 -RootCACertURL [Param.RootCACertURL] |
| RestartOnRetry | True |
| ScriptType | PreInstall |
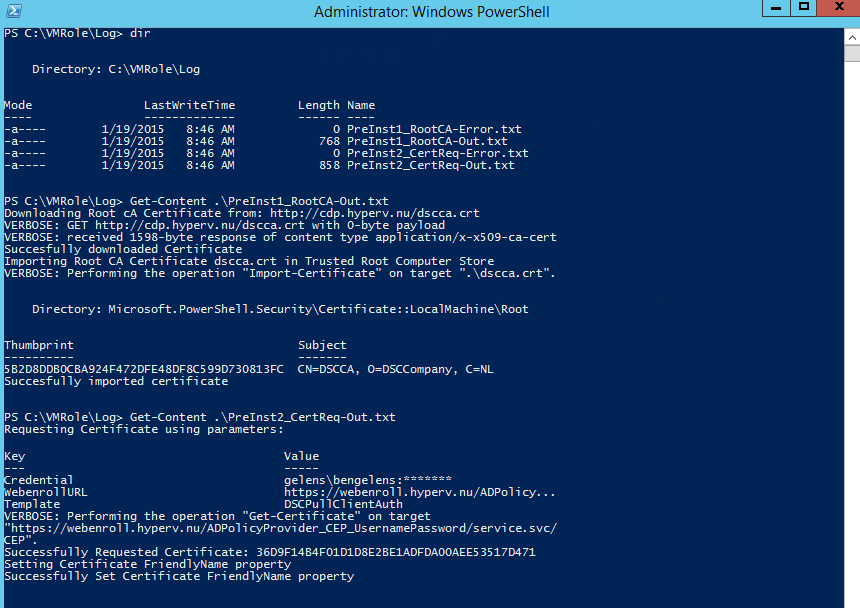
| StandardErrorPath | C:\VMRole\Log\PreInst1_RootCA-Error.txt |
| StandardOutputPath | C:\VMRole\Log\PreInst1_RootCA-Out.txt |
| TimeOutInSeconds | 120 |
Next press the validate button.
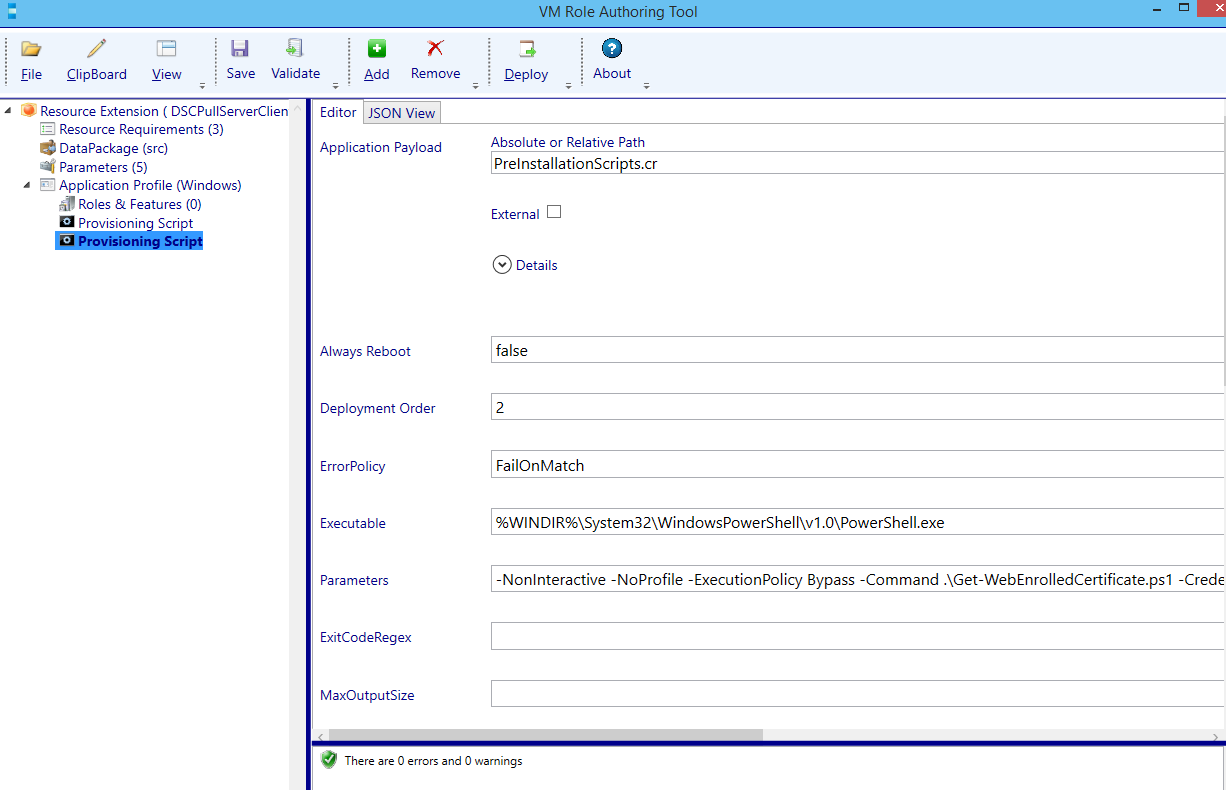
If everything Validates fine. Press Save. Add another Provisioning Script by selecting the Application Profile node, pressing the Add button and selecting the Provisioning Script. At the Application payload enter the name of the custom resource and press update.
Now configure the second provisioning script:
| Name | Value |
|---|---|
| Always Reboot | False |
| Deployment Order | 2 |
| ErrorPolicy | FailOnMatch |
| Executable | %WINDIR%\System32\WindowsPowerShell\v1.0\PowerShell.exe |
| Parameters | -NonInteractive -NoProfile -ExecutionPolicy Bypass -Command .\Get-WebEnrolledCertificate.ps1 -Credential [Param.Credential] -WebenrollURL [Param.WebenrollURL] -Template [Param.Template] |
| RestartOnRetry | True |
| ScriptType | PreInstall |
| StandardErrorPath | C:\VMRole\Log\PreInst2_CertReq-Error.txt |
| StandardOutputPath | C:\VMRole\Log\PreInst2_CertReq-Out.txt |
| TimeOutInSeconds | 120 |
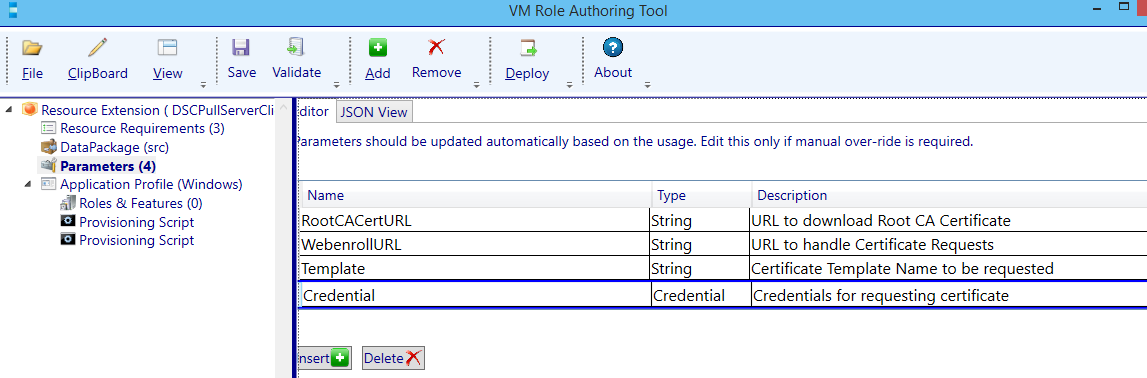
Navigate to the Parameter node.
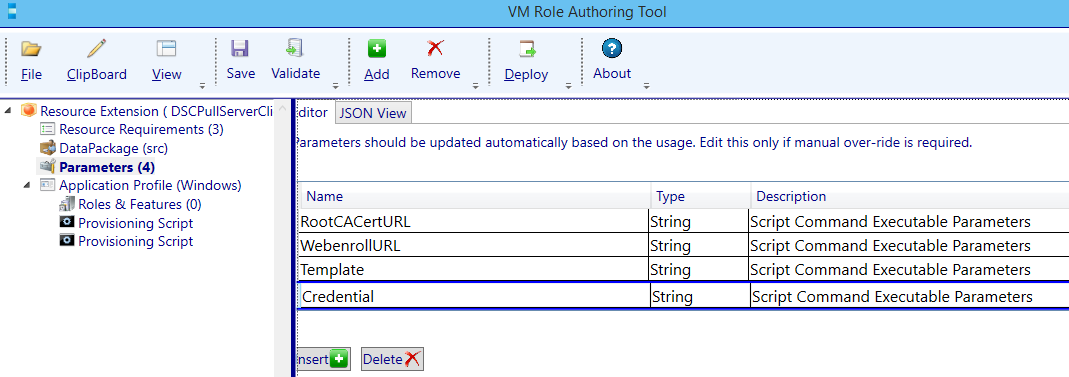
Configure the parameters:
| Name | Type | Description |
|---|---|---|
| RootCACertURL | String | URL to download Root CA Certificate |
| WebenrollURL | String | URL to handle Certificate Requests |
| Template | String | Certificate Template Name to be requested |
| Credential | Credential | Credentials for requesting certificate. |
In this blog series we will parameterize a lot of configuration setting. This is done to make them user configurable at VM Role deployment time (and to show you how parameter values are passed on to the resource extension scripts). If you would implement anything like this in your environment you could off course reduce the amount of user configurable parameters to a bare minimum (e.g. only allow the user to provide the DSC GUID, the rest could be hardcoded in the scripts).
Validate and save!
Resource Definition Package
Now the Resource Extension is finished (at least for the scope of this post), we can start creating the Resource Definition.
If you closed the VM Role Authoring tool, you can now re-open it and load the Resource Extension as well since we will be linking the Resource Definition to the Resource Extension.
Open the file menu and select New Resource Definition Package.
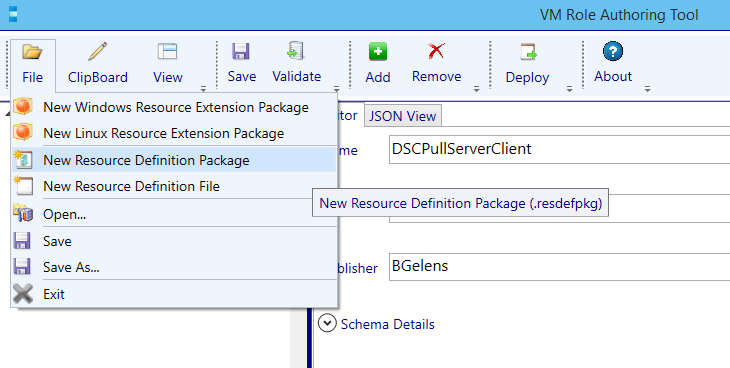
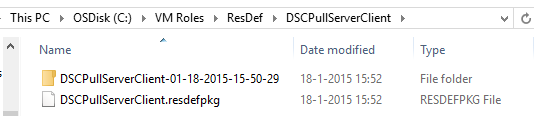
Enter a name and a select a folder where to save the Resource Definition Package. Press OK.

The Resource Definition working directory is created. Modify the Publisher and press the save button.
The save action will actually create the resdefpkg file.
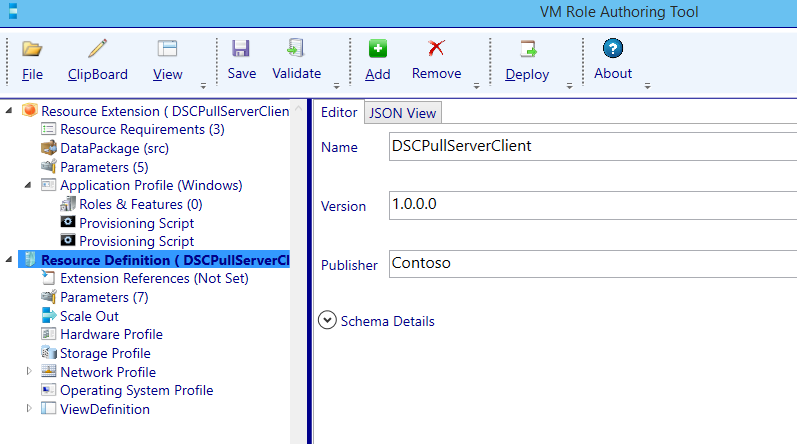
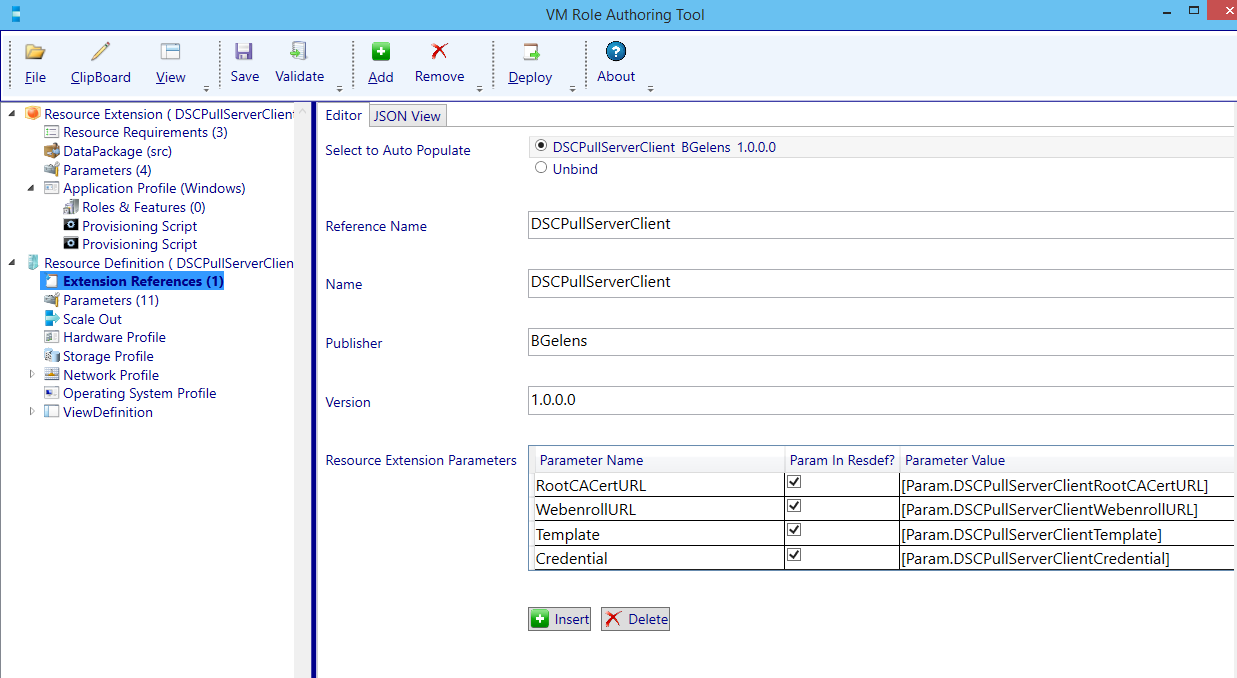
Navigate to the Extension References (Not Set) node.
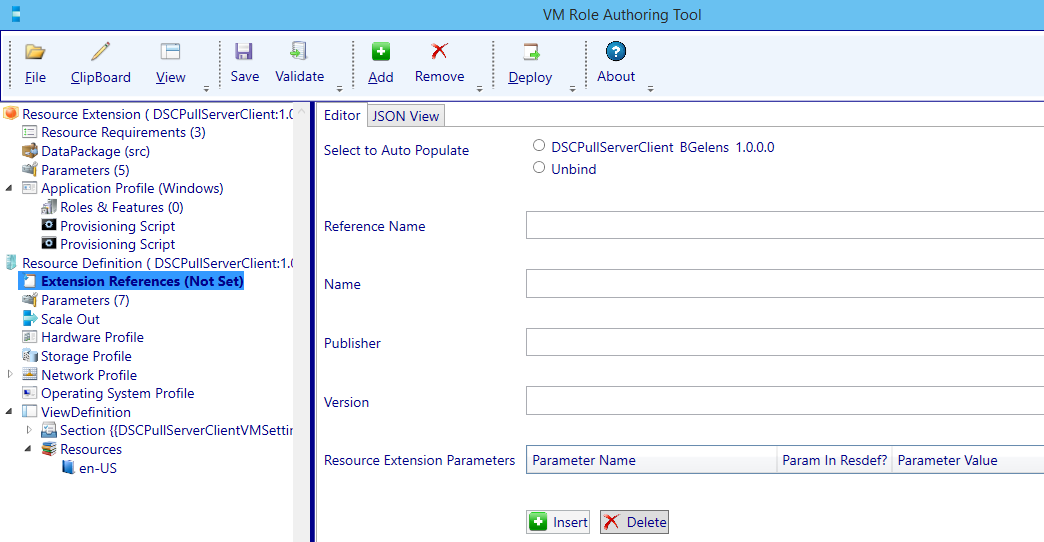
Select the radio button to Auto Populate the values from the Resource Extension (which will appear if the Resource Extension is still loaded in the Authoring Tool).
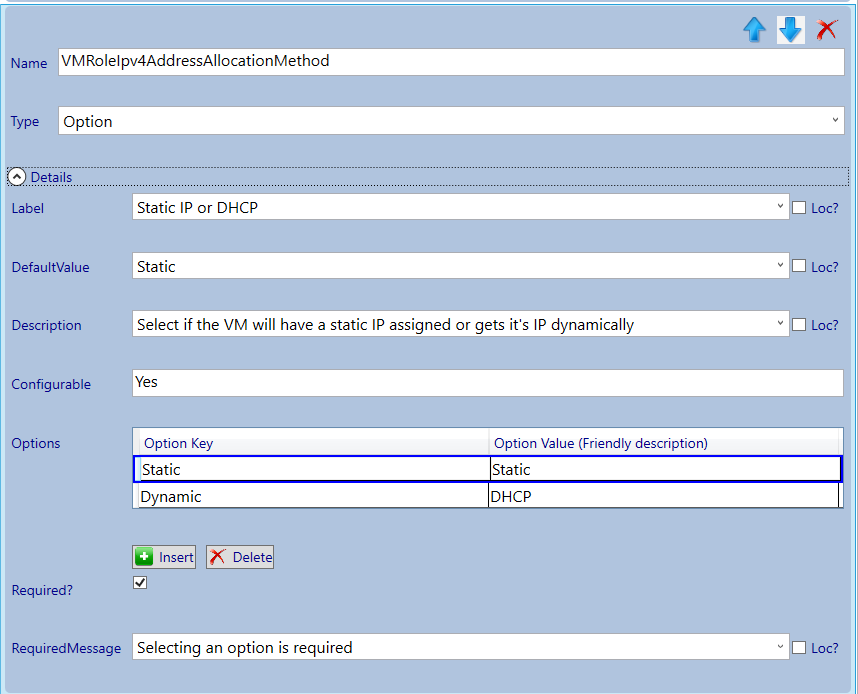
I have multiple network types in my environment. VLAN based and NVGRE based. Depending on which network type will be chosen by the tenant user, either the IP assignment is dynamic (DHCP) or static (injected during deployment). By default the Resource Definition will be configured to have dynamic IP assignment, which is adequate for network virtualization (IP send from SCVMM IP Pool via the SCVMM DHCP Agent) or when a DHCP server is used in a VLAN / Native network . If a normal or VLAN based network is chosen, the IP address could be set statically from an SCVMM IP Pool. Since I need to support both in my environment, I’m going to parameterize the setting.
Navigate to the Network Profile Node and expand it. Then select the Network Adapter (NIC1) node.
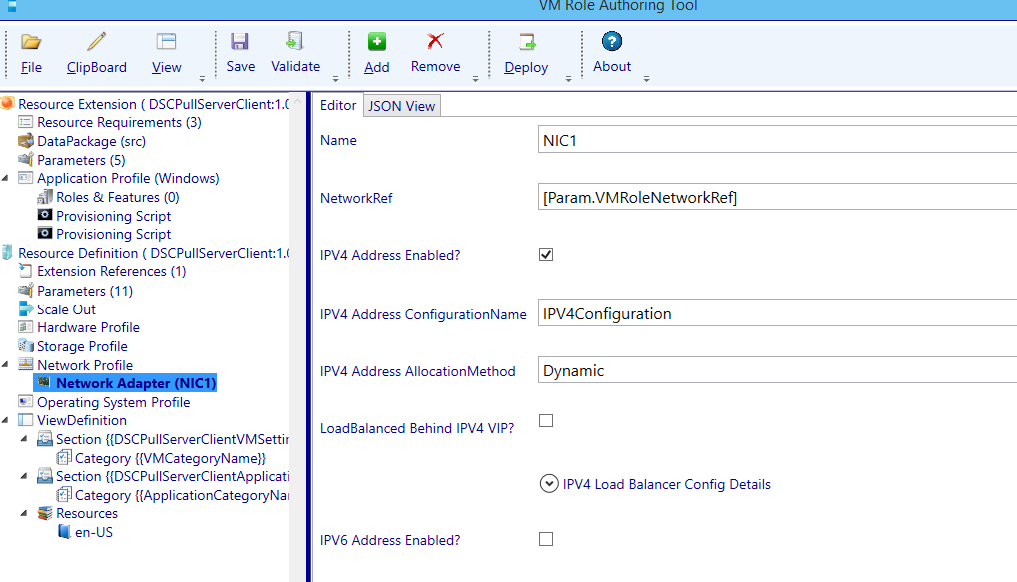
Select the drop down arrow next to IPV4 Address AllocationMethod and select to Generate a new parameter.
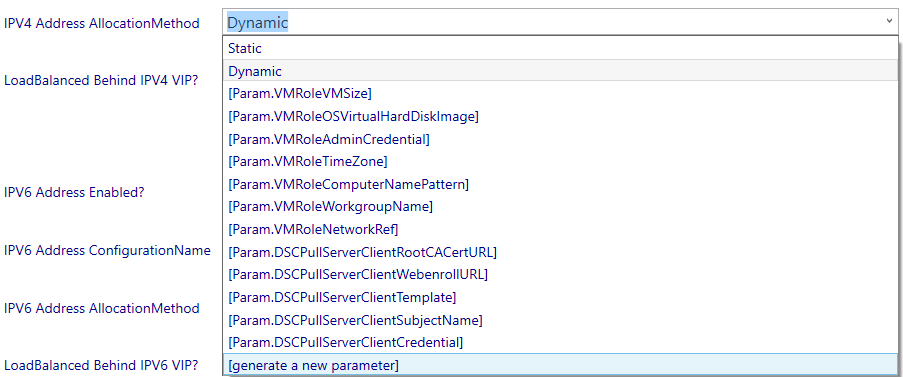
A parameter will be generated and it will be added to the view definition automatically.

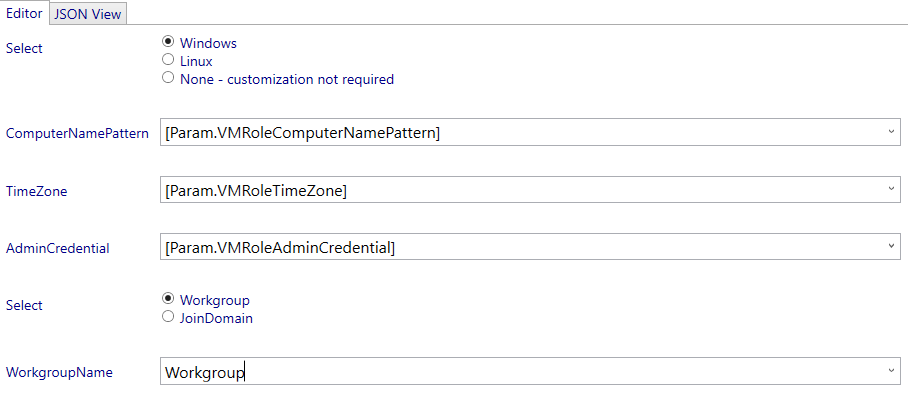
Next navigate to the Operating System node.

I’m going to configure the VM Role to be a Workgroup member. The decision if the VM needs to be a member of the domain will be up to the DSC configuration assigned later on (out of scope for the VM Role settings).
Next select the View Definition node.
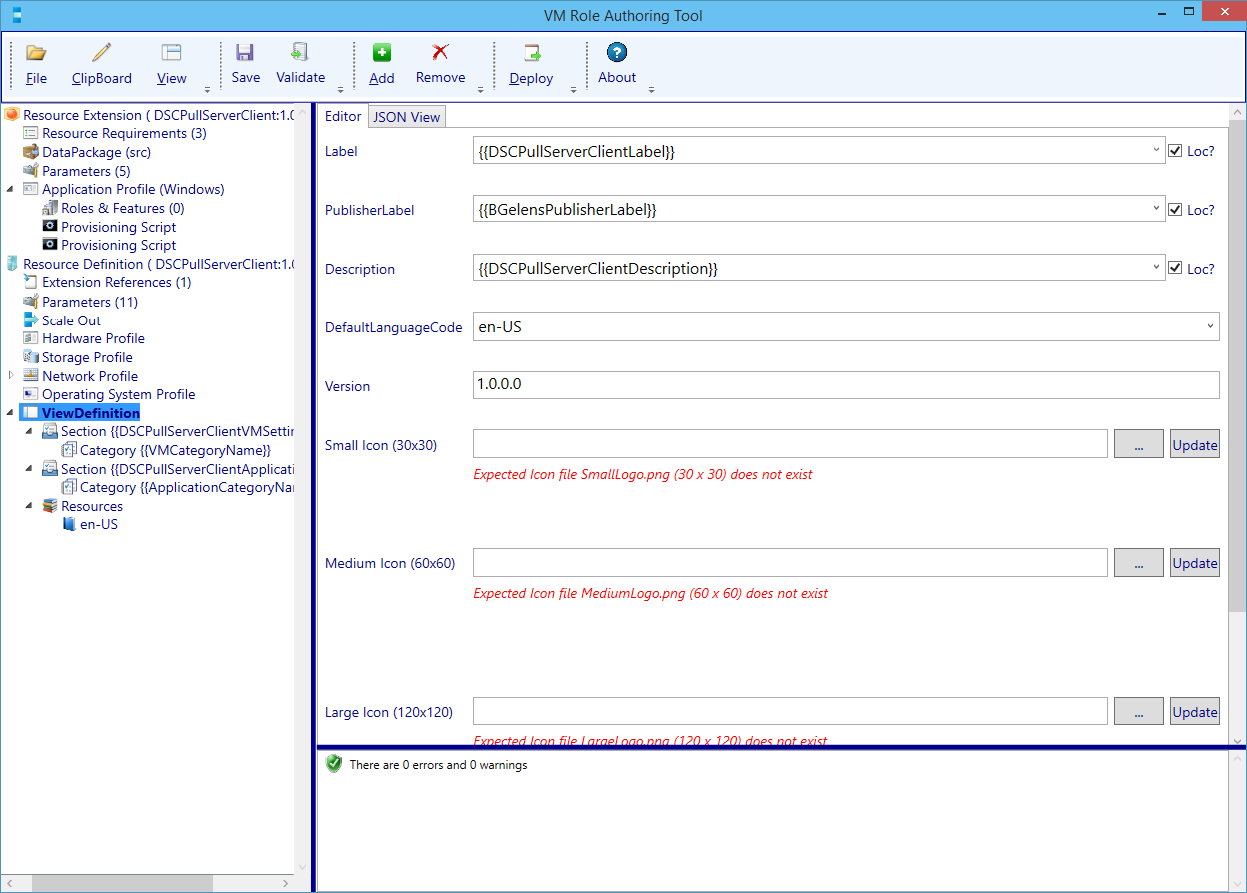
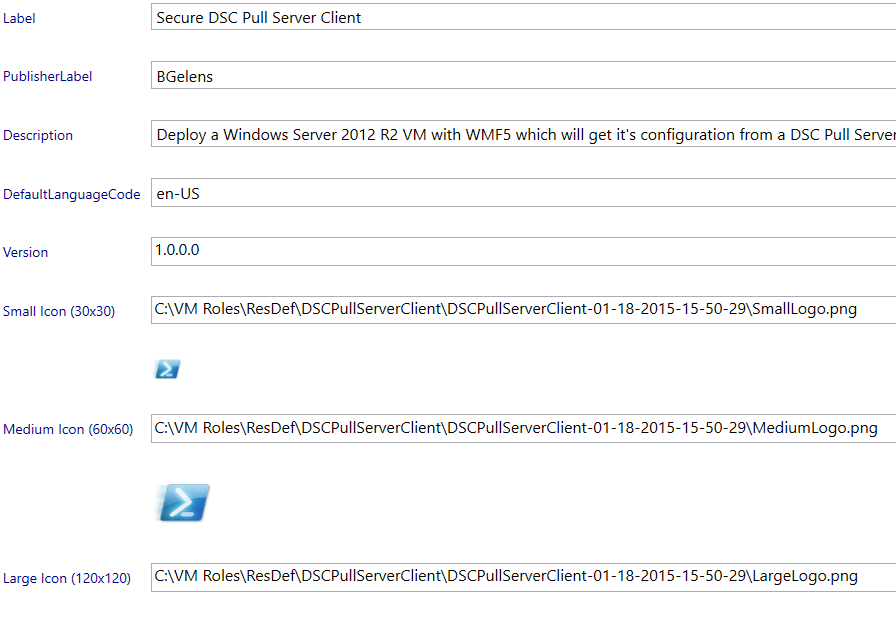
For simplicity sake I’m not going to localize the settings but hardcode them. You can off course do as you like. In my experience (in the Netherlands) we use only en-US.
| Name | Value |
|---|---|
| Label | Secure DSC Pull Server Client |
| PublisherLabel | Bgelens |
| Description | Deploy a Windows Server 2012 R2 VM with WMF5 which will get it’s configuration from a DSC Pull Server securely. |
For the Icons, I’ve downloaded a PowerShell icon via Bing image search and saved 3 copies of it using the desired amount of pixels (120×120, 60×60 and 30×30).
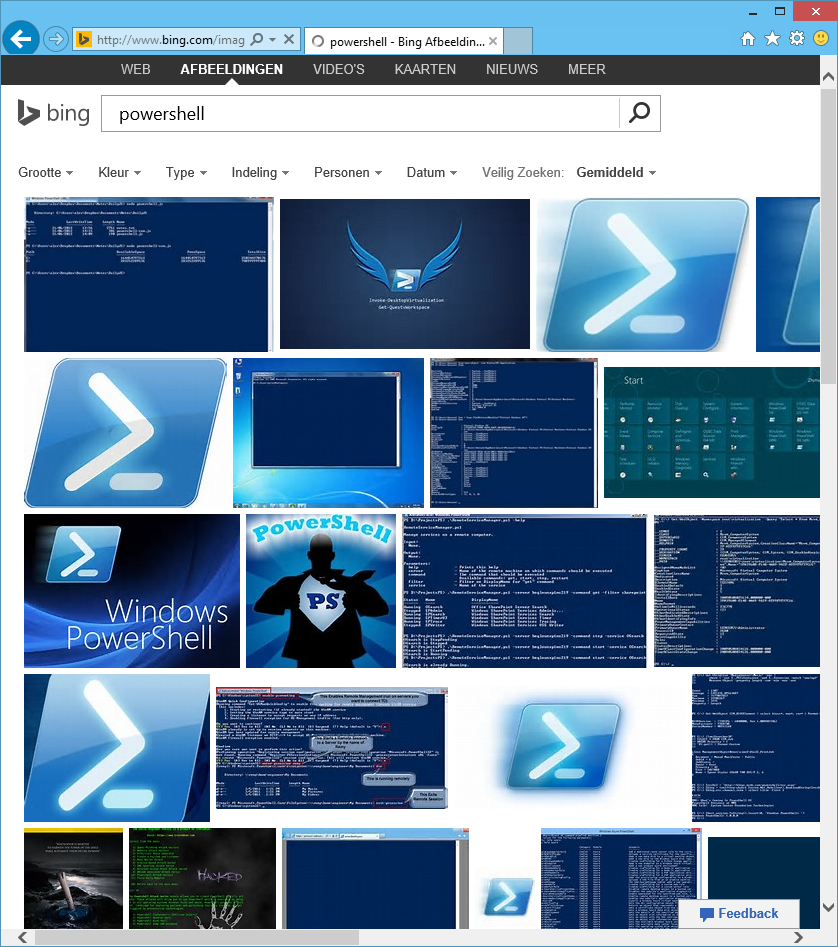
At the end of this post, you can download the Resource Extension and Resource Definition, created in this post, including the icons I used.
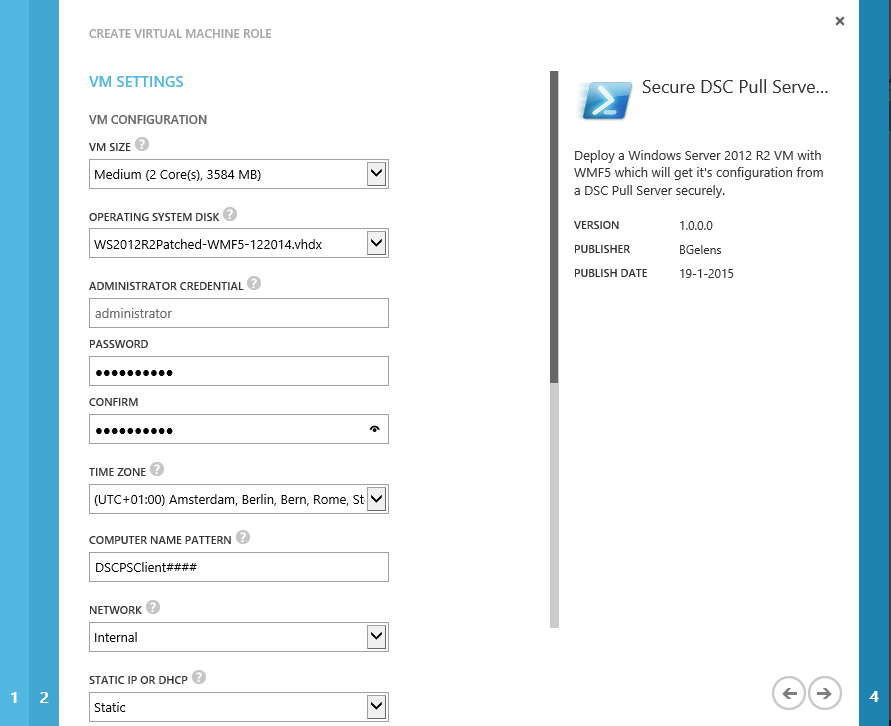
Navigate to the first section node and configure the title: VM Settings
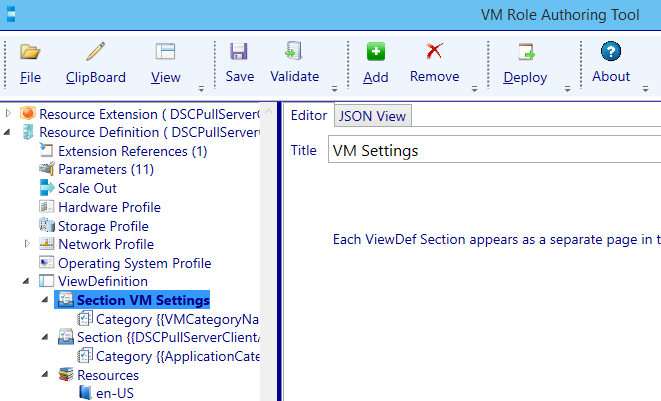
Navigate one level deeper to the category section of the VM Settings section. Change the CategoryName to: VM Configuration.

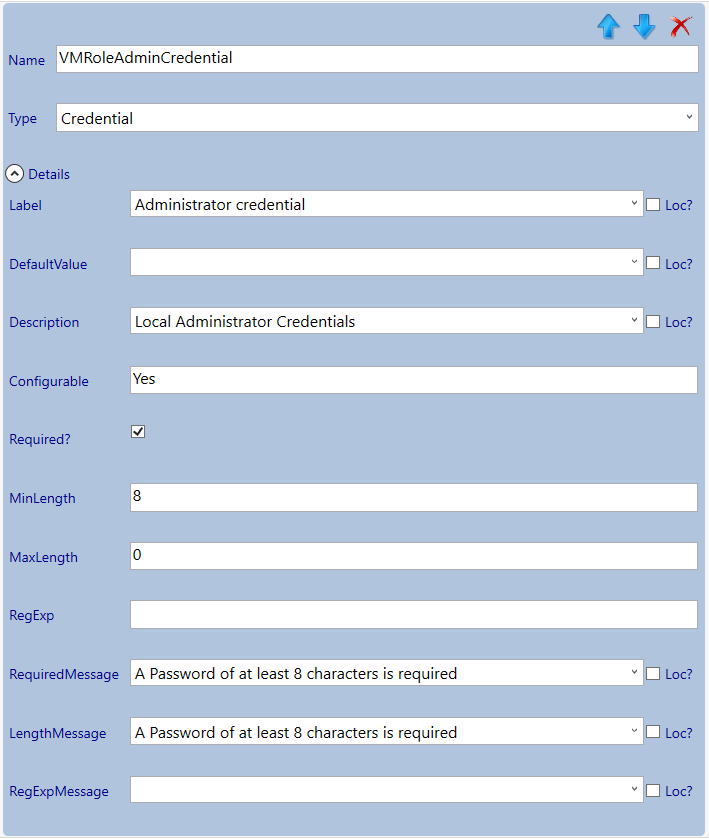
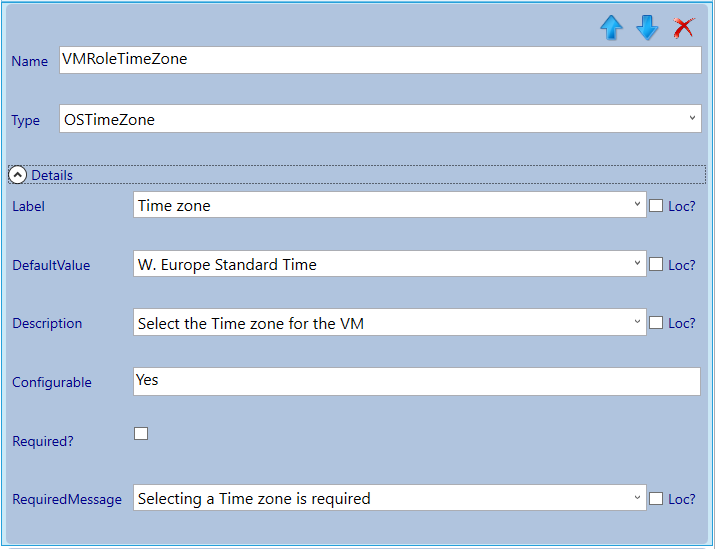
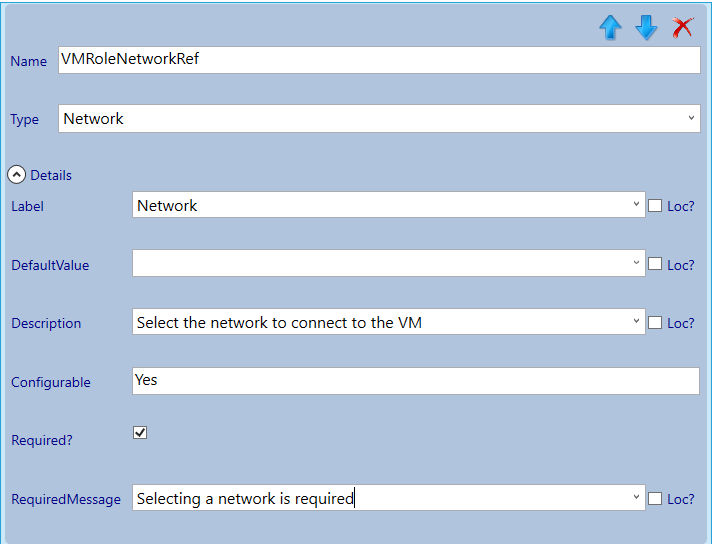
Next we will configure the parameters (you can take the settings from the screenshots).


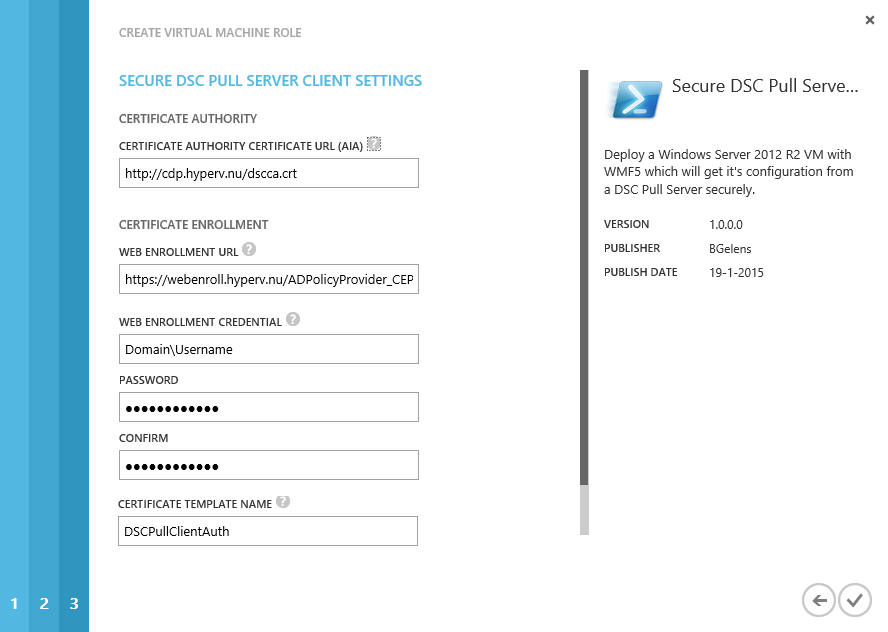
Now the VM settings are done we continue with the next section which we will give the title: Secure DSC Pull Server Client Settings
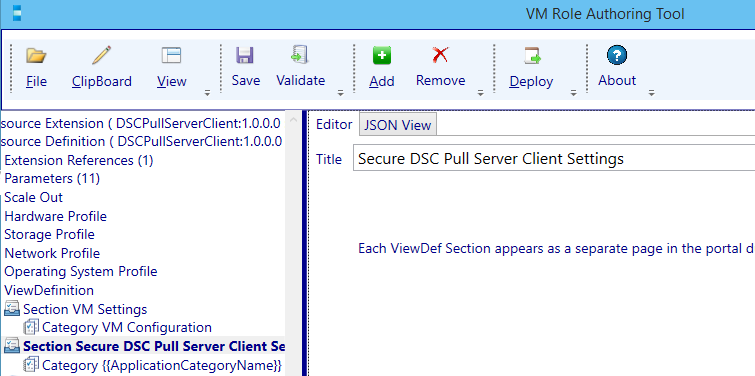
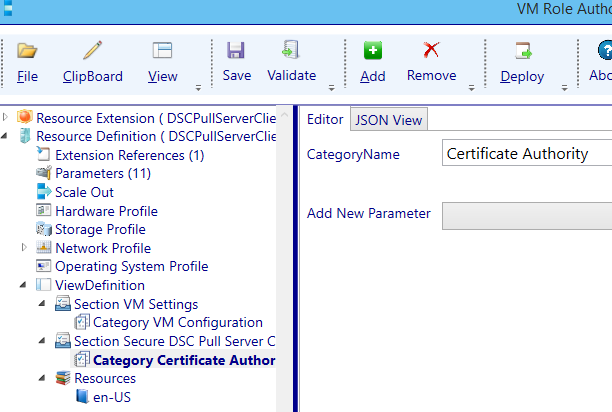
Navigate one level deeper to the category section. Change the CategoryName to: Certificate Authority.
Before we continue, another Category will be added. Select the section Secure DSC Pull Server Client Settings node and select the add button. Now choose View Definition Category.
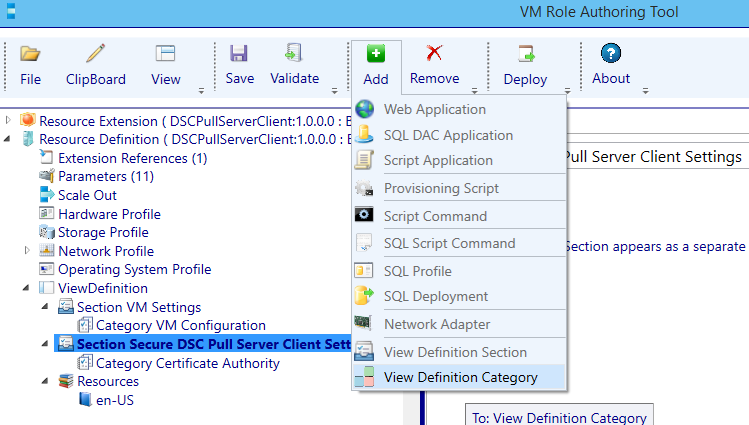
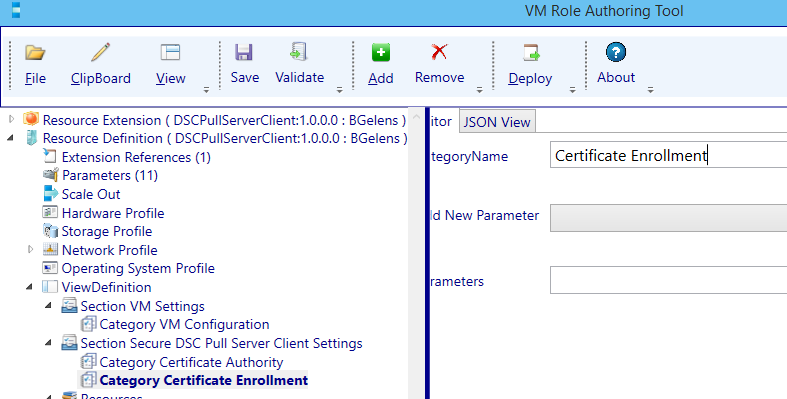
Rename the newly added category to Certificate Enrollment.
Add the following Parameters to the Certificate Enrollment category (in the order listed):
- DSCPullServerClientWebenrollURL
- DSCPullServerClientCredential
- DSCPullServerClientTemplate
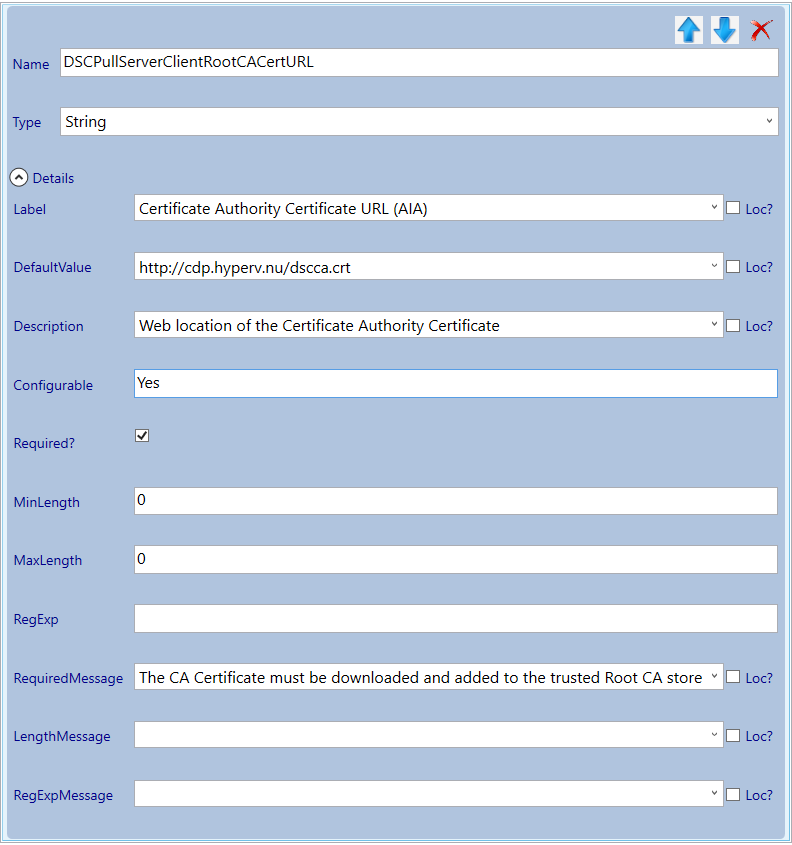
This action will remove the parameters from the Certificate Authority Section. Move back to the Certificate Authority Section and adjust the DSCPullServerClientRootCACertURL parameter (I will populate a lot of default values but leave them user configurable).
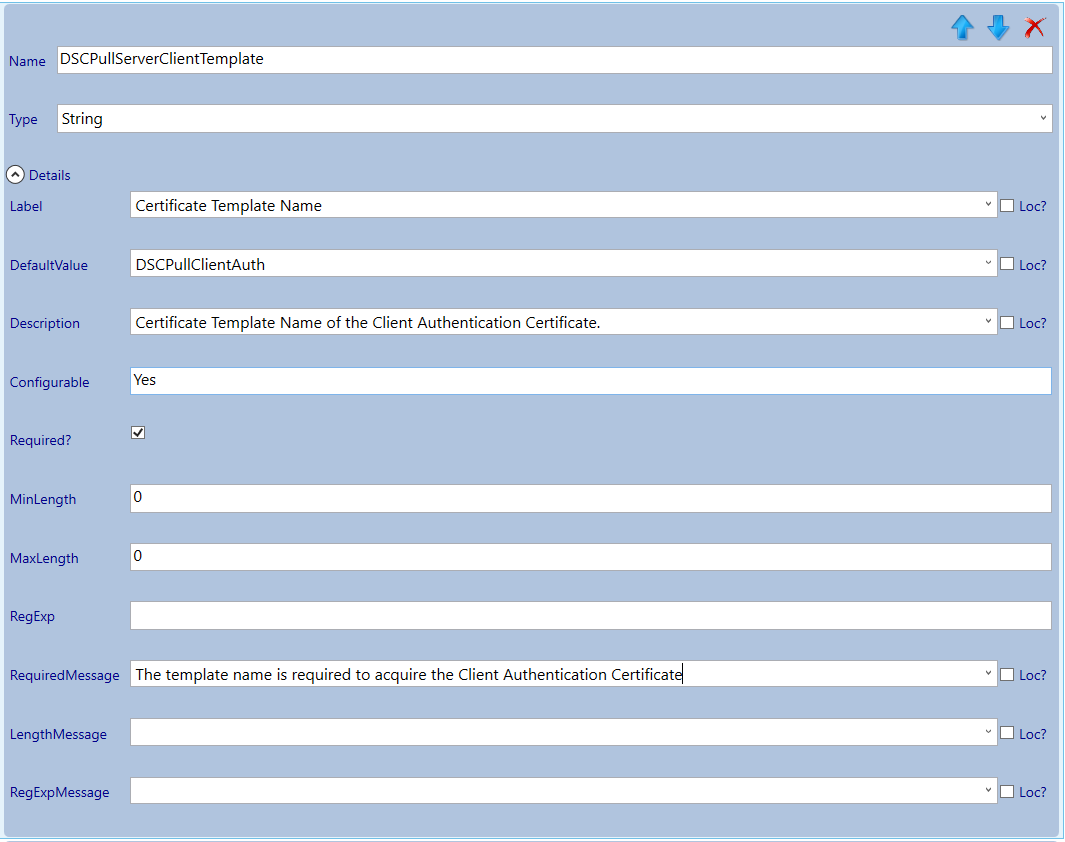
Navigate to the Certificate Enrollment category node and adjust the parameters.


Validate and save!
Import Resource Extension and Definition
Now it is time to import the Resource Extension into the SCVMM Library. To do this copy the resextpkg file to a Server / Client with the SCVMM PowerShell module installed and open a PowerShell console. Then run the following commands.
$resourcepath = 'C:\DSCPullServerClient.resextpkg'
Import-CloudResourceExtension -ResourceExtensionPath $resourcepath -SharePath (Get-SCLibraryShare).path
You can verify the import by running Get-CloudResourceExtension.
Now the resource extension is imported, import the resdefpkg by opening the Azure Pack admin portal and navigating to the VM Clouds resource provider.
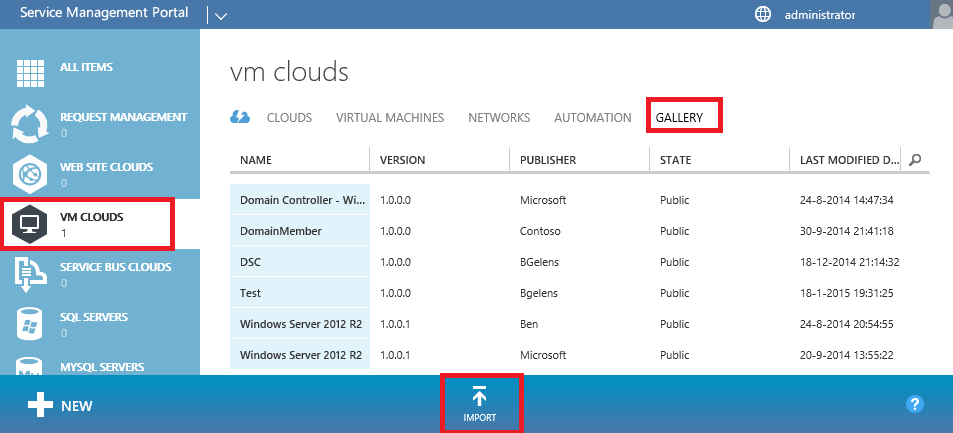
Select the Gallery tab and then select import.
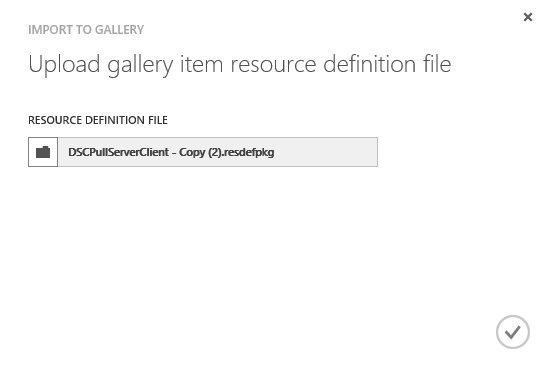
Browse to the resdefpkg and press the OK button. (I always make a copy of the resdefpkg as the Admin portal will place a lock on the file and does not release until the browser is closed).

Wait till the resdefpkg is imported successfully.
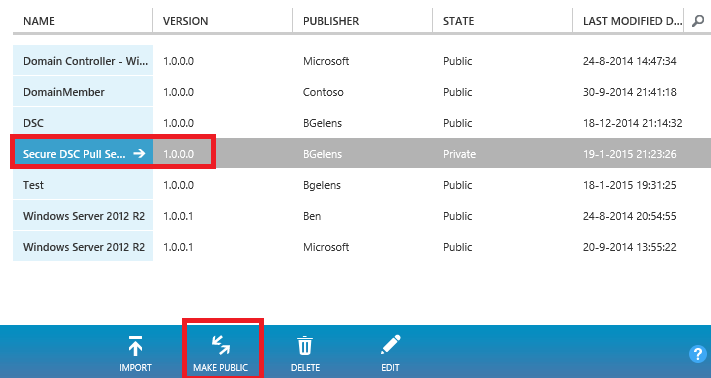
Select the line representing the Gallery item (do not press the name) and select the Make Public option. Next do select the Name.
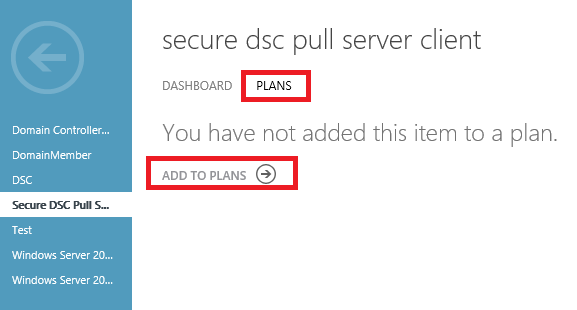
Select the plans tab and then select Add to Plans.
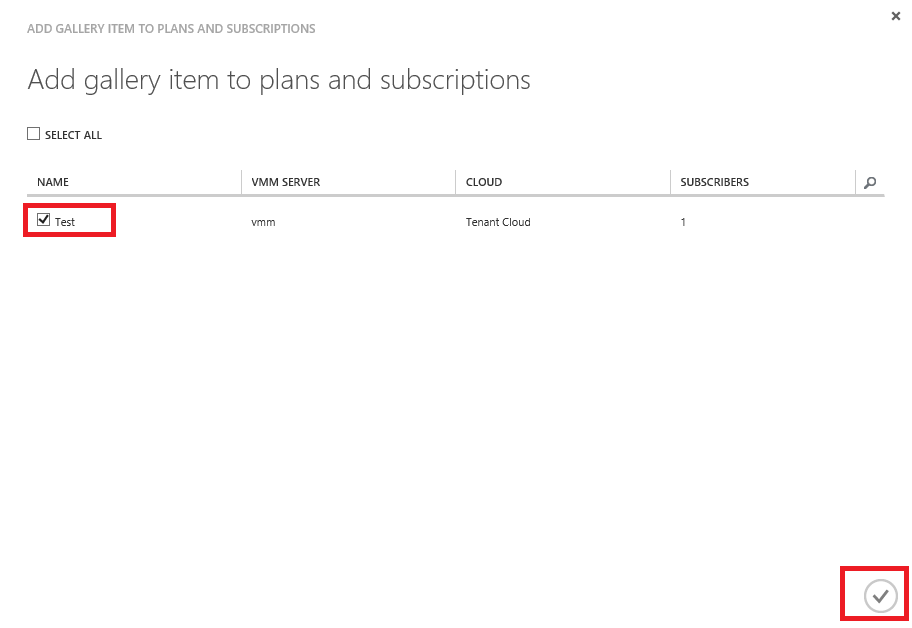
Select the plan you want to assign the Gallery Item to and select the Ok button. That’s it. The VM Role is now available for tenant consumption.
Test Deployment
Time for a test deployment and validate if step 1 and 2 are handled correctly.
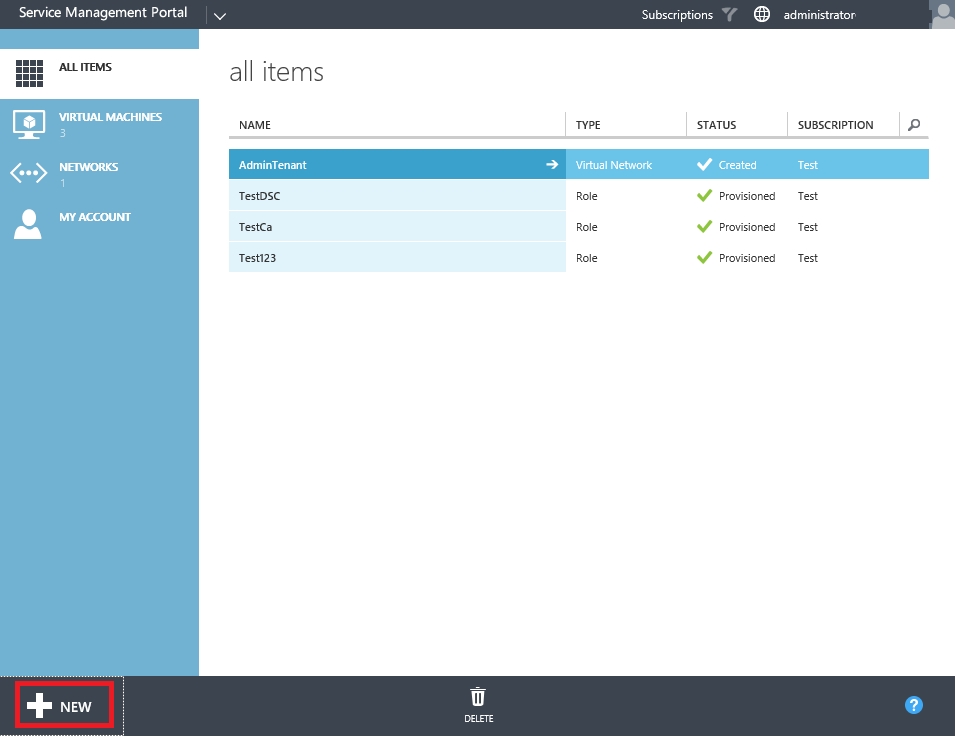
Open the tenant portal using credentials from a tenant user who was assigned to the plan where the Gallery item was published to. Select the New button.
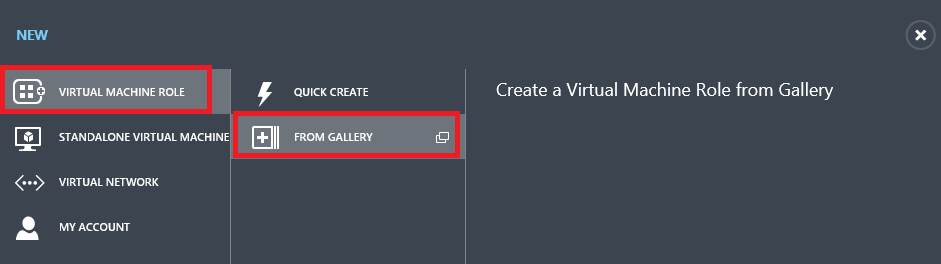
From the New menu select Virtual Machine Role and then From Gallery.
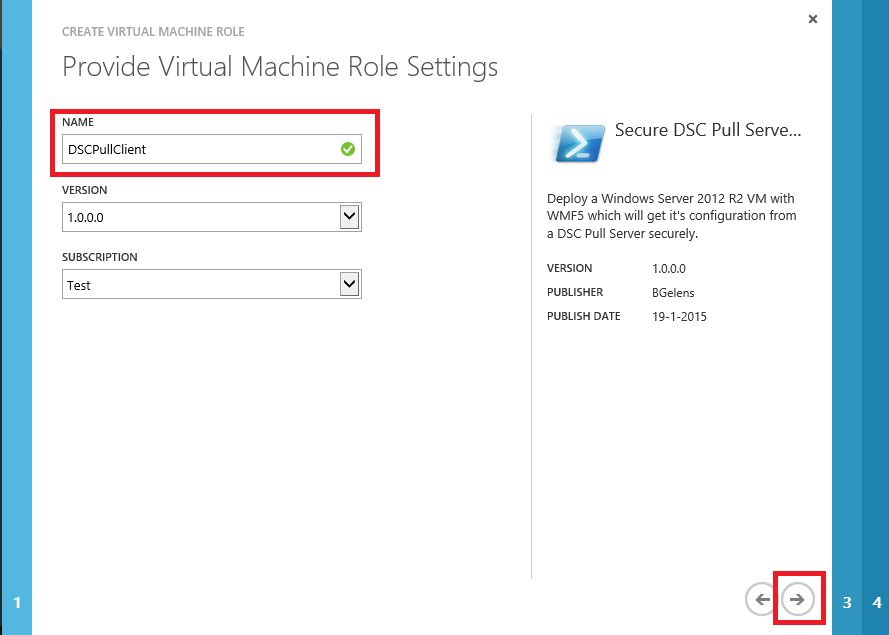
Select the Secure DSC Pull Server Client and press the next button.

Give your deployment a name and select the next button.
Select the desired VM size, OS Disk, Local Admin password, Time zone, Computer name pattern, network and IP assignment method. Then select next.
As we filled in some defaults already, we now only have to provide the correct credentials. As the certificate request will be handled by an Enterprise CA we need to enter valid domain credentials.
Select the finish button and wait for deployment to finish. Then connect with the VM console and login.
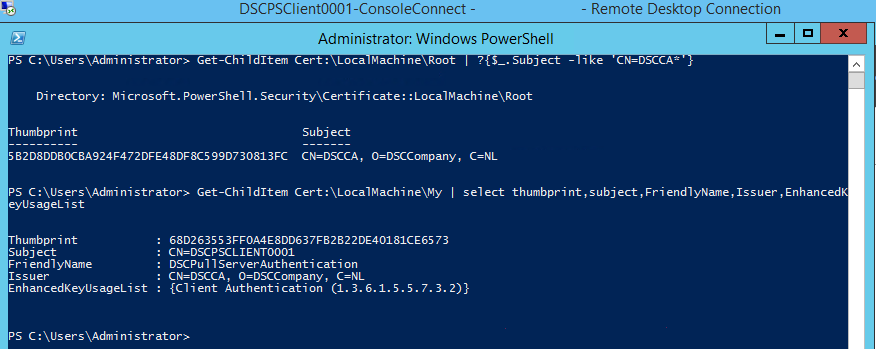
If everything went alright, the Root CA certificate is in the Root CA store of the Computer. In the My store there should be a valid client authentication certificate issued by the CA.
If something went wrong, the VM Role deployment would have raised a failed deployment. To check out what went wrong you can navigate to c:\vmrole\log and look at the log files created.
That’s it for this post. Next we will build the DSC Pull Server.
You can download the files created in this blog here: https://1drv.ms/f/s!AjCqd85FSgV_mtwgTuaQpMQ2ANadPg