
This blog post is written and published on Hyper-V.nu: http://www.hyper-v.nu/archives/bgelens/2015/02/integrating-vm-role-with-desired-state-configuration-part-8-create-deploy-and-validate-the-final-vm-role/
Series Index:
- Introduction and Scenario
- PKI
- Creating the VM Role (step 1 and 2)
- Pull Server
- Resource Kit
- PFX Repository Website
- Creating a configuration document with encrypted content
- Create, deploy and validate the final VM Role
- Create a Domain Join DSC resource
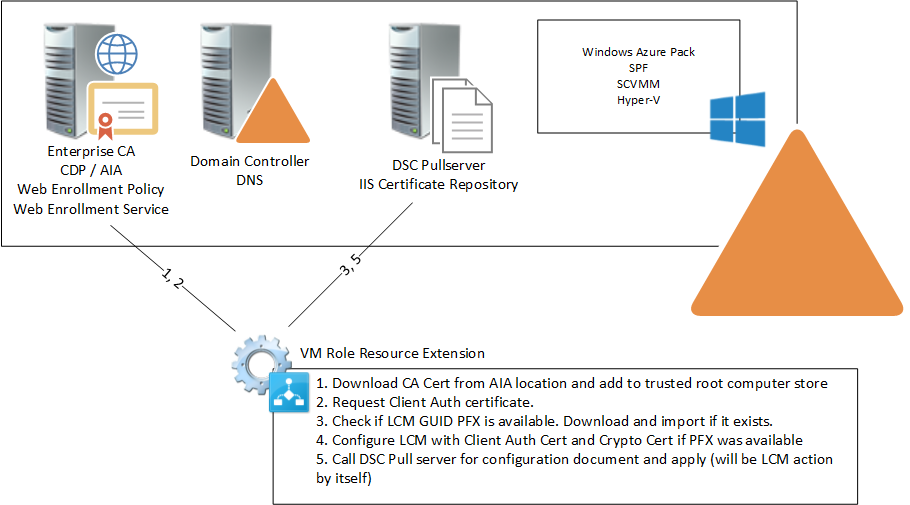
- Closing notes In this post the VM Role Resource Definition and Resource Extension that was built in an earlier post will be updated with the additional required steps (3+). Then the VM Role gets deployed and we will look at the result to validate everything works as expected.
Extend the Resource Extension
First off we extend the Resource Extension with some additional steps.
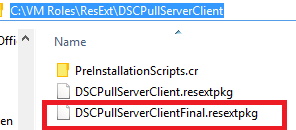
We then copy the current resource extension and give it another name so the previous state is safeguarded (if you did not create the VM Role resource definition and extension packages in part 3, you can download them here if you want to follow along: https://1drv.ms/f/s!AjCqd85FSgV_negB3vp0S0oDOKwD8Q).
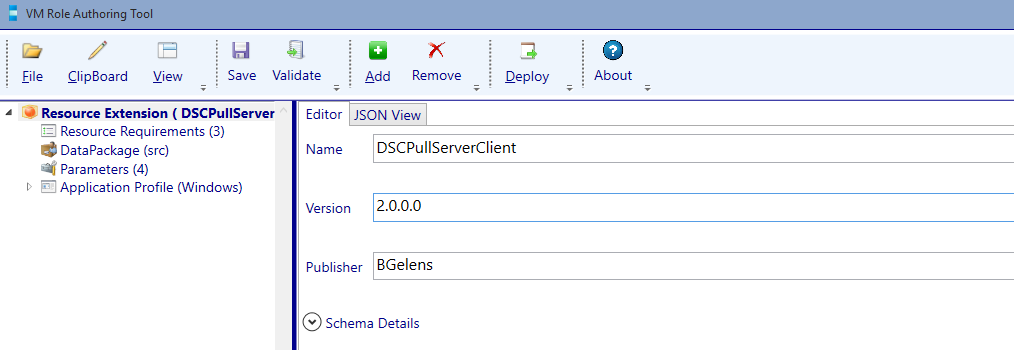
Next open the copied resource extension in the VM Role Authoring Tool and increase the version number to 2.0.0.0.
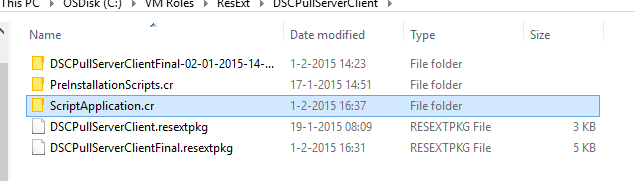
In Windows Explorer, navigate to the resource extension directory and create a new folder called ‘ScriptApplication.cr’.
Add the following script:
Configure-LCM.ps1
param
(
    [Parameter(Mandatory=$true)]
    [String]$ConfigurationId,

    [Parameter(Mandatory=$true)]
    [string]$PullServerURL,

    [Parameter(Mandatory=$true)]
    [string]$PullServerPort,

    [Parameter(Mandatory=$true)]
    [ValidateSet("ApplyOnly", "ApplyAndMonitor", "ApplyAndAutoCorrect")]
    [string]$ConfigurationMode,

    [Parameter(Mandatory=$true)]
    [String]$RebootNodeIfNeeded,

    [Parameter(Mandatory=$true)]
    [ValidateRange(15,22320)]
    [int]$ConfigurationModeFrequencyMins,

    [Parameter(Mandatory=$true)]
    [String]$PFXURL
)
$ErrorActionPreference = 'Stop'
$PWDURI = "$PFXURL/$ConfigurationId.txt"
$PFXURI = "$PFXURL/$ConfigurationId.pfx"
$RebootNode = $RebootNodeIfNeeded.ToBoolean($_)
try
{
    Write-Output -InputObject "Downloading PFX password file using URI: $PWDURI"
    Invoke-WebRequest -Uri $PWDURI `
                      -OutFile .\$ConfigurationId.txt `
                      -Verbose `
                      -Certificate (Get-ChildItem -Path Cert:\LocalMachine\My\ | ?{$_.FriendlyName -eq 'DSCPullServerAuthentication'})
    Write-Output -InputObject "Successfully downloaded PFX password file"
}
catch
{
    Write-Error -Message "Failed Downloading PFX password file using URI: $PWDURI" -Exception $_.exception
    throw $_
}

try
{
    Write-Output -InputObject "Downloading PFX file using URI: $PFXURI"
    Invoke-WebRequest -Uri $PFXURI `
                      -OutFile .\$ConfigurationId.pfx `
                      -Verbose `
                      -Certificate (Get-ChildItem -Path Cert:\LocalMachine\My\ | ?{$_.FriendlyName -eq 'DSCPullServerAuthentication'})
    Write-Output -InputObject "Successfully downloaded PFX file"
}
catch
{
    Write-Error -Message "Failed Downloading PFX file using URI: $PFXURI" -Exception $_.exception
    throw $_
}

try
{
    Write-Output -InputObject "Importing PFX"
    [SecureString]$Pin = Get-Content .\$ConfigurationId.txt | ConvertTo-SecureString -AsPlainText -Force
    $Certificate = Import-PfxCertificate -FilePath .\$ConfigurationId.pfx `
                                         -CertStoreLocation Cert:\LocalMachine\My `
                                         -Password $Pin `
                                         -Verbose
    Write-Output -InputObject "Successfully Imported PFX file"
}
catch
{
    Write-Error -Message "Failed Importing PFX file $ConfigurationId" -Exception $_.exception
    throw $_
}
try
{
    Write-Output -InputObject "Setting Certificate FriendlyName property"
    $Cert = Get-Item Cert:\LocalMachine\My\$($Certificate.Thumbprint)
    $Cert.FriendlyName = 'DSCEncryption'
    Write-Output -InputObject "Successfully Set Certificate FriendlyName property"
}
catch
{
    Write-Error -Message "Failed Setting Certificate FriendlyName property for: $($Certificate.Certificate.Thumbprint)" -Exception $_.exception
    throw $_
}
Remove-Item -Path .\$ConfigurationId.txt -Force
Remove-Item -Path .\$ConfigurationId.pfx -Force

configuration LCM
{
    node 'localhost'
    {
        LocalConfigurationManager
        {
            ConfigurationModeFrequencyMins = $ConfigurationModeFrequencyMins
            RefreshFrequencyMins = $ConfigurationModeFrequencyMins * 2
            RebootNodeIfNeeded = $RebootNode
            ConfigurationMode =  $ConfigurationMode
            ConfigurationID = $ConfigurationId
            DownloadManagerCustomData = @{ServerUrl = "$PullServerURL`:$PullServerPort/PSDSCPullServer.svc";
				                         AllowUnsecureConnection = 'false';
                                         CertificateID = (Get-ChildItem -Path Cert:\LocalMachine\My\ | ?{$_.FriendlyName -eq 'DSCPullServerAuthentication'}).Thumbprint;
                                         }
            DownloadManagerName = 'WebDownloadManager'
            RefreshMode = 'Pull'
            CertificateID = (Get-ChildItem -Path Cert:\LocalMachine\My\ | ?{$_.FriendlyName -eq 'DSCEncryption'} | Sort-Object -Property NotBefore -Descending)[0].Thumbprint;
        }
    }
}
try
{
    Write-Output -InputObject "Configuring LCM"
    LCM
    Set-DscLocalConfigurationManager .\LCM -Verbose
    Write-Output -InputObject "Succesfully configured LCM"
}
catch
{
    Write-Error -Message 'Failed Configuring LCM' -Exception $_.exception
    throw $_
}
Update-DscConfiguration
Remove-Item .\LCM -Recurse -Force
This script takes the following parameters:
- ConfigurationId: DSC Configuration ID to assign to the LCM instance
- PullServerUrl: DSC Pull Server URL (https://dscpull.hyper-v.nu in my case)
- PullServerPort: DSC Pull Server port. We have installed the pull server on port 443 but when following other blogs, you will find port 8080 is mostly used.
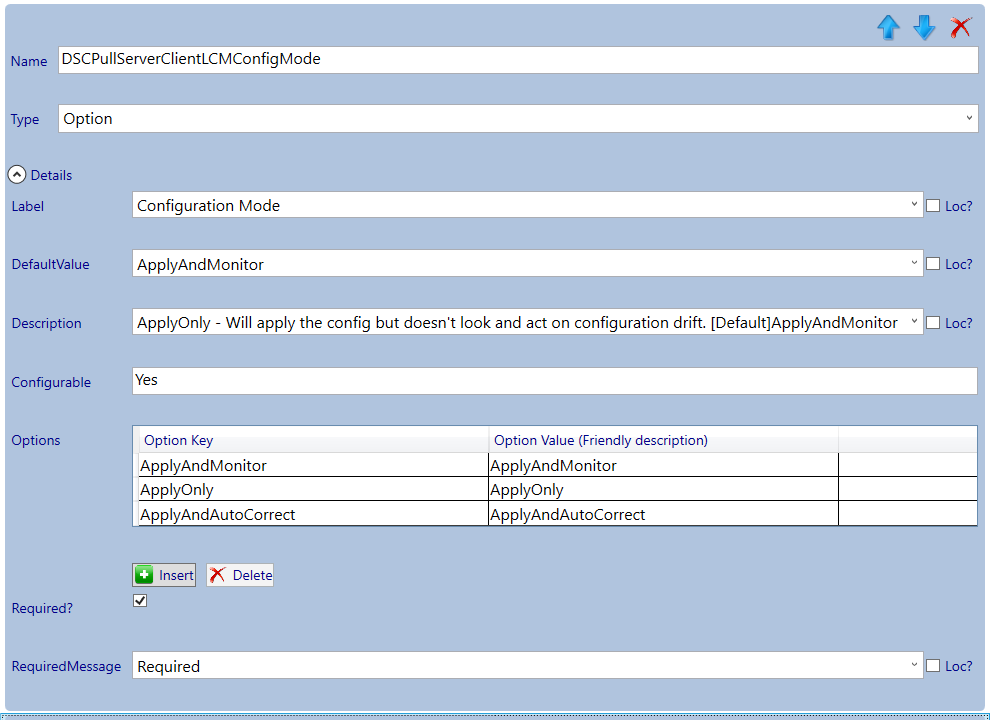
- ConfigurationMode: LCM Configuration mode (The LCM can be configured in 3 modes: 1) ApplyOnly – Will apply the config but doesn’t look and act on configuration drift. 2) * ApplyAndMonitor – Will apply the config and will report on configuration drift. 3) ApplyAndAutoCorrect -Will apply the config and auto-remediate on configuration drift).
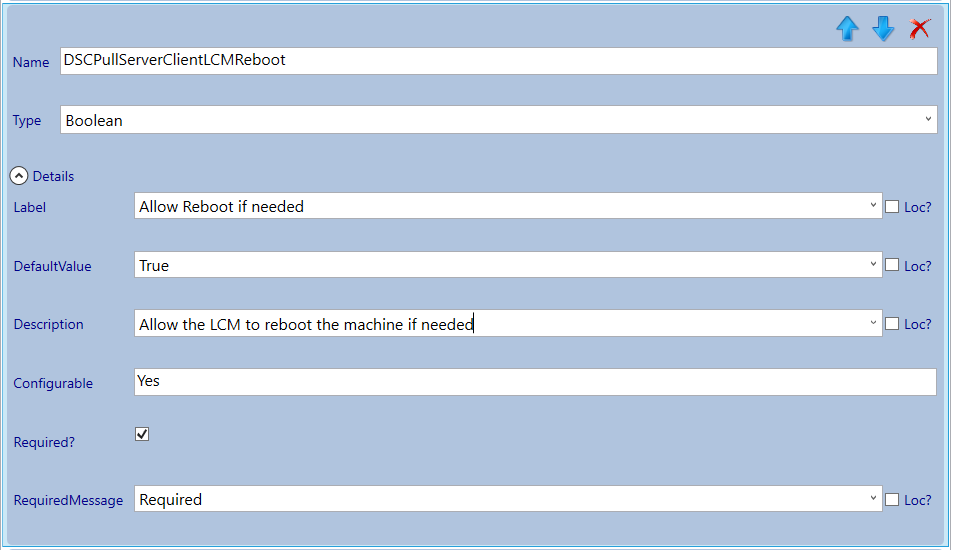
- RebootNodeIfNeeded: If a DSC resource sets the DSCMachineStatus variable to 1, the LCM is allowed or disallowed to reboot the system based on this setting.
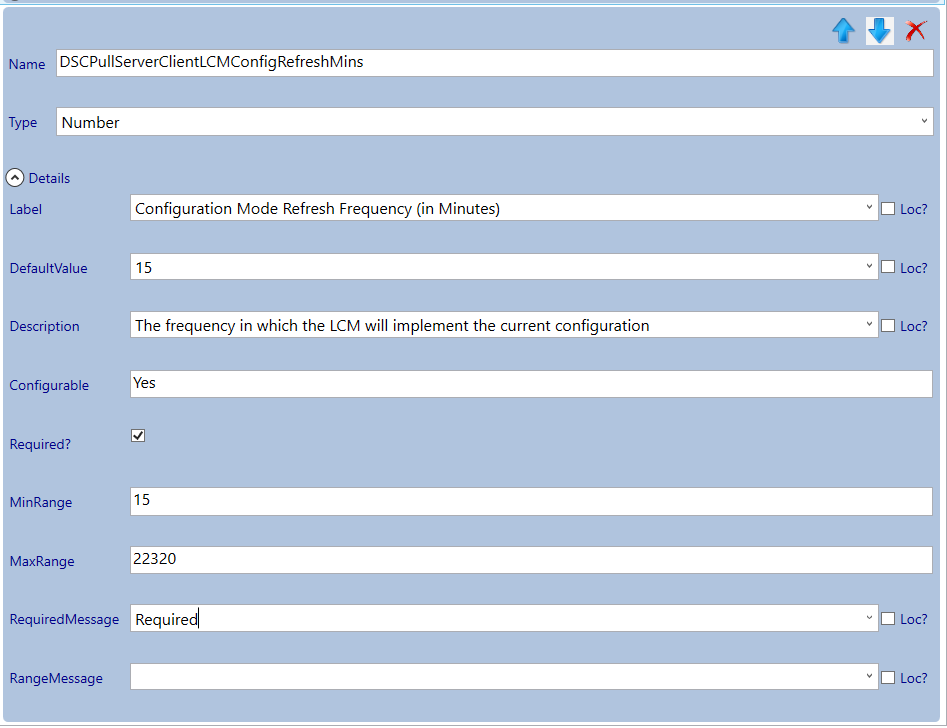
- ConfigurationModeFrequencyMins: The frequency in which the LCM will implement /ensure the current configuration
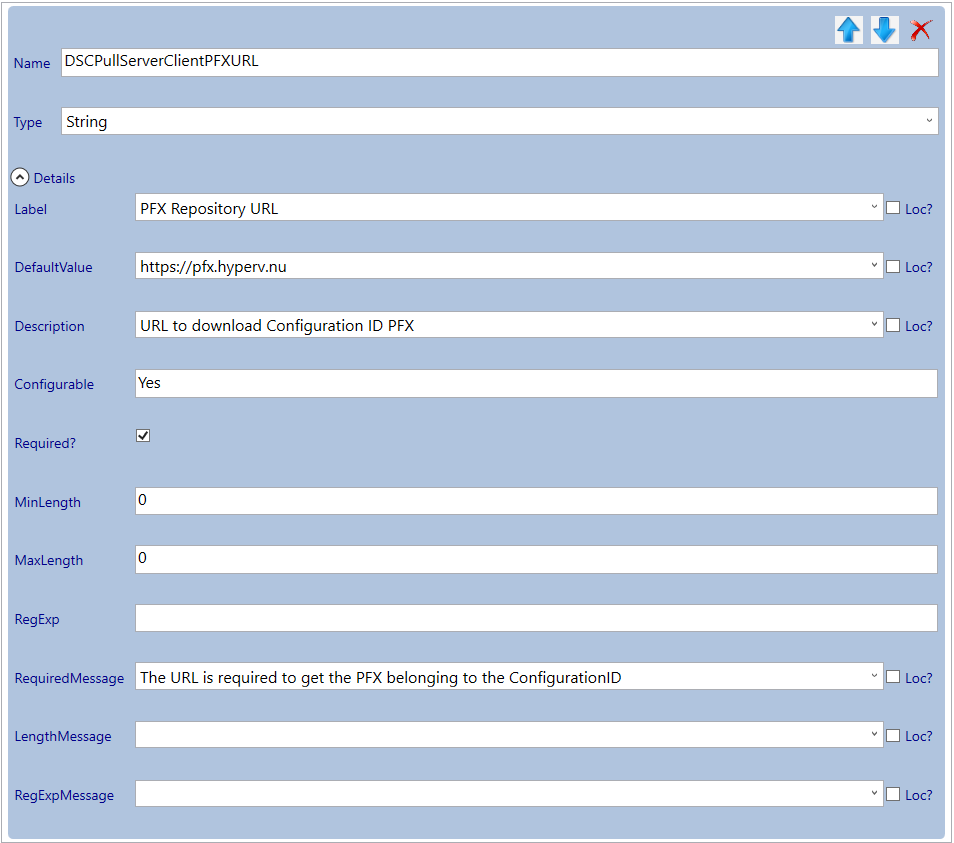
- PFXURL: The PFX repository web URL to download the PFX files from (https://pfx.hyper-v.nu in my case).
It will construct the weblocation of the PFX and password file tied to the LCM Configuration ID and converts the string RebootNodeIfNeeded to a boolean (Resource Definition booleans are of the JSON boolean datatype and are passed as a string to the resource extension).
It will try to download the PFX and password file. When it fails, an error is thrown and script execution is stopped (every step in the script is handling errors in this way). When the files are downloaded, the PFX is imported into the Computers My store using the password from the text file. The certificate is configured with ‘DSCEncryption’ as the FriendlyName for easy reference. The PFX and password text file are removed. Then the LCM configuration is constructed and loaded into memory. The LCM configuration is then called so it will create a meta.mof file. The meta.mof file is then used to configure the LCM and an update is triggered so the configuration is pulled and applied immediately. The script does not wait for the configuration to be done as DSC could reboot the node which would error out to the VM Role deployment. The meta.mof is removed as a final cleanup action which is necessary to make the VM Role serviceable (when files exists in the VMM working directory which were not originally in the resource extension, servicing will break).
For more info about LCM meta configuration see: http://blogs.msdn.com/b/powershell/archive/2013/12/09/understanding-meta-configuration-in-windows-powershell-desired-state-configuration.aspx

Go back to the VM Role Authoring Tool and navigate to the Application Profile (Windows) node and select the Add button, then add a Script Application.
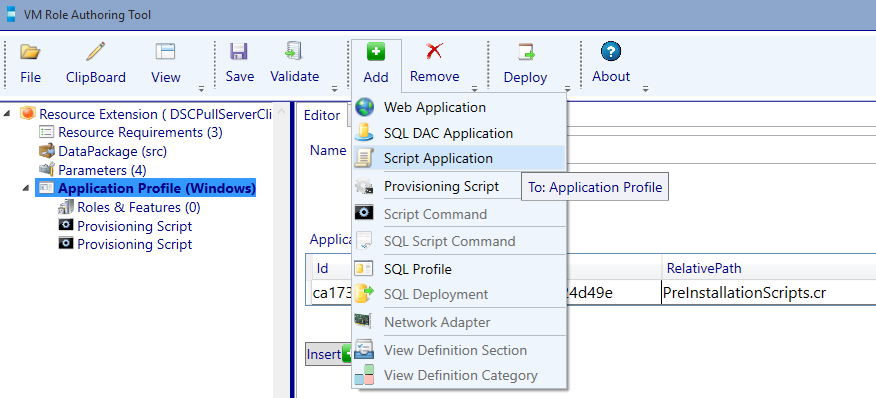
We add a script application because we need the LCM settings and PFX certificate download to be serviceable. Imagine you have an updated configuration and have assigned a new GUID. Because we use a script application, you can update the configuration ID at the cloud service level in WAPack and the scripts will run again (downloading a new PFX and configuring the LCM with the new settings).
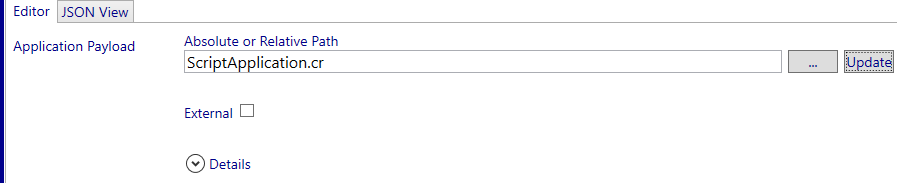
Import the justly created custom resource by browsing for the folder using the … button.

Next select update.
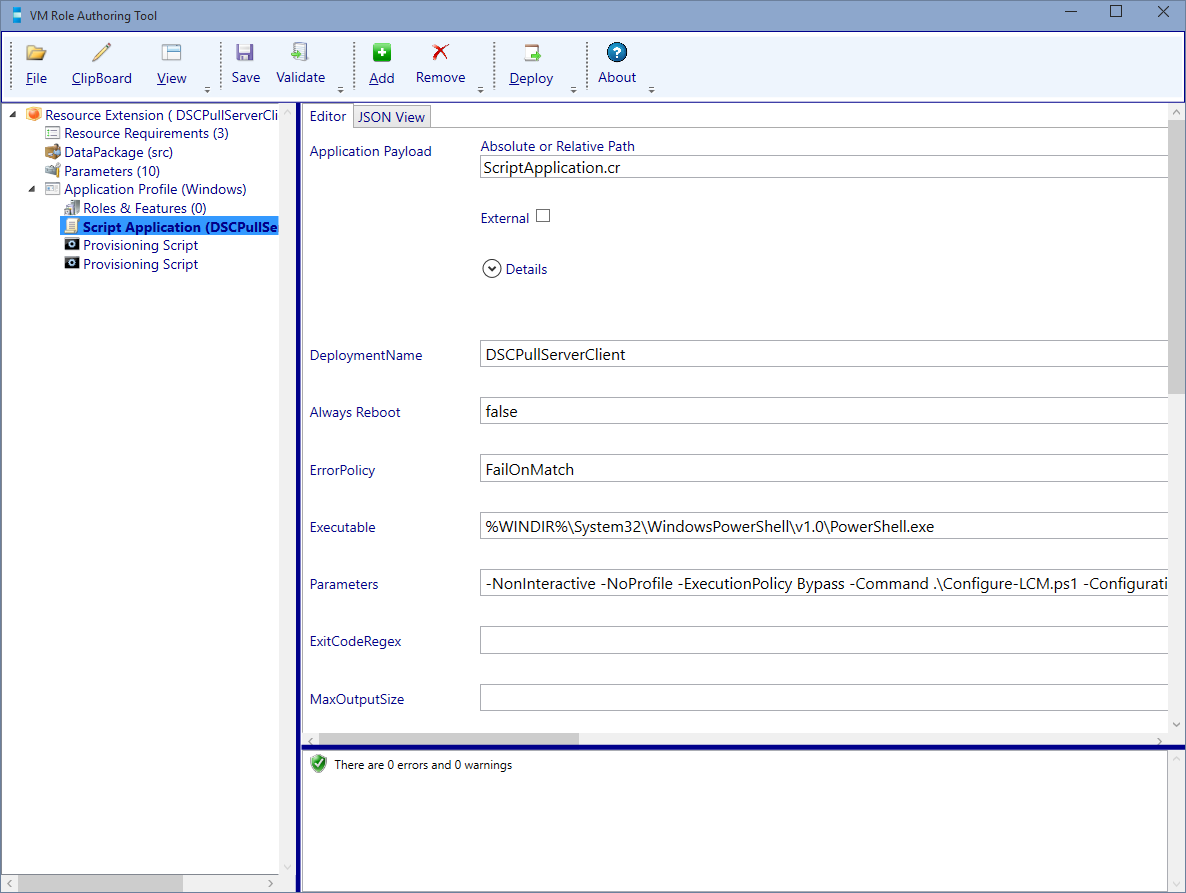
Now we will configure Script Application. Enter the values provided by the following table.
| Name | Value |
|---|---|
| Always Reboot | False |
| ErrorPolicy | FailOnMatch |
| Executable | %WINDIR%\System32\WindowsPowerShell\v1.0\PowerShell.exe |
| Parameters | -NonInteractive -NoProfile -ExecutionPolicy Bypass -Command .\Configure-LCM.ps1 -ConfigurationId [Param.ConfigurationId] -PullServerURL [Param.PullServerURL] -PullServerPort [Param.PullServerPort] -ConfigurationMode [Param.LCMConfigMode] -RebootNodeIfNeeded [Param.LCMReboot] -ConfigurationModeFrequencyMins [Param.LCMConfigRefreshMins] -PFXURL [Param.PFXURL] |
| StandardErrorPath | C:\VMRole\Log\ScriptApp_LCM-Error.txt |
| StandardOutputPath | C:\VMRole\Log\ScriptApp_LCM-Out.txt |
| TimeOutInSeconds | 180 |
Next press the validate button.
If everything Validates fine. Press Save! Then navigate to the Parameter node.
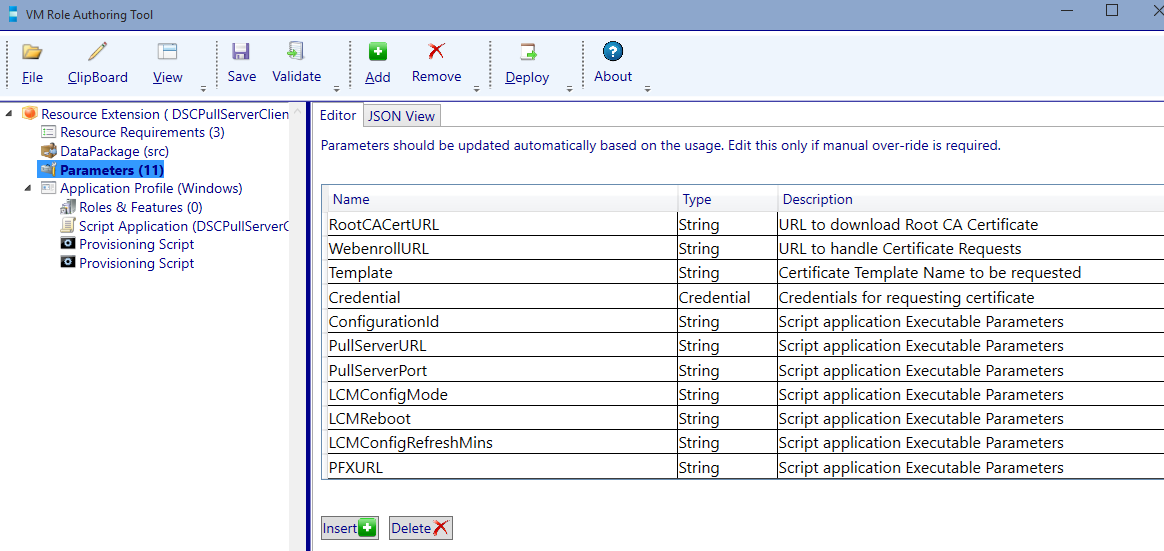
Configure the parameters:
| Name | Type | Description |
|---|---|---|
| ConfigurationId | String | LCM Configuration ID |
| PullServerURL | String | DSC Pull Server URL |
| PullServerPort | Int | DSC Pull Server Port |
| LCMConfigMode | String | LCM Config Mode |
| LCMReboot | Boolean | LCM allow system reboot |
| LCMConfigRefreshMins | Int | LCM Configuration Refresh in Minutes |
| PFXURL | String | URL to download Configuration ID PFX |
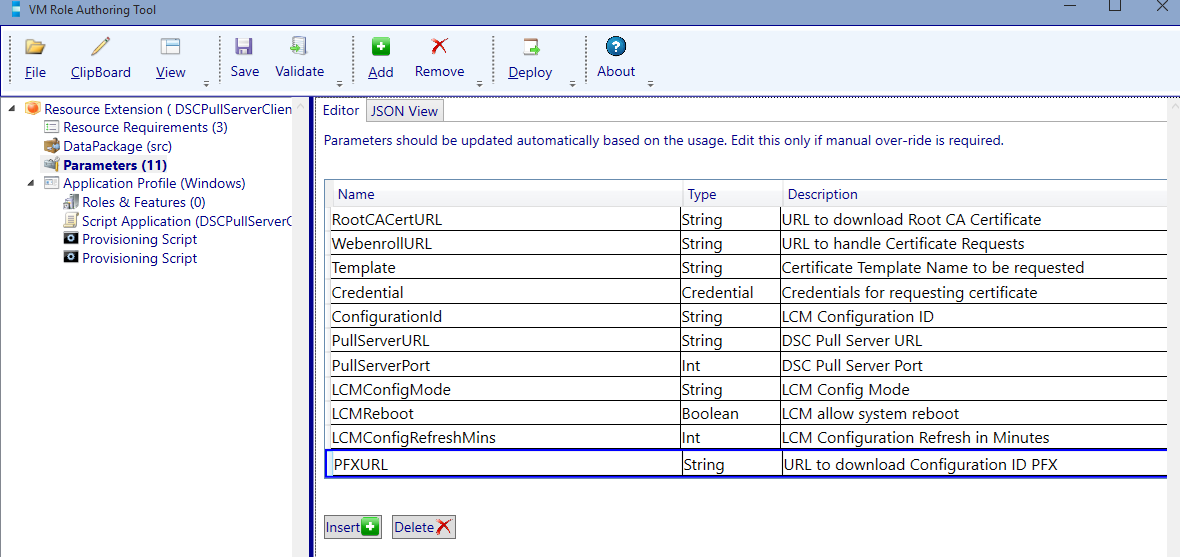
Validate and save. Keep the resource extension open as we need it to extend the resource definition.
Extend the Resource Definition
Copy the current resource definition and give it another name so the previous state is safeguarded.

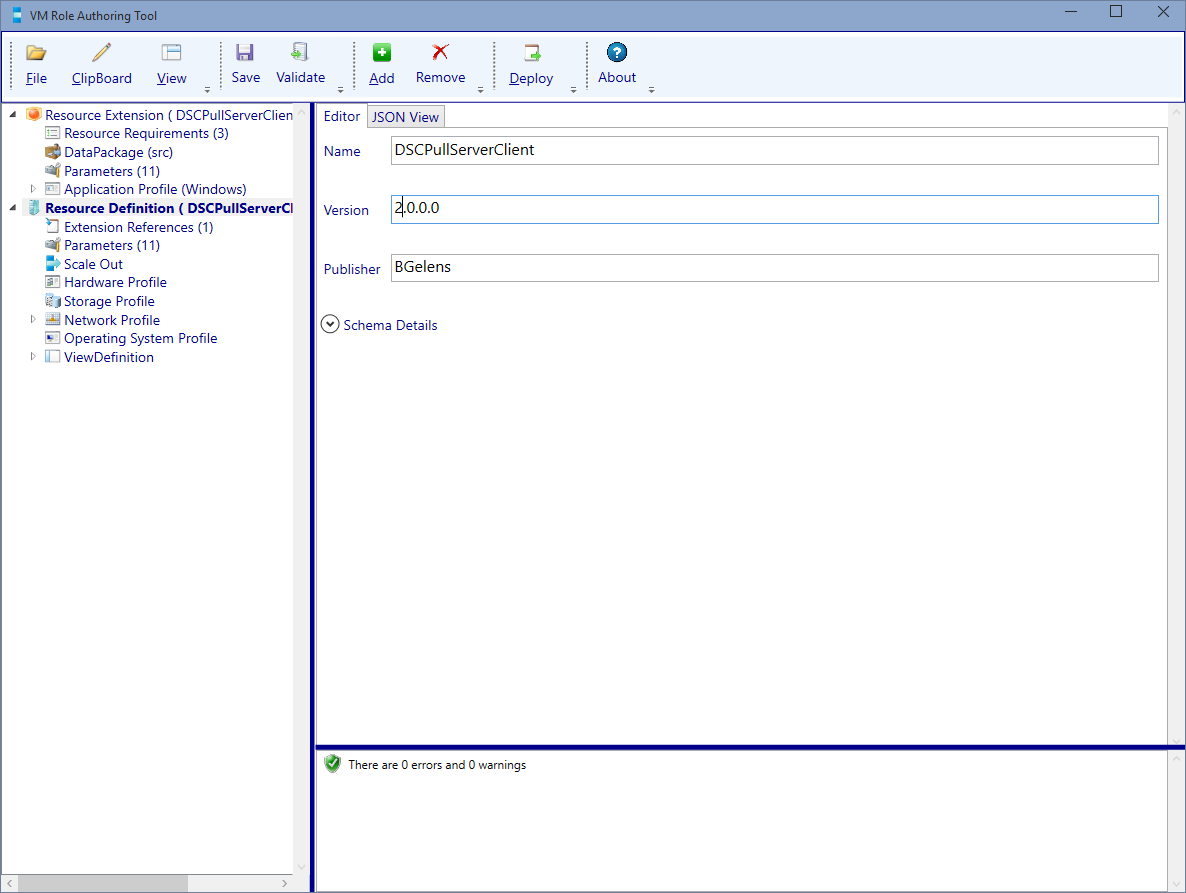
Next open the resource definition package in the VM Role Authoring Tool and increase the version number to 2.0.0.0.
Navigate to the Extension References node.
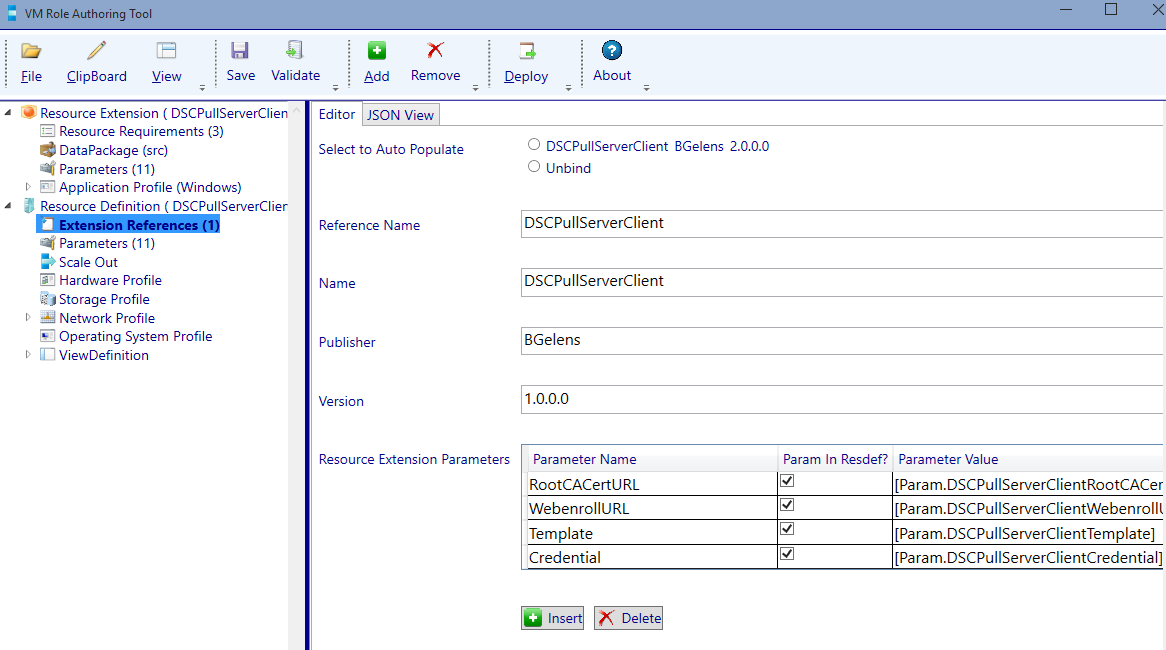
Select the auto populate radio button next to the resource extension reference which is still opened in the authoring tool.

Select the View Definition node and update the version number to 2.0.0.0.
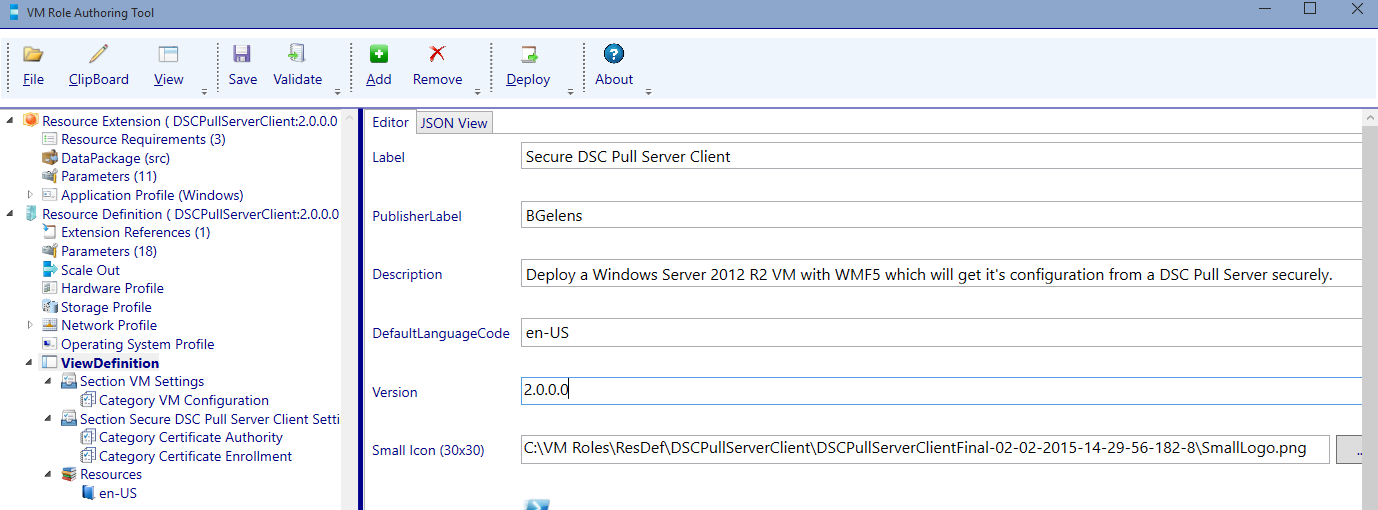
Select the Secure DSC Pull Server Client Settings section and add a new category by clicking the add button.
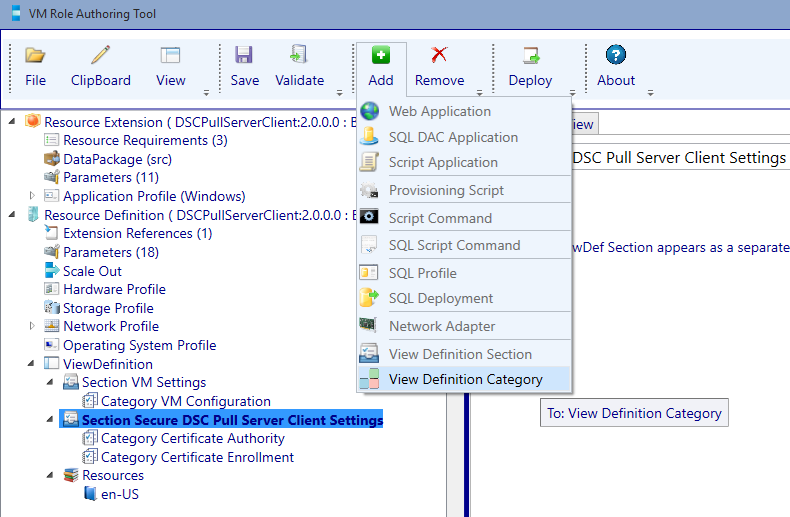
Select the newly created category and give it the name: DSC Pull Server
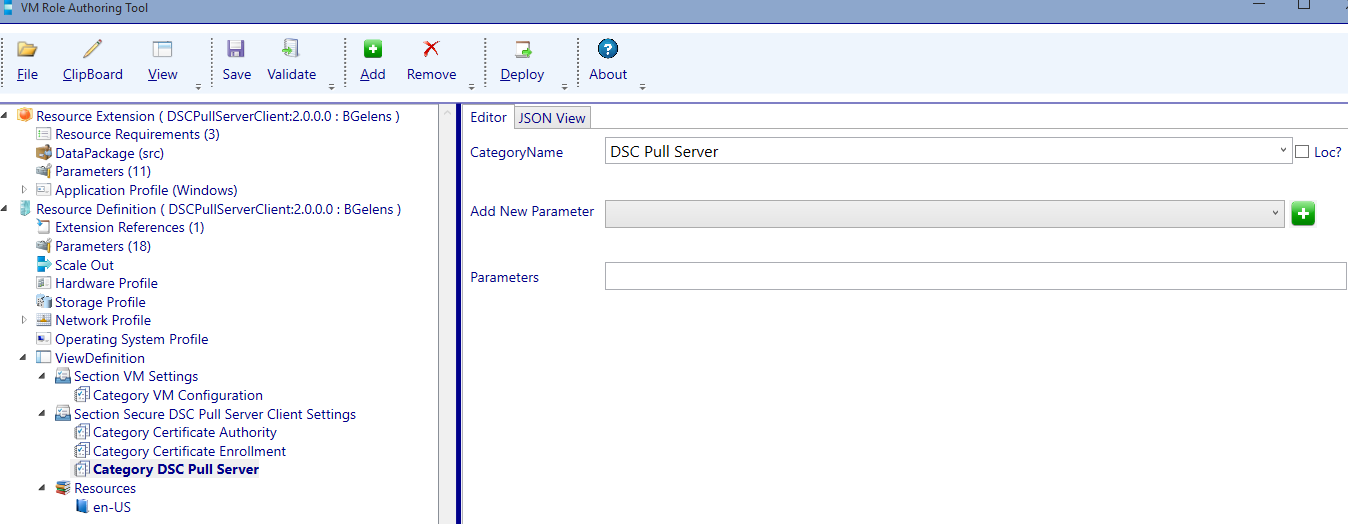
Add the following Parameters to the DSC Pull Server category (in the order listed):
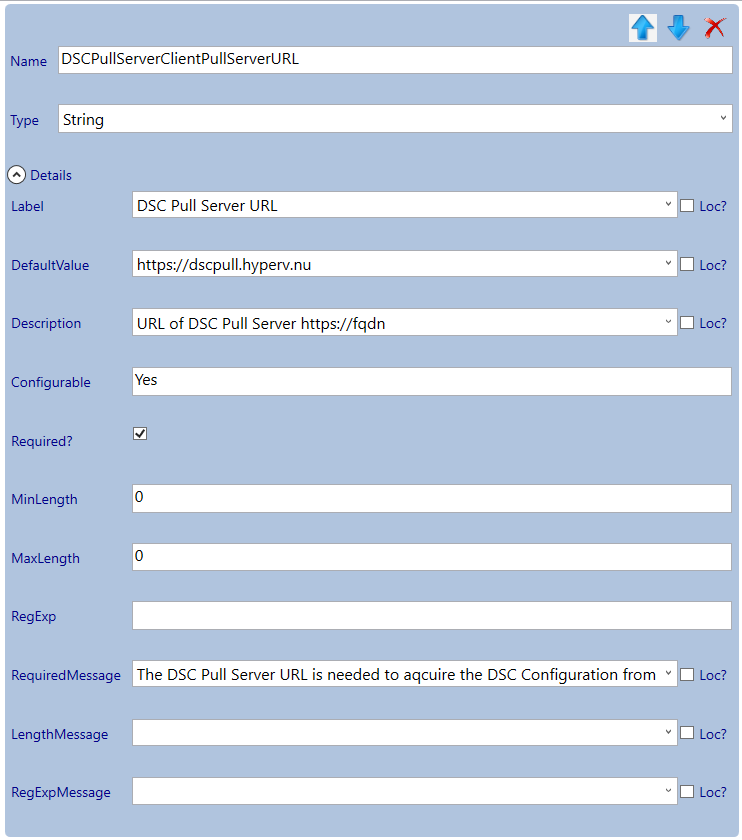
- DSCPullServerClientPullServerURL
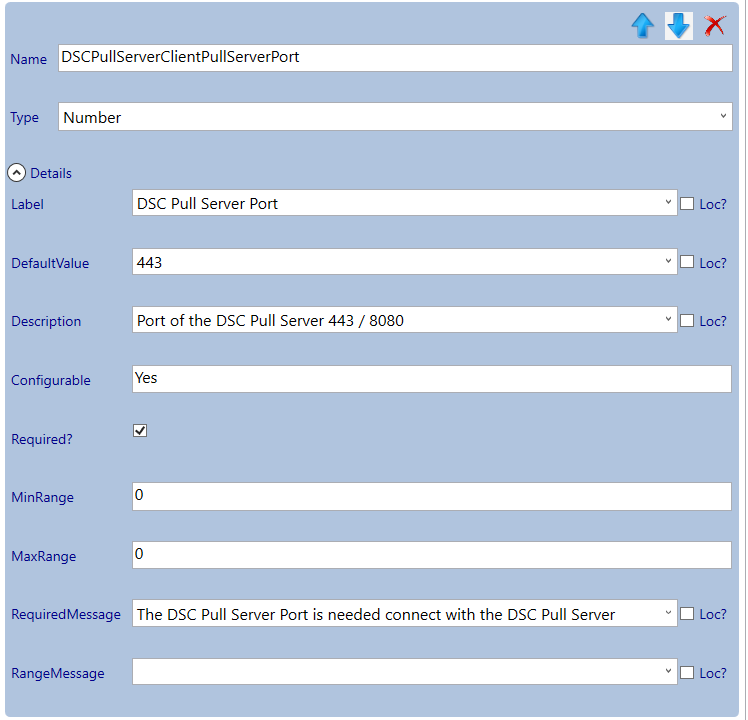
- DSCPullServerClientPullServerPort
Adjust the parameters:
Select the Secure DSC Pull Server Client Settings section and add a new category by clicking the add button. Select the newly created category and give it the name: LCM .
Add the following Parameters to the LCM category (in the order listed):
- DSCPullServerClientConfigurationId
- DSCPullServerClientLCMConfigMode
- DSCPullServerClientLCMReboot
- DSCPullServerClientLCMConfigRefreshMins
Adjust the parameters:

Use the following RegEx to validate the configuration ID to be a valid GUID entry: ^(\{){0,1}[0-9a-fA-F]{8}\-[0-9a-fA-F]{4}\-[0-9a-fA-F]{4}\-[0-9a-fA-F]{4}\-[0-9a-fA-F]{12}(\}){0,1}$
Select the Secure DSC Pull Server Client Settings section and add a new category by clicking the add button. Select the newly created category and give it the name: PFX Repository.
Add the DSCPullServerClientPFXURL parameter and adjust it as follows:
Validate and save. Now the resource definition is finished.
Import Resource Extension and Definition
Now it is time to import the Resource Extension into the SCVMM Library. To do this copy the resextpkg file to a Server / Client with the SCVMM PowerShell module installed and open a PowerShell console. Then run the following commands.
$resourcepath = 'C:\DSCPullServerClient.resextpkg'
Import-CloudResourceExtension -ResourceExtensionPath $resourcepath -SharePath (Get-SCLibraryShare).path
You can verify the import by running Get-CloudResourceExtension.
Now the resource extension is imported, import the resdefpkg by opening the Azure Pack admin portal and navigating to the VM Clouds resource provider.
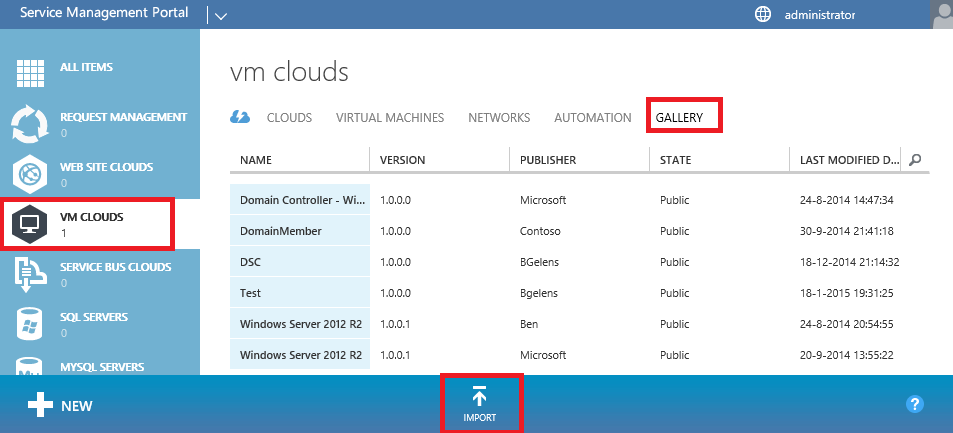
Select the Gallery tab and then select import.
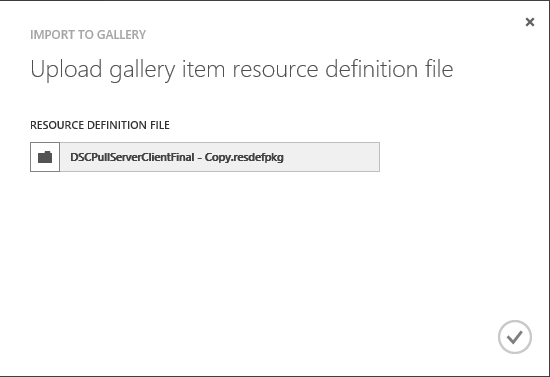
Browse to the resdefpkg and press the OK button. (I always make a copy of the resdefpkg as the Admin portal will place a lock on the file and does not release until the browser is closed).

Wait until the resdefpkg is imported successfully.
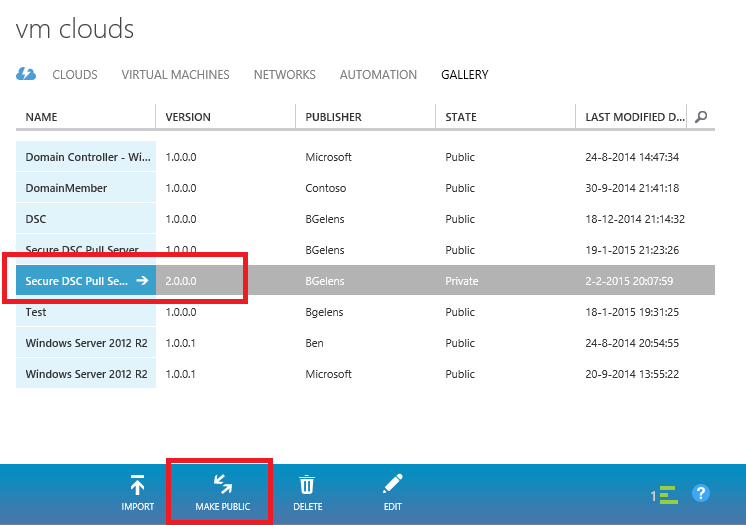
Select the line representing the Gallery item (do not press the name) and select the Make Public option. Next do select the Name.
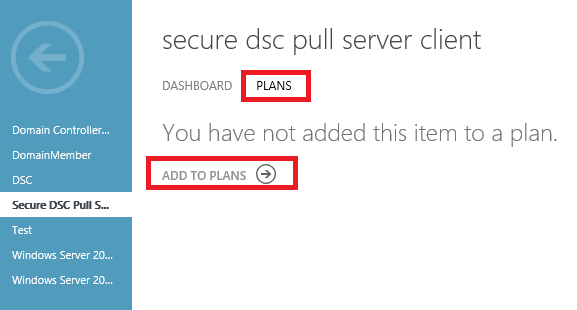
Select the plans tab and then select Add to Plans.
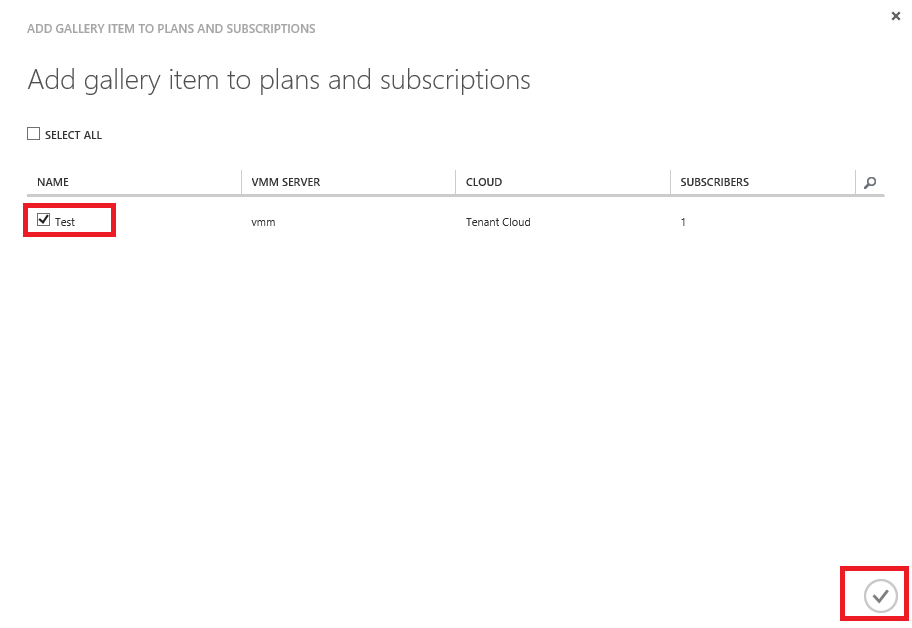
Select the plan you want to assign the Gallery Item to and select the Ok button.
That’s it. The VM Role is now available for tenant consumption.
Deploy and validate the final VM Role
So now everything is in place we can deploy and validate the final VM Role. Since the DSC Pull Server is used for configuration management, could this be the ‘One’ VM Role to rule them all?
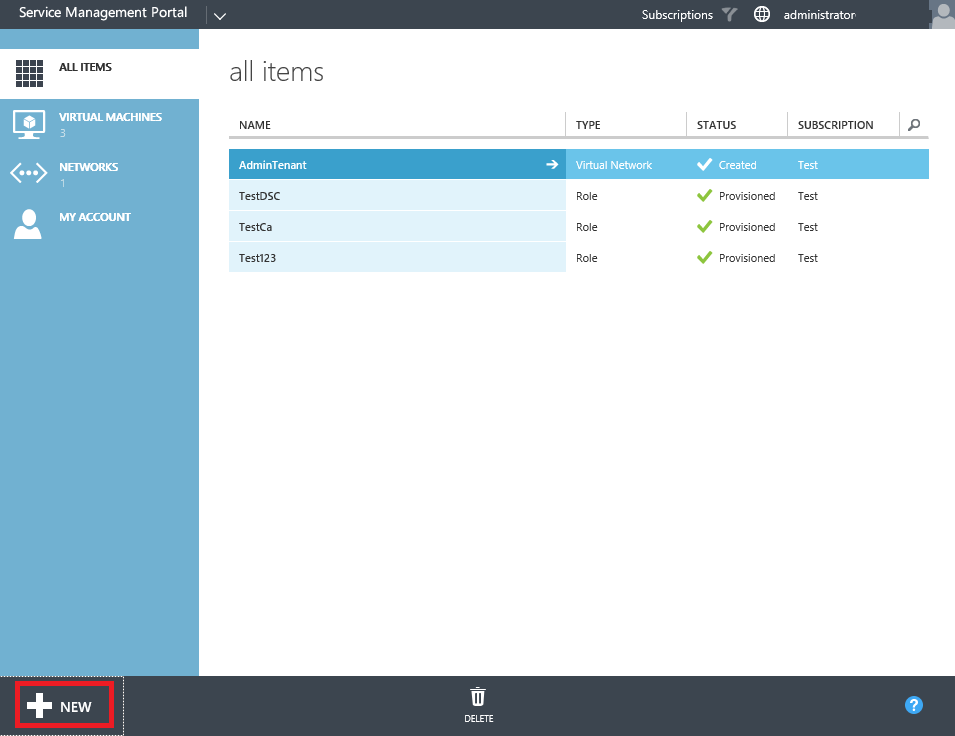
Open the tenant portal using credentials from a tenant user who was assigned to the plan where the Gallery item was published to. Select the New button.
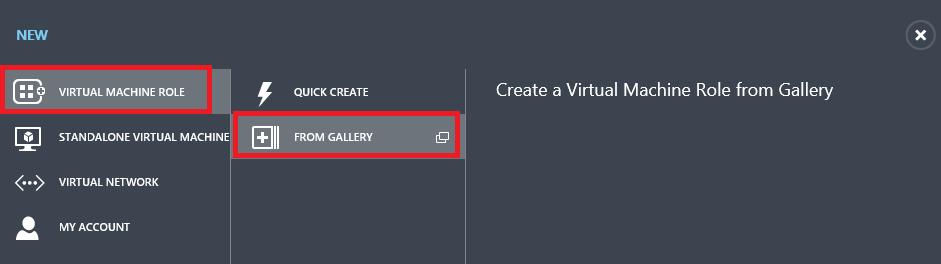
From the New menu select Virtual Machine Role and then From Gallery.
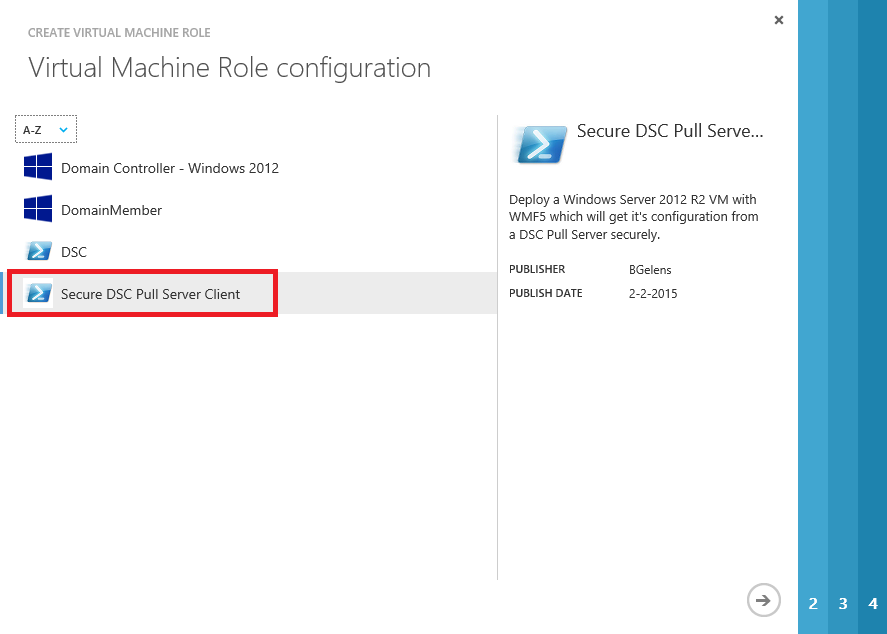
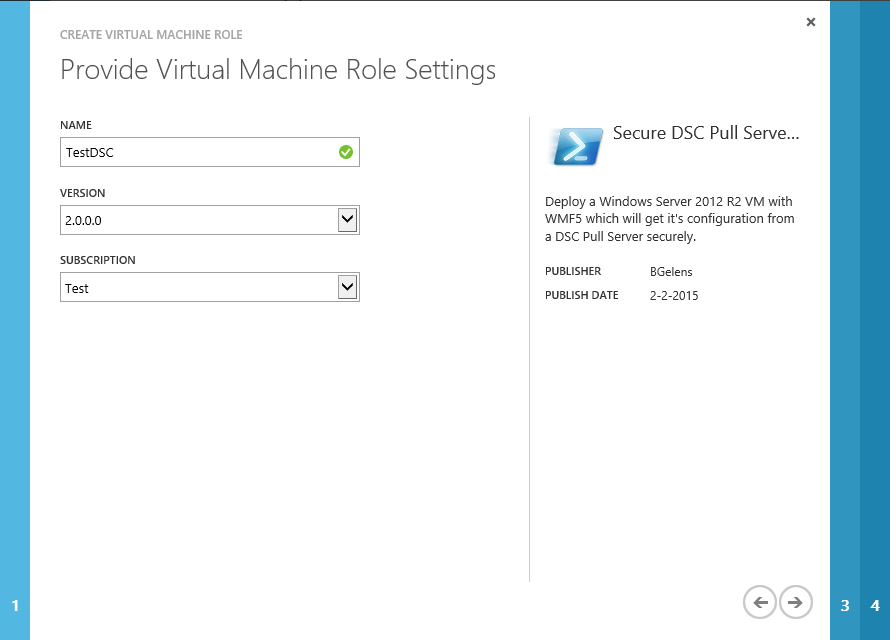
Select the Secure DSC Pull Server Client and press the next button.
Give your deployment a name, make sure you have selected the 2.0.0.0 version and select the next button.
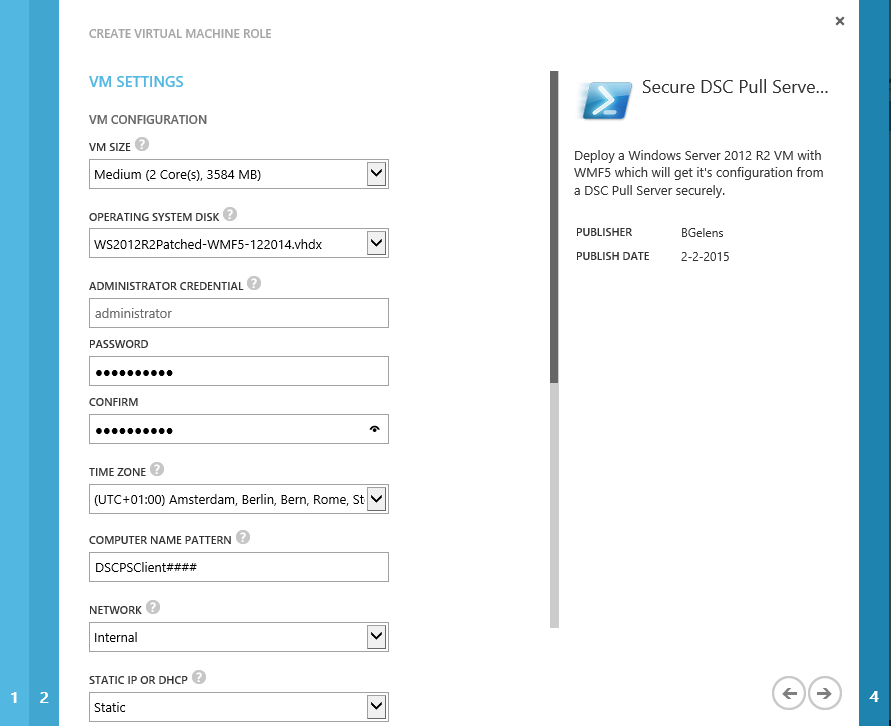
Select the desired VM size, OS Disk, Local Admin password, Time zone, Computer name pattern, network and IP assignment method. Then select next.
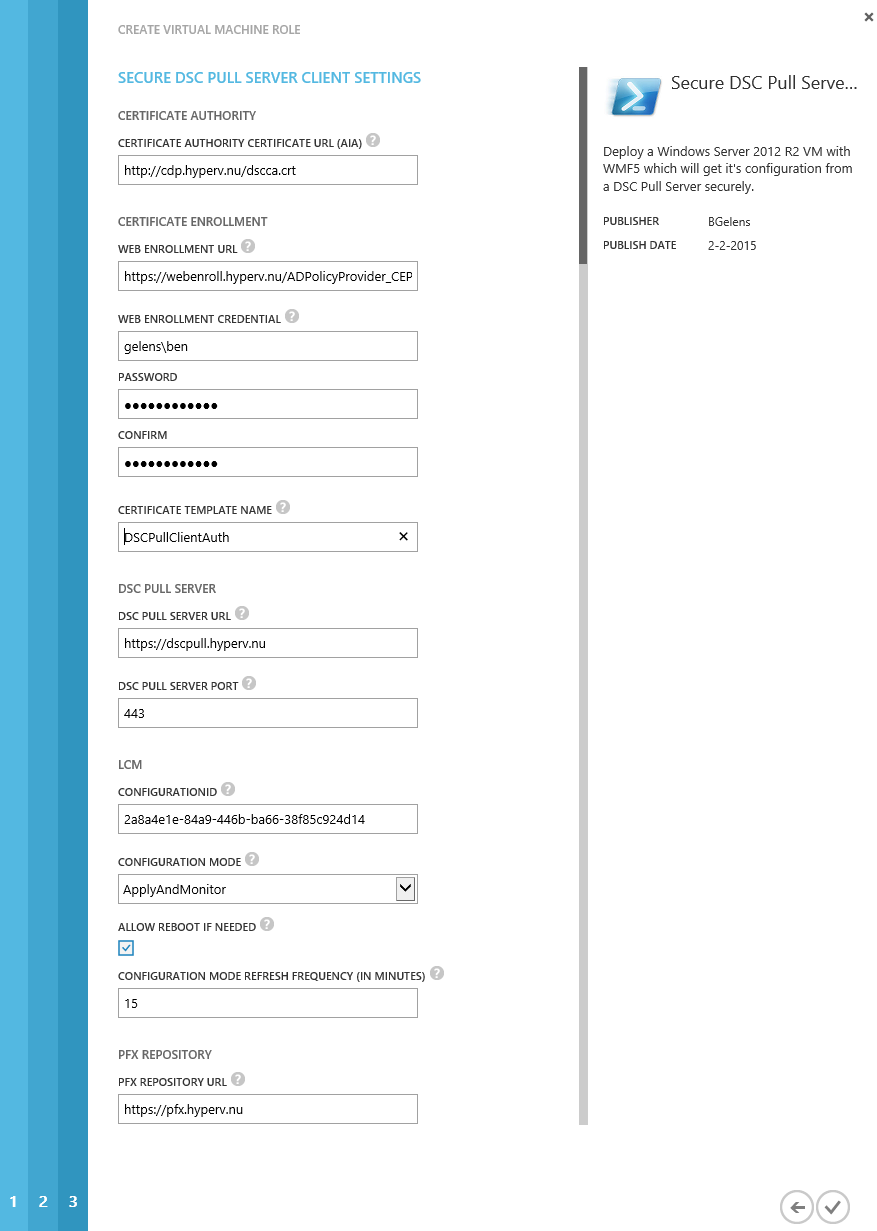
As we filled out some defaults in the view definition already, we now only have to provide the correct credentials to request the authentication certificate and provide the LCM configuration ID. Leave the Configuration mode at ApplyAndMonitor, we will change the setting manually later on to show the effect of this setting.
Select the finish button and wait for deployment to finish. In the mean time you could check the VMM job results as the VM Role gets deployed and see the pre-install scripts and the script application being processed.
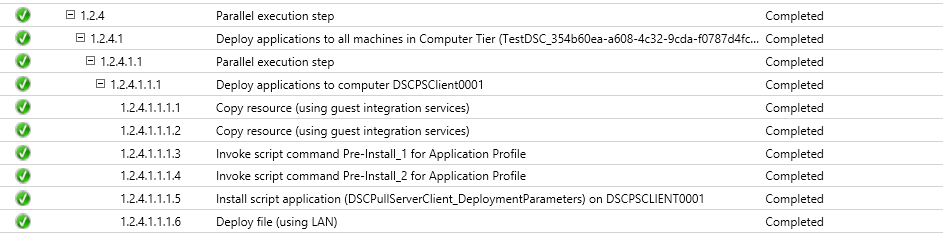
If everything went alright we have the following result:
- Client Authentication Certificate is enrolled.
- Certificate used for encryption is downloaded and installed.
- LCM is configured.
- LCM has authenticated against the DSC Pull Server.
- LCM has downloaded the configuration document.
- LCM has parsed the configuration document and found the system was missing the xCredSSP module.
- LCM downloaded the xCredSSP module from the pull server.
- LCM has applied the configuration (it made it so! :-) )
Note that if you login immediately after the VM Role is deployed, the configuration could still be underway. If you don’t have the expected result right away, get a cup of coffee or tea.
You can check the outcome by logging into the VM and check the DSC event log.
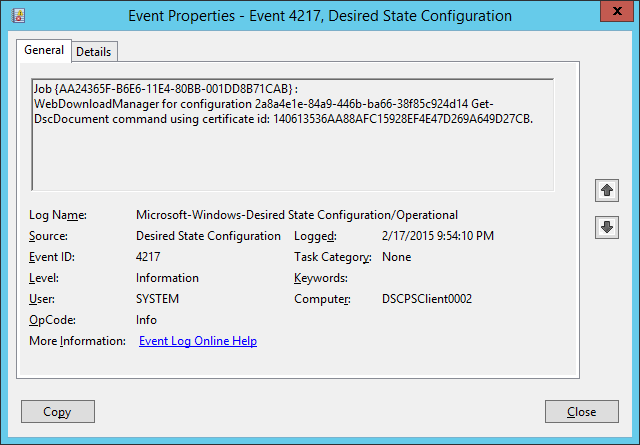
Some events to look for:
- Event 4217. Here you see the LCM using the authentication certificate against the DSC Pull Server.
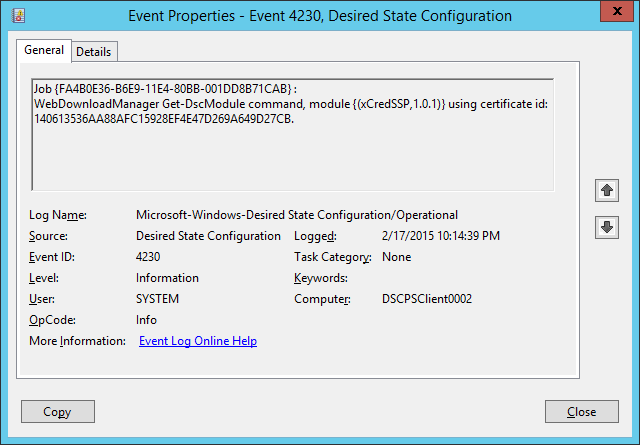
- Event 4230. You will see the LCM requesting the xCredSSP module.
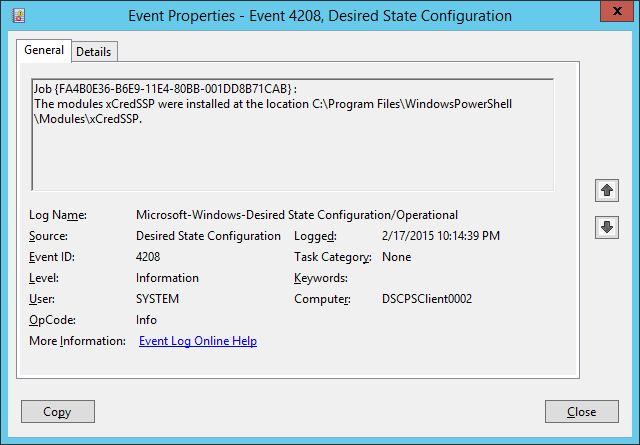
- Event 4208 will show you the module is installed.
Open a PowerShell console and run ‘Get-DscLocalConfigurationManager’ to view the configuration of the LCM.
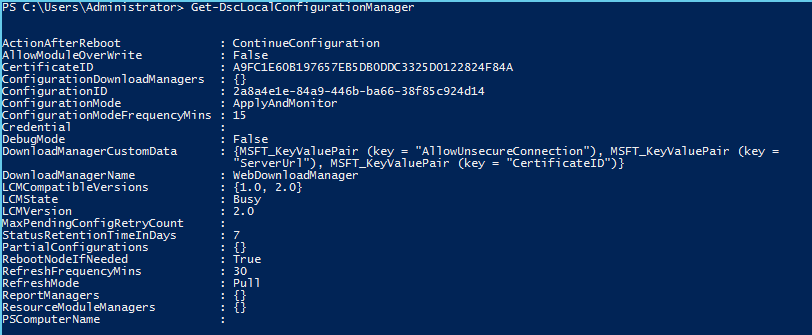
As you can see, the LCM was configured using the parameter values provided during deployment time at the VM Role level. The Certificate ID shown at this level is the certificate thumbprint of the certificate used to decrypt the encrypted content of the configuration file.
To look at what certificate is used to authenticate to the Pull Server run the following command:
Get-DscLocalConfigurationManager | Select-Object -Property DownloadManagerCustomData -ExpandProperty DownloadManagerCustomData | Select-Object -Property key,value

The certificate ID shown here is the certificate thumbprint of the certificate used to authenticate against the Pull server.
Then run ‘Test-DSCConfiguration’ (should result in $true if consistency has been reached) and ‘Get-DSCConfiguration’ (shows what has been configured).
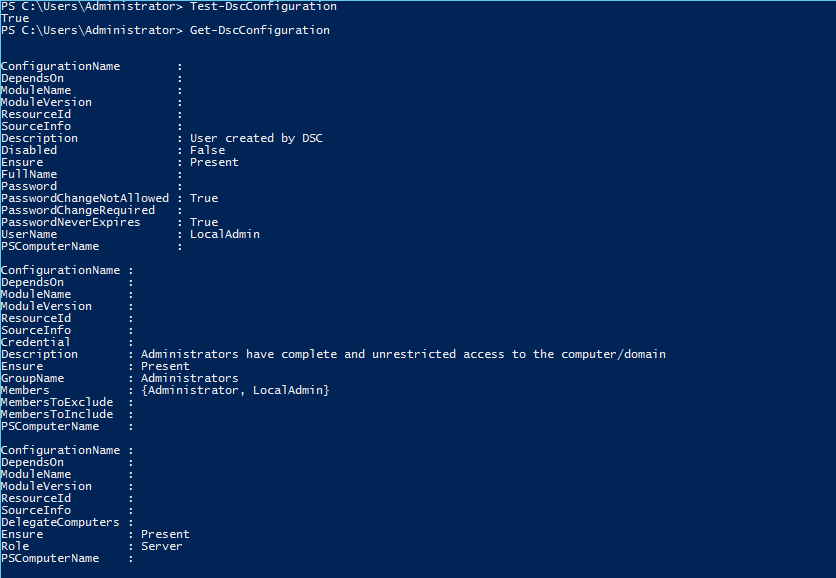
Three hashtables are produced showing you a user was created which was added to the administrators group and that CredSSP authentication was enabled at the WSMAN service level.
Now let’s look at the differences of the LCM’s configuration mode (we won’t look at ApplyOnly as the consistency engine will not run anymore once the configuration has been applied).
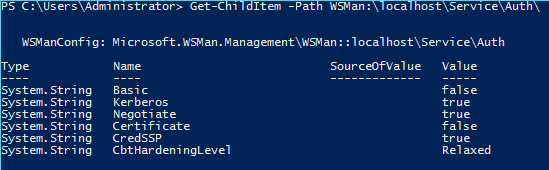
First check the CredSSP configuration manually and then modify the CredSSP authentication setting to $false.
Get-ChildItem -Path WSMan:\localhost\Service\Auth\

Set-Item -Path WSMan:\localhost\Service\Auth\CredSSP -Value $false

Wait for the next consistency check interval (15 minutes in my case, could be longer if you modified the refresh frequency at VM Role deployment time) or run the following method to force a consistency check immediately:
Invoke-CimMethod -Namespace root/Microsoft/Windows/DesiredStateConfiguration `
                 –ClassName MSFT_DSCLocalConfigurationManager `
                 -MethodName PerformRequiredConfigurationChecks `
                 -Arg @{Flags = [System.UInt32]1} -Verbose
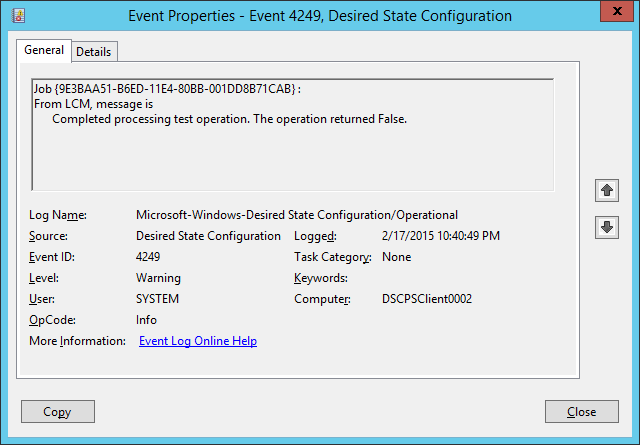
This will result in an event log id 4249 stating the configuration has drifted. However, since the LCM configuration mode is ApplyAndMonitor, the drift is not corrected.
Now let’s change the configuration mode. We can do this in 2 ways.
- Modify it locally by creating a new meta configuration document. Look at the LCM configuration script added to the resource extension to see how this is done. Note that if you try to adjust only the mode, you will overwrite all other settings with blanks. You have to provide a complete meta configuration!
- Modify it by changing the settings in at the cloud service in Azure Pack and let VMM handle the servicing of the LCM!
Lets take a closer look at option 2:
Navigate to the Azure Pack tenant portal and login.
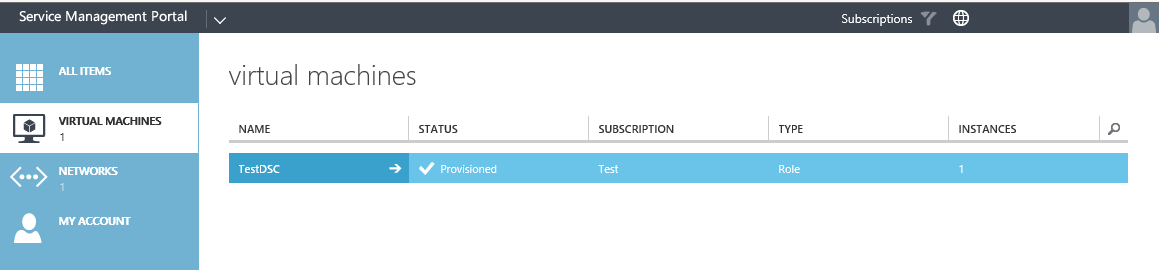
Select the Virtual Machines resource provider and select the Cloud Service deployed earlier. Drill down by select the name.
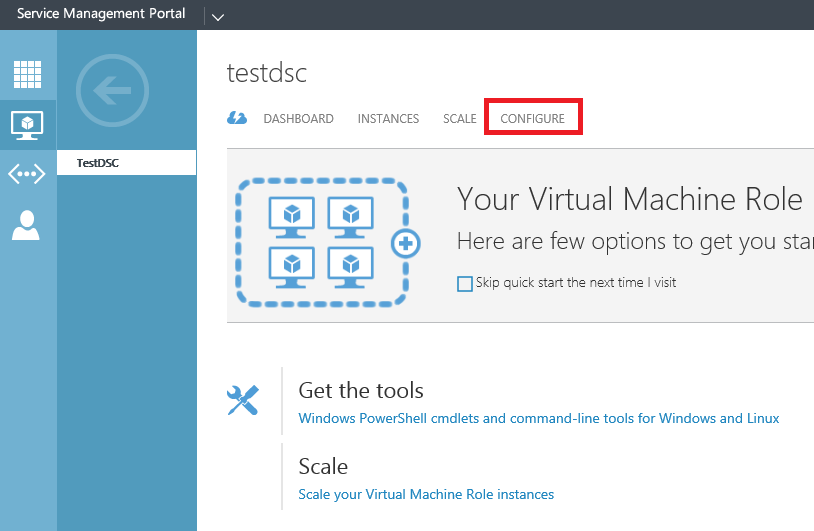
Select the Configure Tab
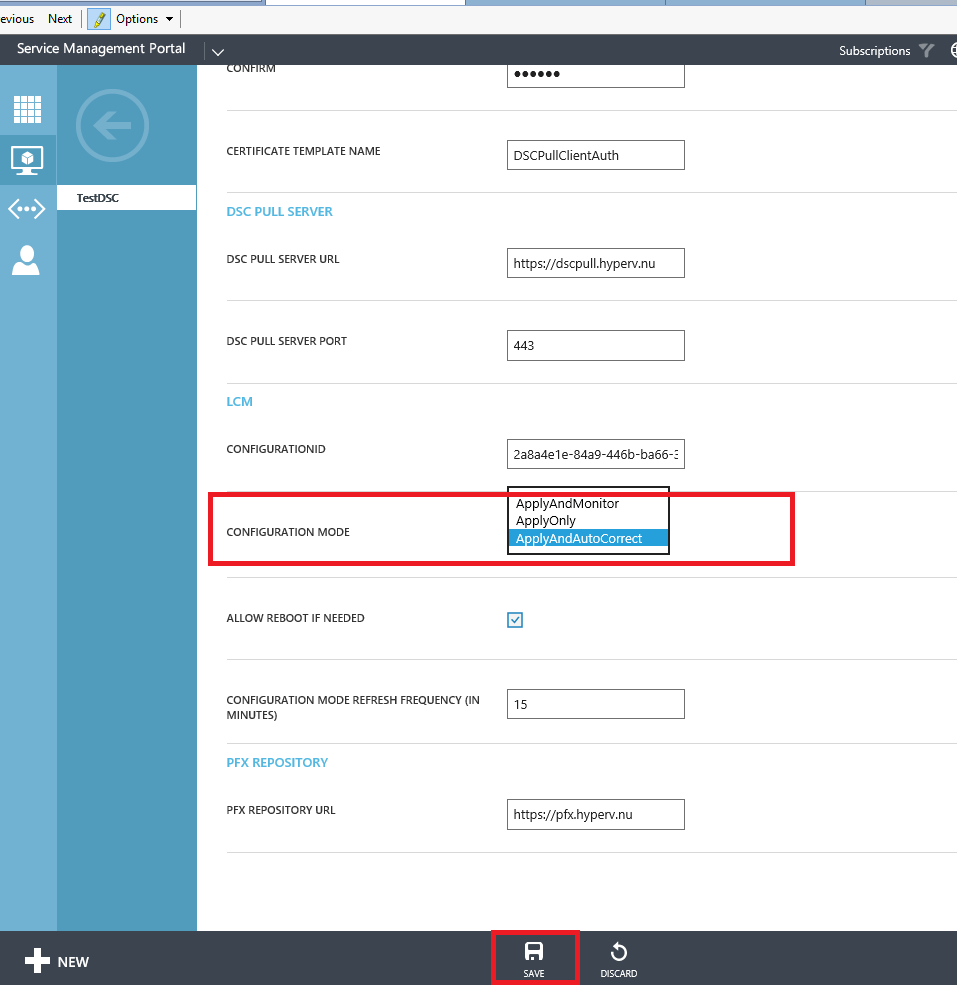
Change the configuration mode to ApplyAndAutoCorrect and press save. A warning will pop-up, select yes to continue with the servicing.

The VM Role is now serviced into the correct state (in a future post we will modify the configuration ID in the same way so you can see how easy it would be to apply a new configuration this way).
When it’s done, again wait for the consistency engine to run or manually trigger it using the method stated previously.
Now you will see that the WSMAN Service CredSSP authentication setting is reset to $true
Servicing a VM in this way is a lot easier than building the logic into new resource extensions / resource definitions in my opinion. If you think about this, the LCM will download the configuration document every time there has been a change at the pull server level and will then apply it. When a new configuration document is generated using a new configuration ID, replacing the old one, it is as easy as changing the parameter at the cloud service level (and this can be scripted as well). Could this be the ‘One’ VM Role to rule them all? I don’t know about you but I think it’s coming close!
That’s it for this post. Next we will create a custom DSC resource suitable to domain join a VM Role instance in the scenario of this blog series.
You can download the files created in this blog here: https://1drv.ms/f/s!AjCqd85FSgV_negB3vp0S0oDOKwD8Q