
Today I had to move the SMA database to a new SQL instance and I did NOT manage to find the information via Google or Bing (probably the operation is not so common yet :)). In this blogpost I will describe the steps necessary to successfully perform this operation.
First you have to copy / move over the database. I did this via a full back up on the source SQL server and restore it on the target SQL server. More information about this process can be found here: http://msdn.microsoft.com/en-us/library/ms187048.aspx.
Then I copied over the necessary logins to the new SQL instance. I exported the logins from the source SQL server using the stored procedure described here: http://support.microsoft.com/kb/918992. The procedure will generate TSQL code to create the logins on the target environment. Pay attention to what you run on your target environment, if your source was polluted with logins and SQL accounts which you don’t want on your target environment then you should pick only the lines involved with the SMA web service account and the SMA Runbook service account (e.g. CREATE LOGIN [Domain\SASMAWEBSVC] FROM WINDOWS WITH DEFAULT_DATABASE = [SMA] ).
Next stop is the SMA Web Service.
I have found configuration in the registry and in the web.config which needs to be adjusted. The registry is plain and simple. Navigate to HKEY_LOCAL_MACHINE\SOFTWARE\Microsoft\ServiceManagementAutomation\WebService and adjust the DatabaseServerName and DatabaseServerInstance keys to reflect the target SQL environment. The web.config has an encrypted connection string which should be decrypted first by running: C:\Windows\Microsoft.NET\Framework\v4.0.30319\aspnet_regiis.exe -pdf “connectionStrings” “C:\inetpub\Service Management Automation” from a command prompt / PowerShell console host.

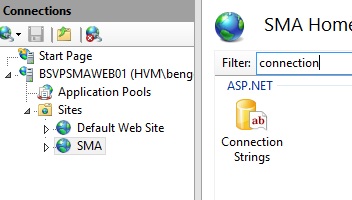
Then the connection string should be modified. This can be done through the IIS manager. Select the SMA web site and click the connection strings object.
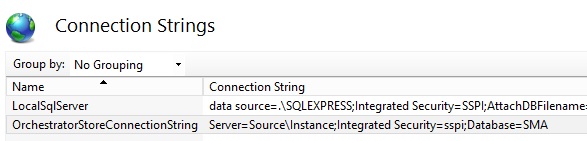
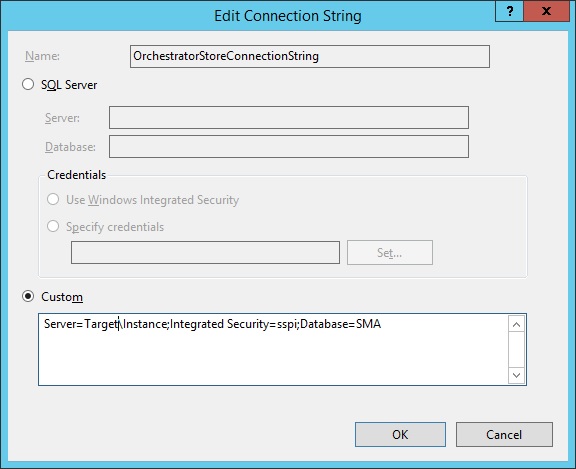
Then edit the connection string to reflect the target SQL environment.
When done, the connection string data in the web.config file should be encrypted again using the following command: C:\Windows\Microsoft.NET\Framework\v4.0.30319\aspnet_regiis.exe -pef “connectionStrings” “C:\inetpub\Service Management Automation”. An iisreset to finish this of and the web service is done!
Then it’s time to reconfigure the Runbook servers. I have found configuration in the registry and in a configuration file which needs to be adjusted. Fist stop the “Runbook Worker” service. The registry is again plain and simple. Navigate to HKEY_LOCAL_MACHINE\SOFTWARE\Microsoft\ServiceManagementAutomation\RunbookWorker and adjust the DatabaseServerName and DatabaseServerInstance keys to reflect the target SQL environment. Then edit the following configuration file: C:\Program Files\Microsoft System Center 2012 R2\Service Management Automation\Orchestrator.Settings.config. Adjust the following entry <add key=”Server” value=”Source\Instance”/> to <add key=”Server” value=”Target\Instance”/>. Then the service can be started again and the working parts are configured and running correctly! Job well done!
Disable the source database, and when happy you can delete it.
There is one thing left to do. A SQL job exists which purges old data from the SMA database. To migrate the job over you can simply right click the Job on the source server and select Script Job as -> Create to -> New Query Editor Window from the SQL management studio.
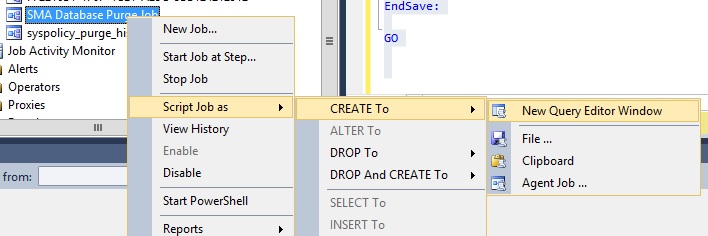
This will generate TSQL code which can be run on the target SQL server which creates the Job for you.
HTH! Ben