
In the last post, we have seen how to setup a simple DSC Pull Server backed by a SQL Database. In this blog post, I’ll expand upon that Pull Server by onboarding a new node and exploring some of the options of the DSCPullServerAdmin PowerShell module to interact with the database directly.
DSCPullServerAdmin is a project I started a while ago to interface with the PullServer edb, making several administrative tasks better achievable. Since Microsoft announced the addition of SQL support in Windows Server 1803 and 2019, it was clear to me that this would be the way forward for the Pull Server so I decided to reboot the project focusing mainly on SQL support. Migrating from edb to SQL is also one of the things handled by this project, more on this in a later post!
Index:
- Part 1: SQL Support
- Part 2: Managing the Pull Server with DSCPullServerAdmin (this post)
- Part 3: Pre-create the Pull Server database
- Part 4: Migrate EDB or MDB to SQL
- Part 5: Containers!
Onboarding a new node
The onboarding experience is exactly the same as it used to be. I used the below meta configuration to onboard a node to the Pull Server setup in part 1.
[dsclocalconfigurationmanager()]
configuration lcm {
    Settings {
        RefreshMode = 'Pull'
    }

    ConfigurationRepositoryWeb SQLPullWeb {
        ServerURL = 'http://pullserver:8080/PSDSCPullServer.svc'
        RegistrationKey = 'cb30127b-4b66-4f83-b207-c4801fb05087'
        AllowUnsecureConnection = $true
    }

    ReportServerWeb SQLPullWeb {
        ServerURL = 'http://pullserver:8080/PSDSCPullServer.svc'
        RegistrationKey = 'cb30127b-4b66-4f83-b207-c4801fb05087'
        AllowUnsecureConnection = $true
    }
}

lcm
Set-DscLocalConfigurationManager .\lcm -Verbose

As you can see, I did not specify the ConfigurationNames property in the Settings block. I left that out intentionally to demonstrate we can now control that easily on the server side (we could already do this before but changing it in the edb proved to be pretty difficult).
Providing the Configuration Name in the meta configuration is still valid and I think it’s perfect for a bootstrapping scenario. It is good to know that overwriting the Configuration Name later on on the server side takes precedence on what is defined locally.
Prolonged management is, in my opinion, better handled on the server side. Going this route saves you from going into the DSC Node (or connecting remotely to it), compile a new meta mof and re-register the node just to change the Configuration Name and pull down another config. In my experience, Pull Servers are often setup when network segregation is a blocker for pushing out to VMs but pulling in from the Pull Server is allowed. Being able to change things on the Server side therefore is very handy!
Staging a configuration
Now we have a LCM registered with the server, we need to compile a configuration for it so it has something to pull down.
Lets create a simple configuration and put it in the configuration store accompanied with a checksum file.
configuration MySuperServer {
    Import-DscResource -ModuleName PSDesiredStateConfiguration -ModuleVersion 1.1

    Node MySuperServer {
        File MySuperFile {
            Ensure = 'Present'
            DestinationPath = 'C:\Windows\Temp\MySuperFile.txt'
            Contents = 'DSC ROCKS!!!'
        }
    }
}
MySuperServer -OutputPath 'c:\pullserver\Configuration'
New-DscChecksum -Path 'c:\pullserver\Configuration\MySuperServer.mof' -Force
Now it is time to assign the Configuration to the node.
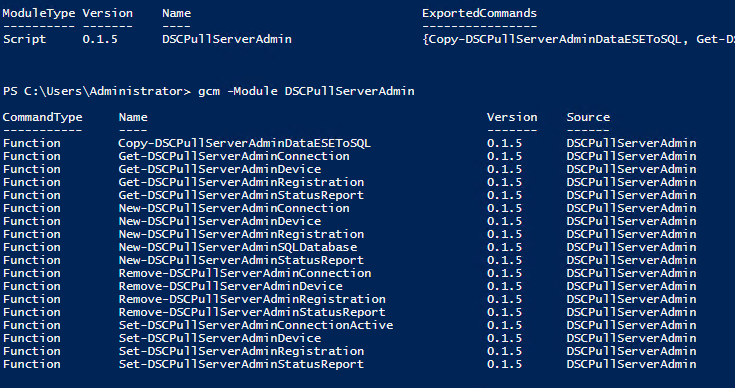
DSCPullServerAdmin
To assign the configuration Server side, we could open SQL management studio and update the entry in the RegistrationData table. We could also make use of my DSCPullServerAdmin module to handle this.
Install the DSCPullServerAdmin module from the PowerShell Gallery. You can install and use it anywhere as long as the machine can communicate with the SQL backend.
Install-Module -Name DSCPullServerAdmin
At the time of writing I’m using version 0.1.5
Now let’s create a new connection with the SQL database.
New-DSCPullServerAdminConnection -SQLServer sql.mshome.net -Database DemoDSC -Credential sa
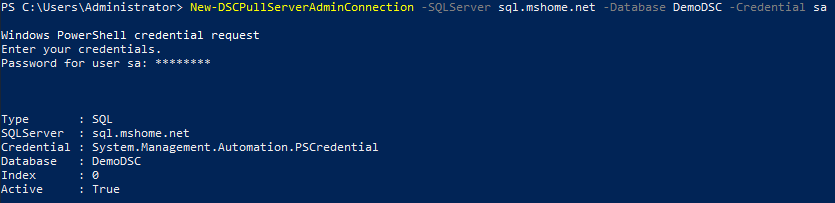
It is possible to create multiple connections to multiple Pull Servers. It is even possible to setup a connection to an edb database (more on this in a later post). Only one connection at a time will be Active though, and this active connection will be used by default. We’ll see more about connection management in a later blog post.
Now we have setup a connection with the database, we can easily enumerate all registered nodes.
Get-DSCPullServerAdminRegistration

This function allows for filtering based on AgentId and NodeName to acquire a more specific node. Just know that NodeName is not a unique value, AgentId is.
So now we figured out how to get the node object out of the database, how do we assign it the Configuration Name we desire?
Get-DSCPullServerAdminRegistration -NodeName PULLSERVER | Set-DSCPullServerAdminRegistration -ConfigurationNames 'MySuperServer'
When getting the node object again, we can see the update worked.

Let’s pull down the configuration on the node.
Update-DscConfiguration -Wait -Verbose
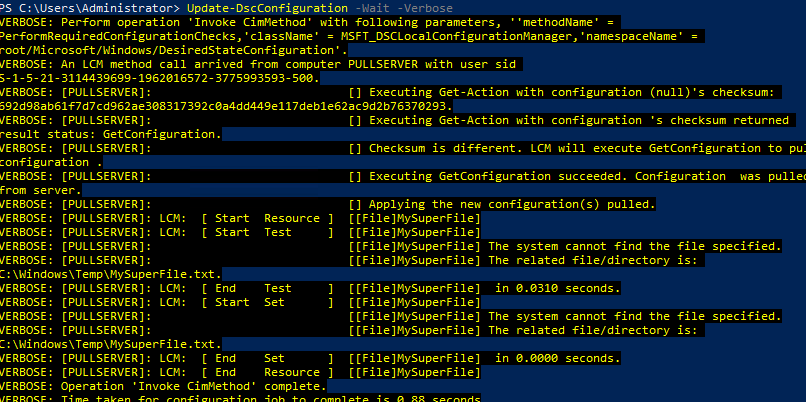
Isn’t that nice! The node picked up the change in Configuration Name assignment and handled it from there!
What else can we do? Look at the reports?
Get-DSCPullServerAdminStatusReport -NodeName PULLSERVER
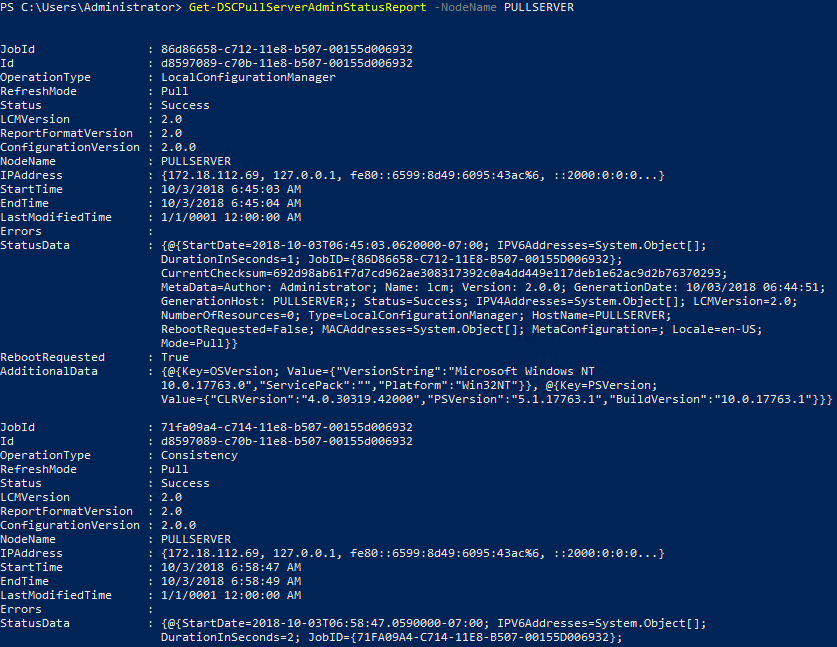
Sure do, we can do all kinds of things using this module. I encourage you to take a look at it and give me any feedback you might have!
A couple of things I worked with until now:
- Removed old reports and node registrations (Database hygiene)
- Manipulated Node Registrations
- Moved reports from one database into another
- Migrated edb to SQL
- Pre-creation of the SQL Database (on local SQL instance and Azure SQL)
- Build admin REST endpoint on top of this module (Polaris)
- Build a Web portal on top of this module (Universal Dashboard)
A lot of these things I will address in this blog series.
That is it for this post. To be continued!